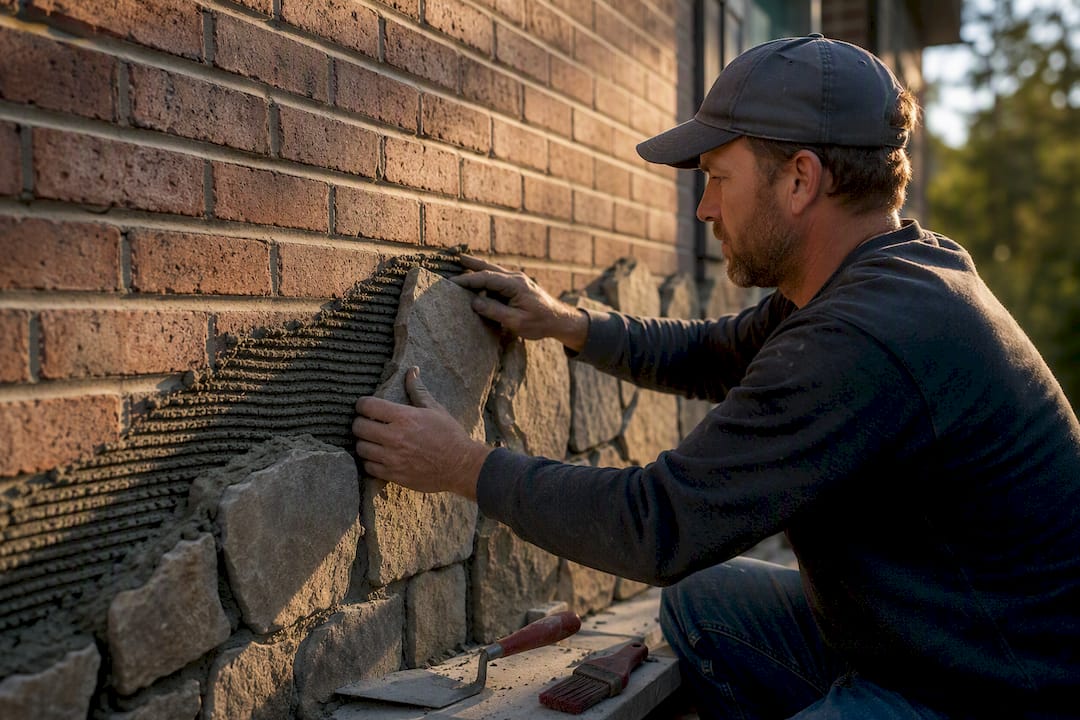
Yes, in most cases you can install thin stone veneer over existing brick, but only if the brick passes three tests: it’s structurally sound, it’s dry, and it’s properly prepared. Painted or sealed brick needs paint removal or a cement board layer first. Rough or unstable surfaces call for metal lath and a scratch coat instead of a direct bond. Exterior walls require effective water management including a weather barrier and flashing to maintain veneer durability.
TL;DR:
- Brick must be structurally sound, dry, and properly prepared; painted or sealed surfaces require paint removal or a cement board layer.
- Moisture issues and delaminating paint can cause veneer failure, so inspection for efflorescence, damp patches, and loose mortar is essential before installation.
- Surface prep includes stripping paint, cleaning, repairing mortar joints, and flattening the wall to ensure proper adhesion and prevent bond failure.
- Choosing the correct underlayment system—direct bond, lath with scratch coat, or cement board—depends on brick surface condition and moisture management needs.
- Proper waterproofing, flashing, and moisture control are critical, especially at rooflines, window intersections, and around chimneys, to prevent interior damage.
Table of Contents
- When Is Stone Veneer Over Brick Possible? A Quick Inspection Checklist
- Preparing the Brick: Clean It, Strip It, or Back It
- Direct-Bond, Lath, or Cement Board: Choosing Your Underlayment
- Waterproofing and Flashing: The Part DIYers Skip
- Materials and Tools Checklist for a Stone Veneer Project
- Step-by-Step Install: Layout, Setting, Jointing, and Curing
- Cleaning, Curing, and Maintenance After Installation
- What Does Stone Veneer Over Brick Cost, and When Should You Call a Pro?
- Common Mistakes When Installing Stone Veneer Over Brick
- What 30 Years of Exterior Work Teaches You About Veneer Jobs
- How J. Signor Exteriors Handles Masonry and Veneer Projects
- Sources
When Is Stone Veneer Over Brick Possible? A Quick Inspection Checklist
Before you buy a single box of stone, walk the wall and look for four things. This five-minute inspection tells you whether you’re doing a straightforward veneer job or something more involved.
- Structural soundness: Press on the brick face and check mortar joints with a screwdriver tip. Soft, crumbling mortar, spalled brick faces, or diagonal cracks mean repair come before anything else.
- Moisture signs: Look for efflorescence (that white, chalky bloom), damp patches, or any history of leaks behind the wall. Moisture trapped behind veneer often causes bond failure.
- Surface condition: Painted or sealed brick behaves very differently than raw, absorbent brick. Painted brick commonly causes veneer failure in retrofit projects, because paint blocks the mechanical and chemical bond mortar needs.
- Weight and anchoring needs: Thin manufactured stone veneer (typically under 15 pounds per square foot) can usually rely on adhesive mortar alone. Heavier or rougher stone veneer panels may require mechanical anchoring in addition to mortar depending on load, according to retrofit installation guidance.
If your wall fails the moisture or structural checks, stop and repair before moving forward. Everything downstream depends on this step.
Preparing the Brick: Clean It, Strip It, or Back It
Retrofitting over existing brick saves you the cost and mess of demolition, and many homeowners choose this route specifically to avoid tearing the wall down. That savings comes with a trade-off: nearly all the real work shifts to surface prep.
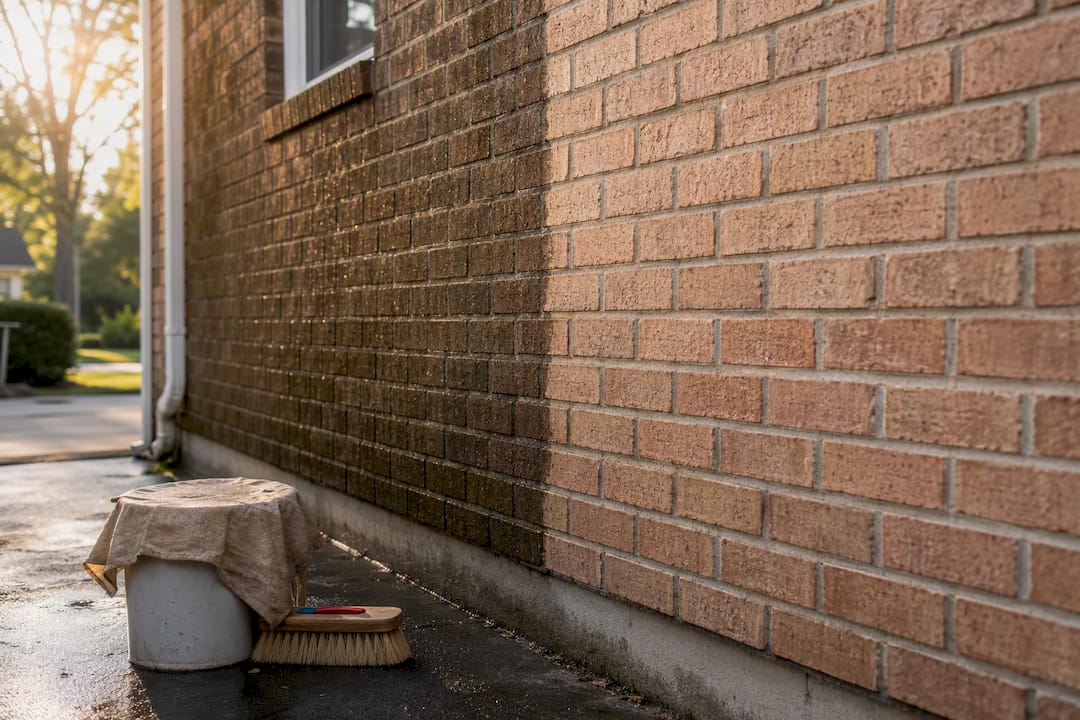
- Identify paint or sealer. Do a water-drop test. If water beads up instead of soaking in, the brick has a sealer or paint film that will block adhesion.
- Choose your path. Strip paint back to raw brick using a chemical stripper or mechanical grinding wheel, which is the preferred option, or fasten cement board over the brick when stripping isn’t practical, per installation guidance for painted surfaces.
- Clean the substrate. Pressure wash to remove dirt, chalking, and efflorescence, then let the wall dry for 24 to 72 hours depending on humidity and temperature.
- Repair mortar joints and loose brick. Repoint any joint that’s crumbling, and replace individual bricks that are cracked or spalled rather than trying to veneer over them.
- Flatten the plane. Deeply recessed mortar joints create an uneven bonding surface. Fill them with mortar so the wall presents a reasonably flush plane before you set stone.
Pro Tip: Run your hand flat across the wall in several spots. If you feel more than about a quarter inch of variation between high and low points, plan on a leveling mortar coat or a mechanical backer rather than fighting it with adhesive alone.
Skipping the drying window is the mistake that comes back to bite people months later. Mortar bonds poorly to a damp surface, and that bond failure often doesn’t show up until the first hard freeze.
Direct-Bond, Lath, or Cement Board: Choosing Your Underlayment
Three accepted systems handle the transition from brick to stone, and picking the wrong one is where most DIY veneer jobs go sideways.
- Direct-bond mortar. This works only on raw, absorbent, structurally sound brick with a reasonably flat surface. No paint, no sealer, no major texture issues. It’s the fastest method when the brick qualifies.
- Metal lath and scratch coat. When the brick is too smooth, painted, or otherwise unable to accept a direct bond, install a weather barrier, fasten galvanized metal lath, and apply a mortar scratch coat as an anchoring surface for the stone. This is also the standard approach for heavier stone panels that need more than adhesion alone.
- Cement board. When paint or sealer removal is impractical, or when code and fire-rating concerns call for a rigid, uniform backer, cement board fastened over the brick gives you a clean, predictable surface to work from.
Whichever system you choose, mortar compatibility matters as much as the substrate decision. Manufacturer systems built around polymer-modified veneer mortar, such as LATICRETE’s MVIS, package the barrier, lath fasteners, and mortar as a tested unit. Following a matched system rather than mixing products from different manufacturers is one of the more overlooked ways installers protect both performance and warranty coverage.
Waterproofing and Flashing: The Part DIYers Skip
Exterior stone veneer fails from the inside out more often than from the face. Water gets behind the stone, has nowhere to go, and the freeze-thaw cycle finishes the job over a winter or two.
- Install a weather-resistant barrier first. On exterior walls, this goes on before lath or cement board, following the manufacturer’s thickness and lap guidance.
- Flash every termination point. Roof-to-wall intersections, window sills, door headers, and chimney crowns all need flashing detail. A chimney cap is worth adding if the chimney doesn’t already have one.
- Add mechanical anchors in exposed conditions. High-wind sites or heavier panels benefit from combining adhesive with mechanical anchors rather than relying on mortar bond alone.
- Check drainage-prone junctions twice. Mansard-style transitions and roof-to-wall corners trap moisture more than any other spot on the wall.
Pro Tip: If your veneer project sits near a roofline, check the flashing there before you touch the brick. A failed roof flashing detail will soak the wall behind your new stone no matter how well the veneer itself is installed.
Materials and Tools Checklist for a Stone Veneer Project
Buying the right quantities up front keeps you from making three hardware store runs mid-project.
- Stone veneer: flats for field coverage and matching corner pieces for outside edges, purchased across multiple boxes and blended together so color variation doesn’t cluster in one area. Allocate additional material to account for waste and cuts.
- Mortar: a polymer-modified veneer mortar for setting the stone (products in the LATICRETE MVIS Hi-Bond family are a common reference point) plus a separate pointing mortar for joints, confirmed compatible with your barrier and lath system.
- Cutting tools: a wet saw for clean face cuts and an angle grinder with a diamond blade for tighter trims and notches; see this пълен наръчник for details on tools and step procedures.
- Setting tools: a notched trowel for back-buttering, a grout bag for pointing joints, jointing tools, spacers, a level, and stiff and soft brushes for cleanup.
- Safety gear: eye protection, gloves, a dust mask for cutting, and stable scaffolding or a sturdy ladder for anything above six feet.
A rough rule of thumb: figure one 80 pound bag of mortar per roughly 25 to 35 square feet of veneer, adjusting for joint width and how heavily you back-butter.
Step-by-Step Install: Layout, Setting, Jointing, and Curing
Sequence matters here more than speed. Rushing the layout costs you far more time in rework than it saves.
- Dry-fit before you mix mortar. Lay out stone pieces on the ground or a table, blending from multiple boxes, so you can plan color and shape distribution before anything is permanent.
- Set corner pieces first. Corners lock the visual pattern for the rest of the wall, so start there and work outward and upward from a bottom starter course.
- Back-butter each stone. Apply mortar to the back of the stone using a notched trowel sized for the stone’s texture and weight, then press and slightly twist each piece into the scratch coat or backer to seat it fully.
- Hold joint widths consistent. Use spacers if your chosen style calls for a uniform joint, and keep an eye on overall pattern rhythm as you move across the wall.
- Point and tool the joints. Once mortar has set enough to hold shape, apply pointing mortar with a grout bag and tool the joints for a clean, consistent profile.
- Cut and trim as you go. Save your wet saw cuts for visible edges and use the angle grinder for quick field adjustments around outlets, vents, or trim.
Pro Tip: Work in sections you can realistically finish in one mortar batch, usually about 15 to 20 square feet at a time. Mortar that sits too long loses workability, and stone set into stiff mortar bonds poorly no matter how hard you press it.
Keep ergonomics in mind on tall walls. Fatigue late in a session is when joint widths drift and corners stop lining up.
Cleaning, Curing, and Maintenance After Installation
Give the mortar time before you expose the wall to weather or attach anything to it. Rushing this stage undoes careful setting work.
- Clean mortar haze carefully. For exterior walls, a cleaner such as Prosoco Sure Klean Vana Trol is a common recommendation, applied per label instructions and rinsed thoroughly afterward. Interior work calls for gentler, non-acidic cleaners.
- Respect the curing timeline. Give mortar several days to cure before attaching light fixtures, mailbox mounts, or other hardware, and longer before applying any sealer.
- Inspect flashing yearly. Check flashing at rooflines and terminations, look at joints for hairline cracks, and repoint small defects before winter rather than after.
What Does Stone Veneer Over Brick Cost, and When Should You Call a Pro?
Cost swings widely based on how much prep the brick needs before a single stone goes up. Paint removal, mortar repair, and repointing damaged sections can easily cost more than the veneer material itself. Stone quality, scaffolding or lift rental for tall exterior walls, and total square footage round out the major cost drivers.
Time follows the same logic. A fireplace surround or small interior accent wall is often a weekend project for a comfortable DIYer. A full exterior wall, especially one needing paint stripping and lath installation, can stretch into a multi-week job once you count cure times between stages.
- Active moisture intrusion behind the wall.
- Structurally compromised brick, meaning widespread cracking or spalling rather than isolated spots.
- Large or high-elevation exterior walls where scaffolding, fall protection, and weight calculations raise the stakes.
- Heavy stone panels where anchoring and structural load need an engineer’s sign-off rather than a guess.
Any of those four situations is a reasonable point to bring in a contractor rather than push forward solo.
Common Mistakes When Installing Stone Veneer Over Brick
Most veneer failures trace back to one of two root causes, and both are preventable with the right prep.
- Bonding directly to painted or sealed brick. This is the leading cause of veneer failure in retrofit work; test adhesion on a small area first if you’re unsure whether paint was fully removed.
- Poor moisture control. Skipping the weather barrier or flashing details lets water get trapped behind the stone, where it freezes, expands, and pops stones loose over time.
- Stones lifting after installation. If a stone comes loose, remove it, check the substrate underneath for the actual cause, reprepare that spot, and reset it, adding a mechanical anchor if the panel is on the heavier side.
- Small ongoing repairs. Loose individual stones, hairline joint cracks, and worn flashing sealant are all fixable in an afternoon if you catch them early. Left alone, they compound into bigger repairs, similar to how ignoring small siding defects tends to snowball into larger exterior problems.
What 30 Years of Exterior Work Teaches You About Veneer Jobs
Most veneer failures we’ve seen didn’t come from bad stone or cheap mortar. They came from someone bonding to painted brick without testing it first, or skipping flashing because the wall “looked dry enough.” Both are avoidable, and both are expensive to fix after the fact.
We tell homeowners the same thing every time: DIY works well on accent walls and low, accessible surfaces. It stops making sense once you’re dealing with active moisture, brick that’s structurally questionable, or any wall where a fall would be serious. At that point, the cost of getting it wrong outweighs the cost of hiring it out.
— Adam
How J. Signor Exteriors Handles Masonry and Veneer Projects
If your brick failed the moisture or structural check, or the wall is tall enough that scaffolding and fall protection are real concerns, that’s exactly the situation where a licensed masonry crew earns its cost. Our team handles the repair and preparation work most DIY guides skip past: repointing, brick replacement, moisture diagnosis, and proper flashing integration, backed by extensive exterior remodeling experience.

As a fully licensed and insured contractor, Jsignorexteriors takes on masonry projects at any scale, from a single fireplace surround to a full exterior wall retrofit, with the same attention to substrate prep and water management covered above. If your wall raised any red flags during your inspection, or you’d simply rather hand off the scaffolding and cure-time logistics, request an estimate through the masonry services page and get a straight answer on scope and timeline before you commit to a DIY weekend that might not stay a weekend.
Sources
The technical guidance in this article draws on published installation references, including Zenbuild’s stone veneer installation guide, its dedicated brick-compatibility guide, and Stoneyard’s condensed installation guide covering LATICRETE MVIS mortar systems and exterior barrier requirements.