If your steps are stable and the damage is shallow, you can patch them yourself with a premixed compound or fast-setting cement. If they’re sinking, tilting, or show deep fractures with exposed rebar, call a contractor. The single constraint that decides success either way: cure the patch above 50°F and keep it moist while it sets, or it will fail within a season.
- Shallow chips or hairline cracks under 1/4 inch: premixed patching compound.
- Broken corners and edges up to 2 inches deep: fast-setting cement patcher.
- Worn, pitted treads across the whole step: polymer-modified resurfacer.
- Sinking steps, full-depth cracks, or rusted rebar: replacement, not repair.
- Expect roughly two days start to finish, at a materials cost near $225 for a typical DIY patch job.
Key Takeaways
Correctly diagnosing shallow versus structural damage before choosing a patch material is the single factor that determines whether a concrete step repair lasts for years or fails within months.
| Point | Details |
|---|---|
| Measure before you buy | Match premixed patch, fast-setting cement, or resurfacer to the exact depth of the damage. |
| Prep decides success | Chisel out loose material, wire-brush, and reach a damp SSD surface before patching. |
| Cure conditions are non-negotiable | Work above 50°F and keep patches moist for 24 hours in hot or dry weather. |
| Know your red flags | Sinking, exposed rebar, or full-depth cracks mean replacement, not a patch. |
| Call in the pros for structural work | Jsignorexteriors handles masonry replacement when steps have failed beyond DIY repair. |
Table of Contents
- How to Tell If Your Concrete Steps Need Repair or Replacement
- What to Buy: Tools and Materials for the Job
- Step-by-Step: How to Repair Concrete Steps
- Finishing Touches: Texture, Curing, and Sealing
- When a Repair Isn’t Enough: Signs You Need a Contractor
- How Long It Takes and What It Costs
- What This Repair Actually Teaches You About Concrete
- Get a Professional Assessment for Bigger Masonry Repairs
- Sources
How to Tell If Your Concrete Steps Need Repair or Replacement
Start with a tape measure and a cold chisel, not a guess. Depth and pattern tell you almost everything you need to know before you decide whether a Saturday project will fix your steps or whether you’re calling a mason.
Run through this checklist in order:
- Check for structural red flags first. Sinking steps, a riser that’s gone out of plumb, continuous cracks running through the full thickness of the concrete, or rusty rebar poking through the surface all point to replacement, not patching.
- Measure the depth of the damage. Surface chips under 1/4 inch are cosmetic. Damage between 1/4 inch and 1 inch is patchable with the right product. Anything deeper than an inch, or edge loss spanning several inches, usually needs a full recap or new pour.
- Probe the edges with a chisel. Tap around the damaged area. If concrete keeps flaking off beyond a small, contained zone, the surrounding material has already lost its bond and a patch won’t hold.
- Identify the cause before you patch it. Freeze-thaw cycling, de-icing salt, and poor drainage at the base of the steps are the three most common culprits in colder climates, and patching over an active drainage problem just buys you a repeat repair next year.
Roughly minor chips and cracks under 1/4 inch qualify as DIY-repairable with a standard patching compound, while anything deeper calls for fast-setting cement or layered resurfacing. When you’re not sure which category you’re in, treat the chisel test as your tiebreaker. If concrete comes off in chunks rather than a clean scrape, you’re looking at replacement territory.
What to Buy: Tools and Materials for the Job
Match the product to the depth of the damage, not the other way around. Buying a bag of resurfacer for a 2 inch edge repair, or fast-set patcher for a hairline crack, wastes money and gives you a worse result than the right product would.
Tools you’ll need:
- Cold chisel and hand sledge (or a small hammer drill) for undercutting damaged concrete
- Wire brush and shop vacuum for cleaning debris and dust
- Pressure washer (rentable) for a final rinse before patching
- Margin trowel, pointing trowel, and a wood float
- Mixing bucket or a drill mixer attachment if you’re doing more than one batch
- Safety glasses, work gloves, knee pads, and an N95 dust mask
Materials by depth:
- Premixed patching compound for chips and cracks under 1/4 inch
- Fast-setting cement patcher for edges and corners from 1/4 inch to 2 inches
- Polymer-modified resurfacer for worn or pitted treads across a whole step
- Bonding adhesive or acrylic fortifier to improve adhesion on deeper repairs
- A masonry sealer for the finished surface, applied after full cure
Pro Tip: Buy one extra bag of whatever patching material you choose. Fast-setting products have a short working window, and running out mid-pour while you drive back to the store almost always ruins the batch you already placed.
Dust control matters more than most DIYers expect. Wet the surface lightly before chiseling and vacuum as you go. This keeps silica dust down and also helps you see the true edge of sound concrete instead of guessing through a cloud of debris.
Step-by-Step: How to Repair Concrete Steps
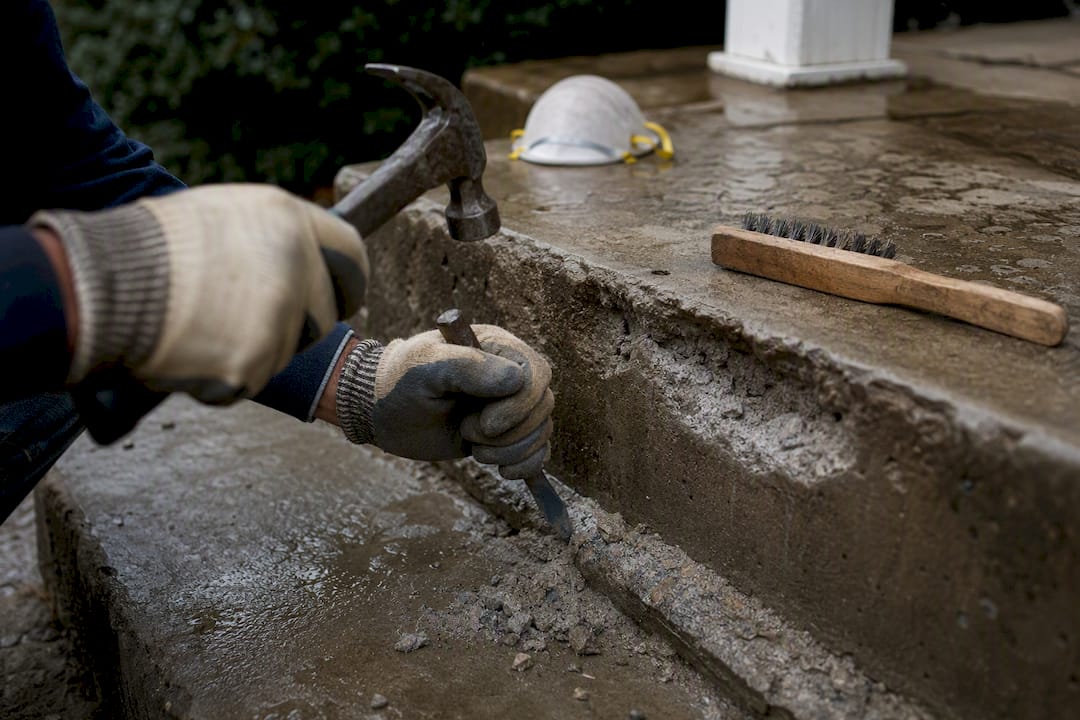
Prep the surface. Chisel out all loose or crumbling concrete, undercutting the edges slightly so the patch locks in mechanically rather than just sitting on top. Wire-brush the area to remove dust and paint, then pressure wash it clean. This step decides whether your patch lasts five years or five months: most patch failures trace back to poor surface preparation, not the product itself. Let the surface dry until it’s damp but not puddled, what pros call saturated surface dry, or SSD.
Choose your bonding approach. For repairs under an inch, brush on a bonding adhesive or mix an acrylic fortifier into your patch material to improve grip on the old concrete. Polymer-modified resurfacers often skip this step entirely because the bonding agent is built into the product, provided the surface is properly prepped and the temperature is above 50°F.
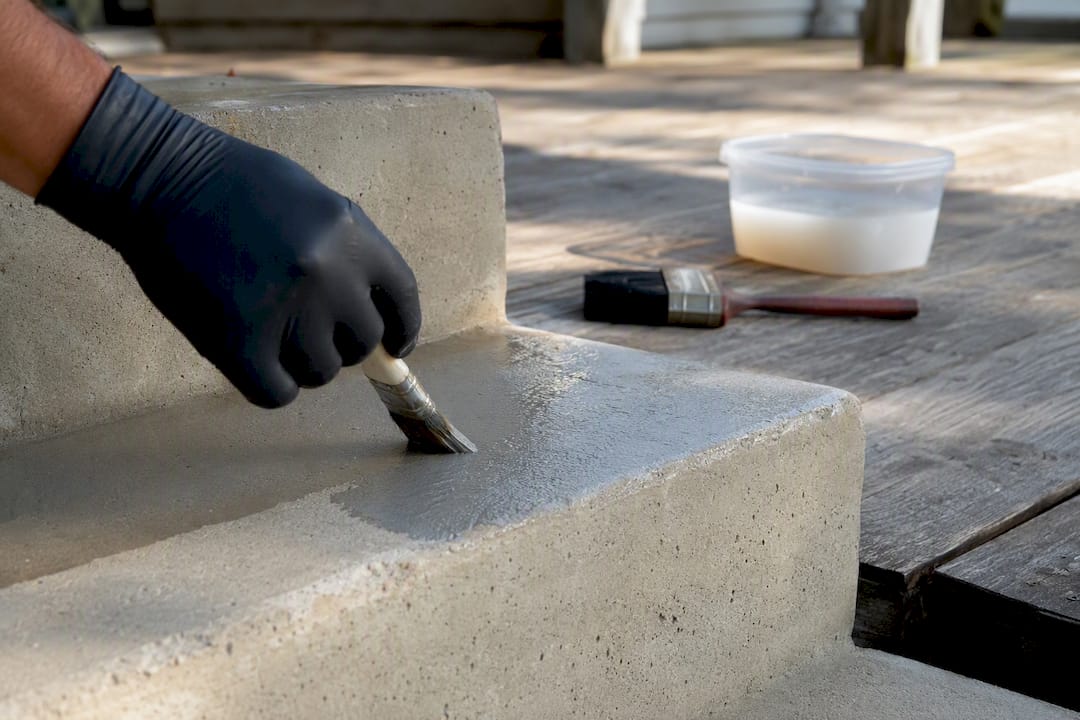
Mix in small batches. Follow the ratio printed on the bag rather than eyeballing it, since fast-setting cement products often run close to a 4 parts mix to 1 part water rule of thumb. Mix only what you can place within the product’s working time, which can be as short as 10 to 15 minutes for fast-set formulas.
Work through the placement in this order:
- Dampen the substrate again right before placing the patch so it doesn’t pull moisture out of your fresh mix.
- Press the material firmly into the substrate and rod it in with a trowel edge to force out trapped air, since trapped air pockets are a leading cause of patch failure in freeze-thaw climates.
- For vertical edges, hold a flat trowel against the face of the patch as a temporary form while the material sets up, a technique that works especially well with fast-setting patchers.
- Sculpt the patch to match the original step profile, feathering the edges of larger repairs so the transition isn’t visible or a trip hazard.
Rebuild corners with a form. For a missing corner, build a simple L-shaped wood form, brace it against the step with tape or a clamp, and fill in lifts if the repair is deeper than 2 inches rather than packing it all in one pour. Remove the form carefully once the material has taken its initial set, usually within 20 to 40 minutes for fast-setting products, so you don’t tear the fresh patch.
Pro Tip: Work in the shade or during cooler parts of the day. Direct sun on fresh fast-setting cement shortens your working time dramatically and can cause surface cracking before the patch fully cures.
Finishing Touches: Texture, Curing, and Sealing
Traction matters as much as strength on a step. Once you’ve sculpted the patch to shape, drag a masonry brush or broom lightly across the surface to create texture. A finish that’s too smooth becomes dangerously slick when wet, which defeats the purpose of repairing a step in the first place.
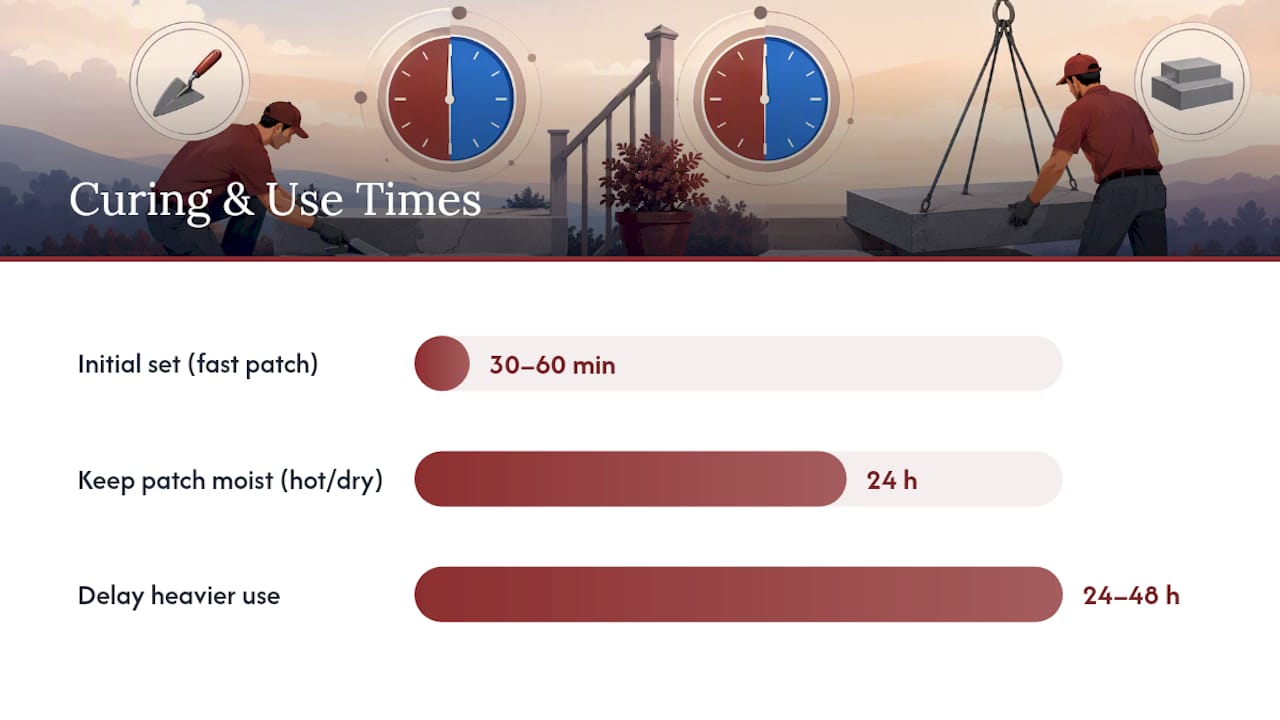
Curing windows vary by product, but a few rules hold across most patchers:
- Keep the patch moist for at least 24 hours in hot or dry conditions, misting it or covering it with plastic sheeting.
- Avoid foot traffic for the initial set window listed on the bag, often 30 minutes to an hour for fast-setting cement.
- Wait a full 24 to 48 hours before heavier use, and longer in cold weather.
Managing the cure with a light mist or plastic cover is a small effort that prevents shrinkage cracking in hot, dry weather, and it’s the step most weekend DIYers skip. Once cured, a masonry sealer protects the patch and evens out color, or you can resurface the whole step if the patch stands out against older concrete. Going forward, redirect downspouts away from the base of the steps and skip de-icing salt in winter. Both are common causes of the freeze-thaw damage that started this project.
When a Repair Isn’t Enough: Signs You Need a Contractor
Some damage isn’t a patching problem. If your steps are sinking, if rebar is exposed and rusted, if cracks run through multiple treads, or if the subgrade underneath has washed out, no amount of surface patching fixes the underlying issue.
A patch bonds to the surface, but it can’t fix a foundation that’s moving underneath it. When the subgrade has failed or reinforcement has corroded, replacement is the only repair that actually lasts.
Professional replacement typically involves:
- Demolishing and removing the failed steps
- Correcting or compacting the subgrade
- Installing reinforcement and forming a new pour, or setting new precast steps
- Grading for proper drainage so water doesn’t pool against the new concrete
Before a contractor visit, take photos of the damage from a few angles, jot down rough measurements, and note when the problem started. Jsignorexteriors’s masonry services cover exactly this kind of replacement work, and a concrete block repair overview walks through what a professional assessment typically includes.
How Long It Takes and What It Costs
A basic patch or resurfacing job runs on a predictable schedule. Budget one day for prep and application, and a second day for cure before normal use, roughly two days total for a straightforward DIY repair.
A baseline materials list, patching compound, bonding adhesive, and basic tools, lands around $225 for most homeowners, though rental costs for a pressure washer or mixer add to that if you don’t already own them.
Costs and timelines expand quickly once a job needs:
- Rebar replacement or repair
- Subgrade excavation and compaction
- Formwork and a full concrete pour for new steps
Pick a dry, mild weather window for any DIY repair, ideally several days without rain and temperatures staying above 50°F, since cold snaps during the cure window are one of the most common reasons patches fail their first winter.
What This Repair Actually Teaches You About Concrete
Most guides treat concrete step repair as a product problem: pick the right bag, follow the directions, done. That framing undersells the part that actually determines whether a patch survives its first Connecticut winter, which is preparation and cure management, not the material you buy off the shelf.
The conventional advice tends to rush past surface prep because it’s the least satisfying part of the job. Nobody wants to spend an hour chiseling and wire-brushing when they could be mixing and pouring. But the failures I see traced back most often aren’t from the wrong product, they’re from skipping the undercut, skipping the SSD check, or pulling the forms too early.
The other place homeowners get overconfident is triage. A hairline crack and a sinking step look similar from a distance, but they are not the same problem, and no patching compound fixes a subgrade that’s washing out underneath. If you take one thing from this guide, let it be this: spend ten extra minutes with a chisel and a tape measure before you open a single bag of cement. That decision matters more than which brand you buy.
— Adam
Get a Professional Assessment for Bigger Masonry Repairs
A weekend patch handles chips and worn edges, but it can’t fix a step that’s sinking or a subgrade that’s failed. That’s where Jsignorexteriors comes in as the option for jobs beyond DIY: full masonry replacement, proper subgrade correction, and forming work that a bag of fast-setting cement was never designed to solve.

Jsignorexteriors has spent more than 30 years working on Connecticut homes, and step and walkway repairs are a routine part of the masonry services offered to homeowners across the state. If your chisel test turned up loose concrete beyond a small patch area, or you spotted exposed rebar, that’s your signal to stop DIYing and start planning. Request an estimate through Jsignorexteriors’s masonry team, bring the photos and measurements you gathered during your inspection, and get a clear scope of work before winter freeze-thaw cycles turn a manageable repair into a full replacement.
Sources
- How to Repair Concrete Steps
- Repair or Replace Pouring Concrete Steps
- Repairing broken concrete edges and deep damage (Sakrete project guide)