There are three primary roof underlayment types: asphalt-saturated felt, synthetic polymer underlayment, and self-adhering (peel-and-stick) membranes. Felt suits budget-conscious jobs with short exposure windows, synthetic works best when durability and longer exposure matter, and self-adhering membranes handle waterproofing and ice-barrier protection in cold climates. Local building codes often dictate which one your roof actually needs.
TL;DR:
- Synthetic underlayment generally offers longer exposure tolerance and better tear resistance, making it suitable for complex or delayed roofing projects.
- Roofs in ice-dam-prone regions must have an ice barrier extending at least 24 inches inside the wall line, with self-adhering membranes being the most common solution.
- Proper fastener choice is critical, as synthetic underlayment typically requires cap nails or staples to prevent leaks and maintain warranty coverage.
- Felt remains a cost-effective option for straightforward, short-exposure roofing jobs where budget is a priority, but synthetic materials may justify their higher cost over time in tougher conditions.
- Always verify local code requirements and manufacturer installation instructions to ensure correct underlayment selection and placement.
Table of Contents
- The three main types of underlayment explained
- Weighing durability, safety, and long-term performance
- Ice-dam codes and where a barrier is required
- Getting the installation and fasteners right
- What underlayment actually costs over time
- A homeowner’s checklist for choosing the right product
- What years of roofing calls have taught us
- Where the underlayment conversation usually goes wrong
- How J. Signor Exteriors handles underlayment selection
- Where to check the standards yourself
- Sources
- FAQ
The three main types of underlayment explained
Asphalt-saturated felt is the material most homeowners picture when they think of roofing paper. It comes in two weights, #15 and #30, with the heavier #30 offering better tear resistance and a longer track record on steeper or higher-traffic roofs. Roofers still reach for felt on straightforward asphalt shingle jobs where cost matters more than extended exposure, since it remains one of the least expensive options on the market.
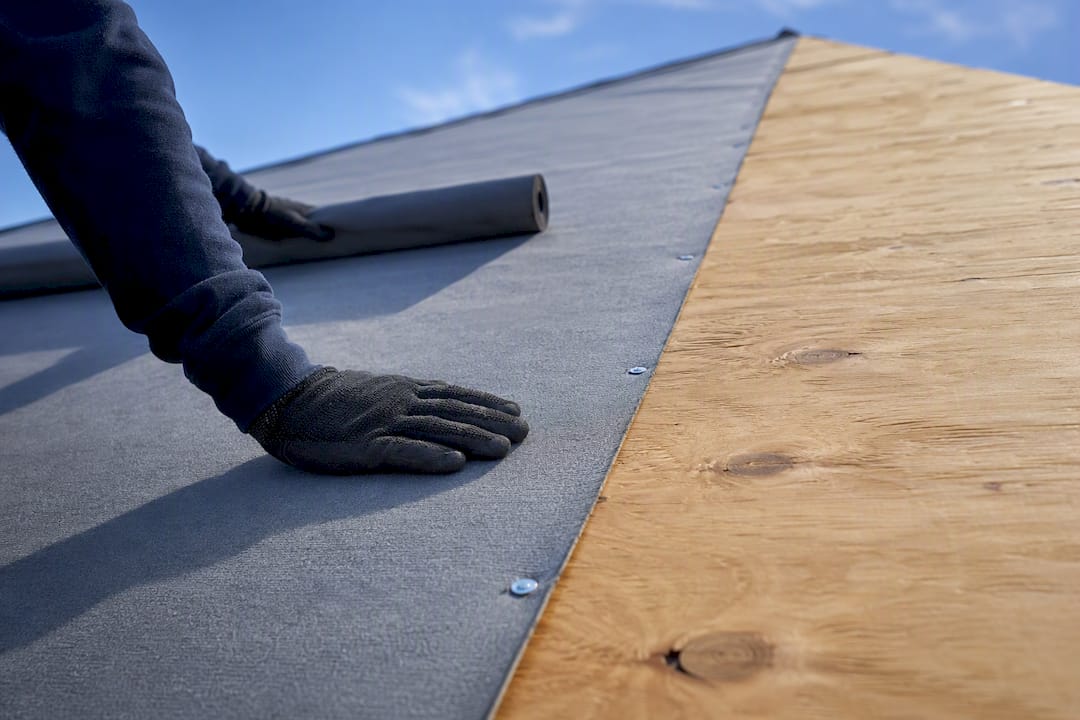
Synthetic underlayment is woven from polypropylene or polyethylene rather than saturated paper, which is why it holds up so much better underfoot. According to InterNACHI, synthetics offer superior tear resistance and can typically stay exposed to the weather for several months depending on the manufacturer, compared with felt’s much shorter exposure window. Many rolls also weigh less than two pounds per square, which makes them easier to carry up a ladder and faster to roll out across a deck.
Self-adhering membranes, sometimes called peel-and-stick, use a rubberized asphalt adhesive backing that bonds directly to the deck and seals around fastener penetrations. That self-sealing quality is why they show up most often at eaves, in valleys, and around chimneys and vent pipes where water tends to find its way in.
- Felt (#15/#30): economical, short exposure window, best for straightforward asphalt shingle roofs.
- Synthetic: lightweight, tear-resistant, longer exposure tolerance, favored on complex or slow-moving projects.
- Self-adhering: waterproof and self-sealing, standard choice for ice barriers and vulnerable roof areas.
Weighing durability, safety, and long-term performance
The material you choose affects more than the finished roof. It shapes how the job goes while your house sits open to the weather. Green Building Advisor notes that synthetics install faster, resist tearing better than felt, and often give installers more secure footing, which matters on steep pitches.
Fastener choice carries real consequences too. Cap fasteners are often required for many synthetic products because ordinary staples or nails can create leak points that plain felt tolerates better. Vapor behavior is another factor worth understanding: synthetics often carry low permeance and act more like a vapor barrier, while felt behaves more like a vapor retarder that allows some moisture movement, which matters most on roofs that need to dry upward, such as tile or wood shake.
- Tear resistance: synthetics generally outperform felt during construction traffic.
- Fasteners: cap nails or cap staples are standard for synthetics; ordinary staples increase leak risk.
- UV exposure: synthetics tolerate longer scheduling delays than felt without degrading.
- Vapor permeance: felt suits assemblies needing upward drying; synthetics suit standard shingle roofs.
Pro Tip: Ask your contractor which fastener type the underlayment manufacturer requires before installation day, not after.
Ice-dam codes and where a barrier is required
Building codes in ice-dam-prone regions typically call for an ice barrier along the eaves, and IBHS reports that protection must extend at least 24 inches inside the exterior wall line, or 36 inches on slopes steeper than 8:12. An ASTM D1970-compliant self-adhering membrane is the most common way contractors meet this requirement.
Some situations call for more than a single layer. NRCA guidance notes that low-slope or high-wind regions often warrant two-layer felt systems or an approved self-adhering alternative, along with specific overlap and fastening details.
- Confirm your ice barrier extends the full required distance past the wall line.
- Ask whether your slope or region calls for two-layer underlayment instead of one.
- Verify the installer is following both code and the shingle manufacturer’s instructions.
Getting the installation and fasteners right
Good underlayment fails when it’s installed poorly. A few checks protect the investment:
- Confirm cap nails or cap staples are used on synthetic products rather than standard staples, which can leave gaps that leak.
- Ask about attachment spacing, since NRCA and manufacturer guidelines specify overlap and fastener patterns for wind resistance.
- Consider a sealed-deck approach, taping seams or applying a full self-adhered layer, on high-wind or vulnerable roofs.
- Get the manufacturer’s exposure limit in writing so your project schedule doesn’t outlast the product’s UV tolerance.
Felt’s shorter exposure window means a delayed shingle install can leave the deck at risk, while a synthetic rated for months of exposure gives more scheduling flexibility on larger or interrupted projects, as explained in detail in why staggered installs cause roof damage.
What underlayment actually costs over time
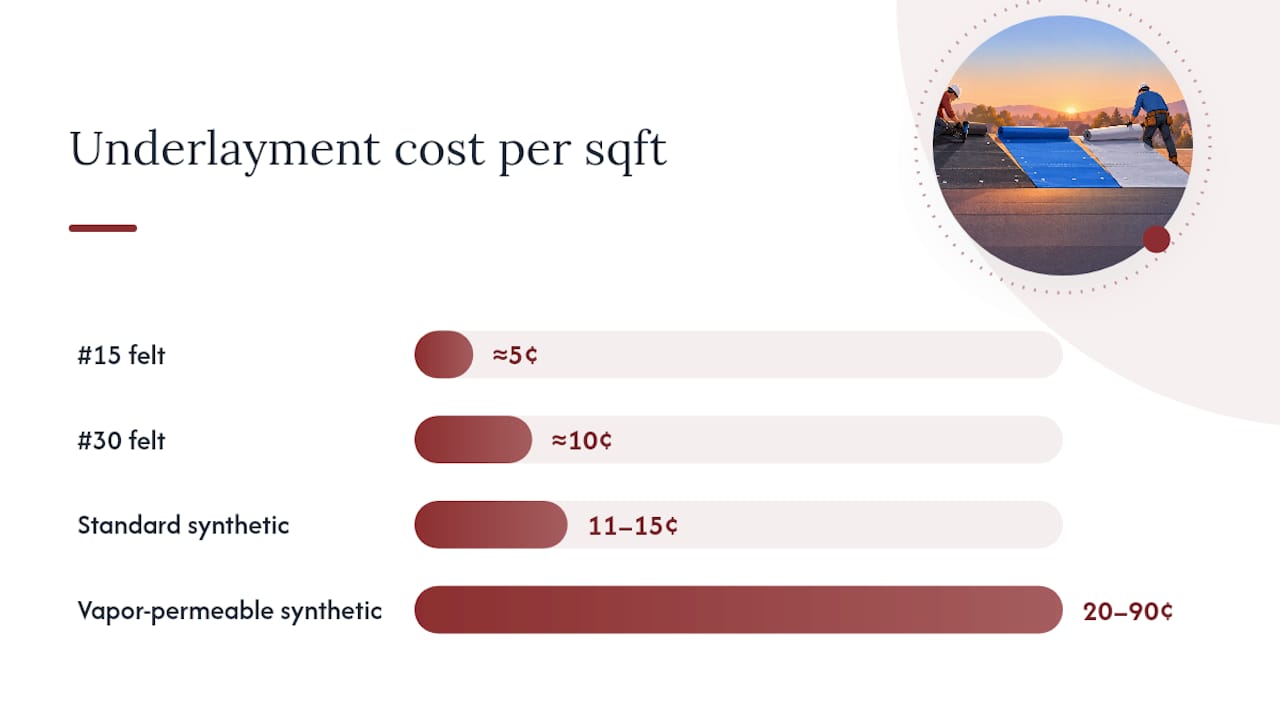
Price differences between underlayment types are modest compared with the rest of a roofing budget, but they add up on a large roof. Green Building Advisor puts #15 felt around 5 cents per square foot and #30 felt around 10 cents, while standard synthetics run 11 to 15 cents and vapor-permeable synthetics can range from 20 to 90 cents per square foot.
Spending more usually pays off when a project involves long exposure periods, a complex roofline, or premium roofing materials that justify a longer service life underneath them.
- Felt suits simple, fast-turnaround jobs where budget is the priority.
- Standard synthetic earns its cost on steep or multi-day projects.
- Premium vapor-permeable synthetic fits roofs needing both durability and moisture management.
Choosing the tougher option upfront can also reduce the odds of costly roof decking damage from prolonged weather exposure during installation.
A homeowner’s checklist for choosing the right product
Before signing a contract, walk through these questions with your roofer:
- Does the underlayment match your roofing material and slope, whether asphalt shingle, metal, or tile or membrane system?
- If you live somewhere with regular freeze-thaw cycles, has an ice-barrier method been specified and does it meet the required extension distance?
- Has the contractor provided the product’s exposure limit, required fasteners, and installation instructions in writing?
- Is there a warranty covering exposure if the roof will stay papered for more than a few days?
Watch for red flags like standard staples used on synthetic underlayment or no ice barrier where your climate and code clearly call for one.
Pro Tip: A written product spec sheet from your contractor is worth more than a verbal assurance when it comes to exposure limits and warranty coverage.
What years of roofing calls have taught us
A licensed and insured contractor with more than 30 years of experience has installed and repaired roofs in Connecticut. That field time shapes a simple habit: specifying synthetic underlayment on projects with extended timelines or complicated roof geometry, since the longer exposure window reduces the odds of deck damage if weather delays the shingle install.
On more than one job, switching from felt to a longer-rated synthetic mid-project avoided a costly deck replacement after a stretch of unexpected rain delays.
That kind of on-the-ground judgment, informed by ice-dam mitigation work and hundreds of roof replacements, is what separates a spec sheet from a decision that actually holds up.
Where the underlayment conversation usually goes wrong
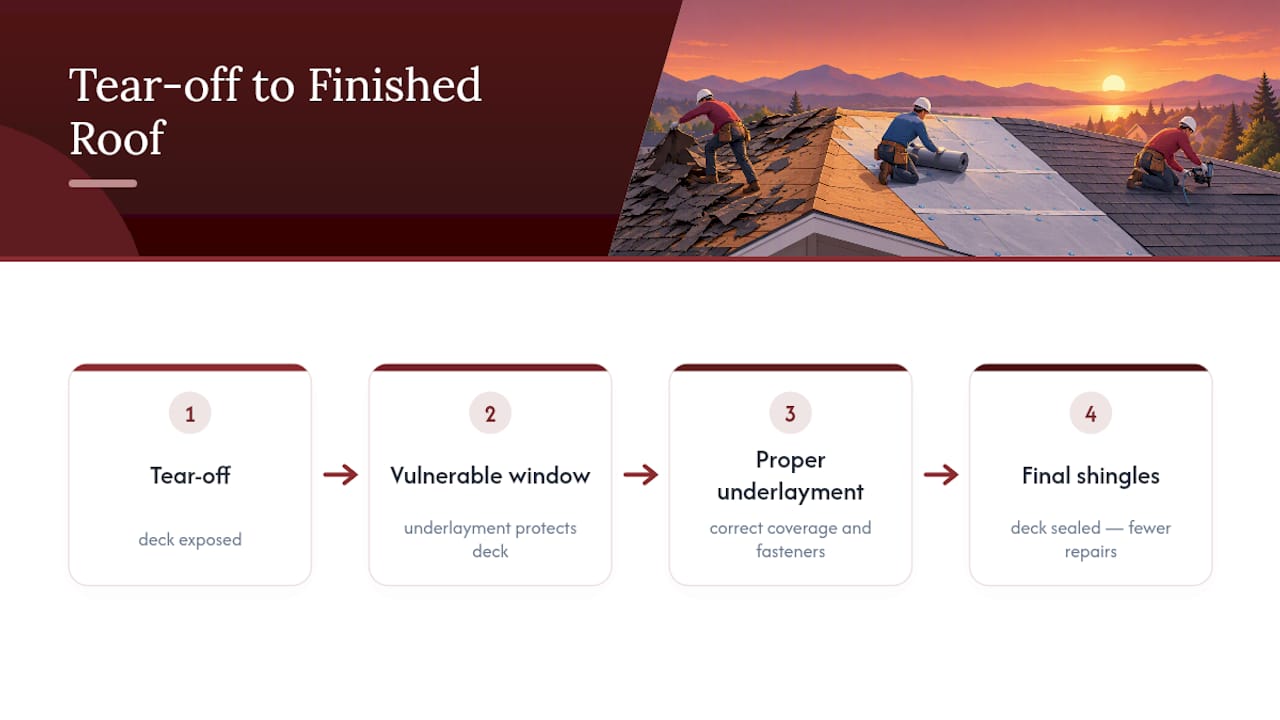
Most homeowners get steered straight into a shingle color choice while the underlayment underneath gets treated as an afterthought. That’s backwards. The underlayment is what protects your deck during the vulnerable window between tear-off and final shingle, and it’s often the difference between a clean job and a surprise repair bill.
The conventional advice to just “get synthetic, it’s better” oversimplifies things. Felt still makes sense for a straightforward, fast reroof on a simple gable roof where cost matters and exposure will be brief. The real judgment call is matching exposure risk, slope, and climate to the product, not chasing the newest material by default.
If you take one thing from this guide, prioritize the ice-barrier and fastener details over the brand name on the roll. A synthetic underlayment installed with the wrong fasteners performs worse than felt installed correctly.
— Adam
How J. Signor Exteriors handles underlayment selection
Choosing between felt, synthetic, and self-adhering membranes shouldn’t fall entirely on the homeowner. Professional contractors assess your roof’s slope, material, and climate exposure, confirm local code requirements including ice-barrier placement, and install underlayment with the correct fasteners and attachment patterns for the product specified.

An estimate includes a clear breakdown of the underlayment product recommended and why. Visit our roofing services page to schedule an assessment for your Connecticut property.
Where to check the standards yourself
- InterNACHI: underlayment category definitions and exposure comparisons.
- IBHS ice-dam report: code-driven ice-barrier requirements.
- NRCA guidelines: fastening and low-slope underlayment rules.
- Green Building Advisor: synthetic underlayment cost and performance review.
Always confirm exact requirements with your local building code office, since amendments vary by jurisdiction.
Sources
- Roofing Underlayment Types – InterNACHI®
- Ice dams & building codes report – IBHS
- Synthetic roofing underlayments – Green Building Advisor
- NRCA roofing guidelines and underlayment requirements
FAQ
What’s the difference between felt and synthetic underlayment?
Felt is asphalt-saturated paper rated for short exposure, while synthetic is a woven polypropylene or polyethylene material that resists tearing better and, per InterNACHI, can often stay exposed for 90 days to six months depending on the manufacturer. Synthetic typically costs more but offers more scheduling flexibility.
Do I need an ice barrier on my roof?
If you live in a region prone to ice dams, code typically requires an ice barrier extending at least 24 inches inside the exterior wall line, or 36 inches on steeper slopes, according to IBHS. An ASTM D1970-compliant self-adhering membrane is the standard way to meet this requirement.
Can I use staples instead of cap nails for synthetic underlayment?
No, most synthetic underlayment manufacturers require cap nails or cap staples because standard staples can create leak-prone penetrations. Using the wrong fastener can also void the product warranty.
Which underlayment is best for asphalt shingles?
Standard synthetic underlayment is a common choice for asphalt shingle roofs because it resists tearing and tolerates longer exposure during installation. Felt remains a workable, lower-cost option for simple roofs with a fast install timeline.
How much does roof underlayment cost?
Costs vary by type: Green Building Advisor lists roughly 5 cents per square foot for #15 felt, 10 cents for #30 felt, 11 to 15 cents for standard synthetics, and 20 to 90 cents for vapor-permeable synthetics. Underlayment recommendations and pricing are typically provided as part of a roofing estimate by contractors.