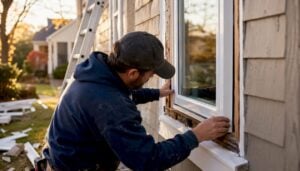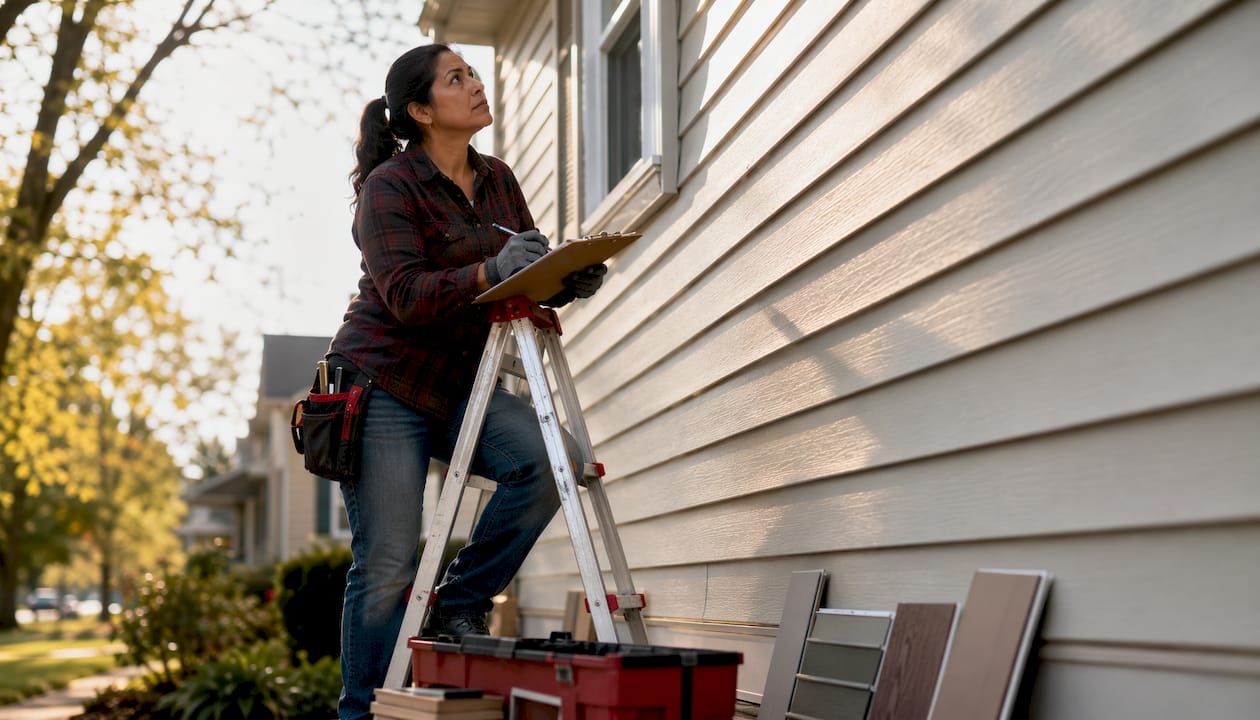
Most siding failures come down to installation errors, not material defects. Poor moisture management, incorrect fastening, and missing or improperly installed flashing are the three biggest culprits. If you suspect a problem with your siding, start here: walk the perimeter of your home and look for missing flashing at windows and doors, overdriven nails, and panels with no visible expansion gap at butt joints.
Manufacturers like James Hardie and LP Building Solutions publish detailed installation manuals for good reason. When installers skip those specs, the wall assembly fails from the inside out, often before you see a single buckled panel. Jsignorexteriors has seen this pattern repeatedly on Connecticut homes where the exterior looked fine at first glance but concealed serious moisture damage behind the cladding.
The top six mistakes at a glance:
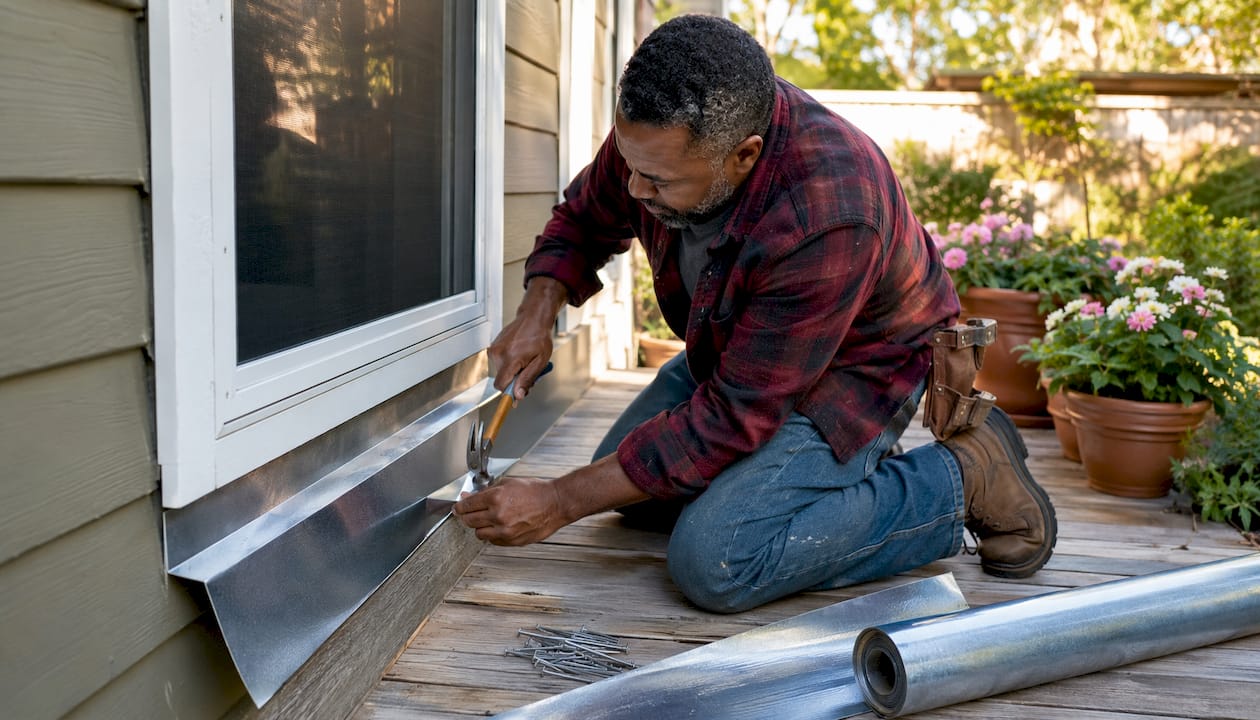
- Missing or incorrect flashing — Reinstall with shingle-style metal flashing; caulk alone will not hold.
- No expansion gaps — Leave the manufacturer-specified expansion gap at all butt joints against trim to allow for siding movement.
- Overdriven or misplaced nails — Nails should leave roughly 1/32" clearance and land in the center of nailing slots.
- No WRB or drainage plane — Install a continuous house wrap and, where climate warrants, a vented rainscreen.
- Installing over wet sheathing — Dry the substrate completely before any panel goes up.
- Skipping the starter strip — A misaligned or missing starter strip throws off every course above it.
Table of Contents
- What are the most common siding installation mistakes?
- How can you tell if your siding was installed correctly?
- How do you fix or prevent siding installation problems?
- Which material and climate factors lead to siding mistakes?
- What do repairs and reinstallation typically cost and how long do they take?
- When should you hire a professional for siding problems?
- How experienced contractors prevent these mistakes from the start
- Key Takeaways
- Why the “it looks fine” assumption costs homeowners the most
- Jsignorexteriors can diagnose and fix your siding the right way
- Sources and further reading
What are the most common siding installation mistakes?
Siding failures are overwhelmingly caused by installation errors rather than material defects. Here are the most damaging mistakes, what they look like, and how to address them.
1. Poor moisture management and a missing WRB
The wall assembly needs a continuous water-resistive barrier (WRB) — typically a house wrap like Tyvek or Typar — behind the cladding. Without it, any water that gets past the siding soaks directly into the sheathing. Symptoms include interior wall stains after rain, soft drywall near exterior walls, and a persistent musty smell. The fix is a full reinstall with proper WRB; there is no shortcut patch.
2. Missing or incorrect flashing
Flashing installed incorrectly around windows, doors, and roof-wall intersections is a leading cause of hidden rot and mold. Every flashing layer must overlap the one below it, shingle-style, so water sheds outward. Kick-out flashing at roof-to-wall intersections is especially critical: without it, water runs directly behind the siding at the base of the roof. Look for water stains on trim boards, rotting sill plates, and soft spots in the wall below windows. Learn more about proper flashing techniques before attempting any repair.
3. Overdriven or underdriven nails
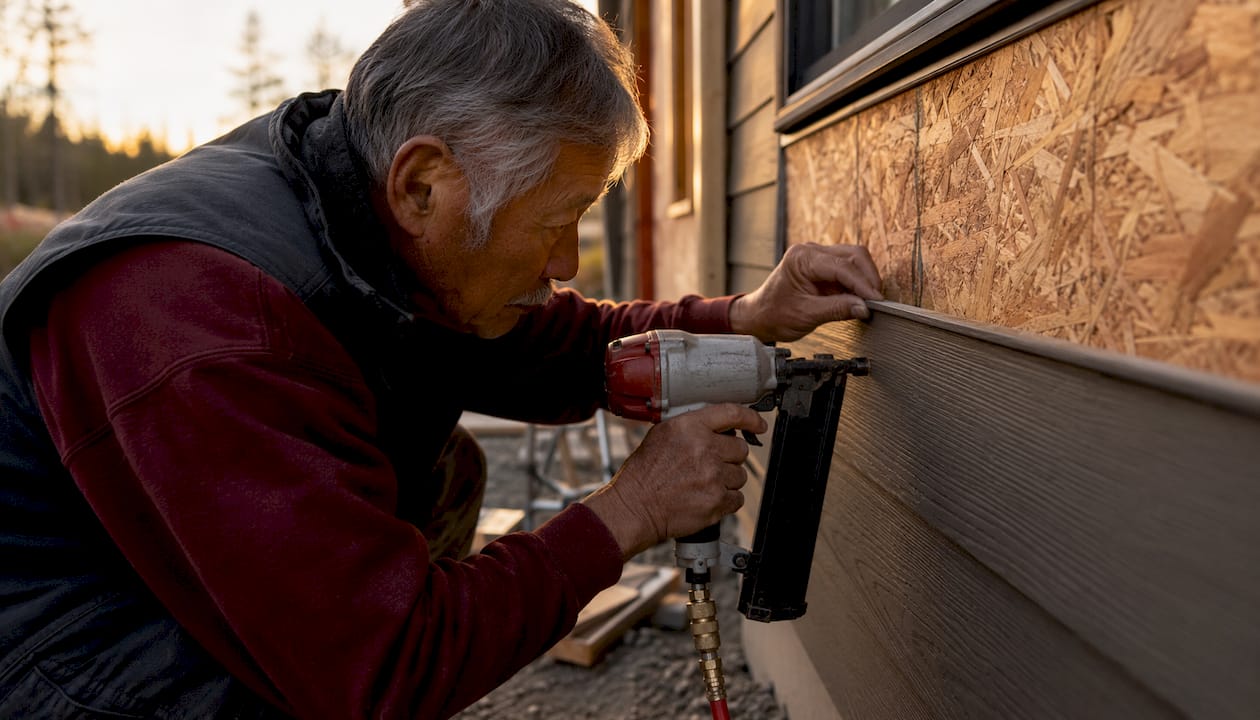
Correct nail depth leaves about 1/32" of clearance between the nail head and the siding face. Overdriven nails prevent the panel from moving with temperature changes, causing buckling and rippling. Underdriven nails leave panels loose and rattling. Both conditions can void manufacturer warranties. Nails must also land in the center of nailing slots, not at the edges.
4. Wrong nail type or nails missing studs
Fasteners must engage studs or solid blocking, not just sheathing. OSB and foam sheathing have poor nail-holding strength on their own. When a nail misses a stud, the panel can pull away from the wall under wind load. Use the nail type and length specified in your product manual; galvanized or stainless steel is typically required to prevent rust staining.
Pro Tip: Before nailing, snap chalk lines at each stud location. It takes five minutes and prevents a full course of misfastened panels.
5. No expansion gaps at butt joints and trim
Siding expands and contracts with temperature swings. A 3/16" gap where panels butt against window trim, door casings, and other fixed objects is a common manufacturer requirement. Panels installed tight against trim have nowhere to go in summer heat and buckle visibly. Check your specific product manual for the exact tolerance — it varies by material.
6. Skipping or misplacing the starter strip
The starter strip sets the angle and height of every course above it. A strip that is too low, too high, or not level throws off the entire installation. Symptoms show up as courses that gradually drift out of alignment and panels that sit at an odd angle against the foundation. This is a full-reinstall problem; shimming individual courses rarely fixes it cleanly.
7. Nailing panels too tight
This is distinct from overdriving. Some installers nail panels at the top of the nailing slot rather than the center, which locks the panel in place and prevents vertical movement. Vinyl siding is especially vulnerable to this mistake because it has a higher coefficient of thermal expansion than fiber cement. The result is visible buckling on hot days.
8. Installing over wet sheathing or in bad weather
Materials installed over saturated sheathing trap moisture against the wall from day one. Fiber cement can absorb water and swell at cut edges; engineered wood products can delaminate. Manufacturers advise dry storage on site and prohibit installation over wet substrates. If rain is forecast within 24 hours, delay the job.
9. Weak or damaged sheathing
Rotted, delaminated, or undersized sheathing cannot hold fasteners reliably and will not provide a flat substrate. Panels installed over damaged sheathing look wavy immediately and fail faster. Probe suspect areas with a screwdriver before siding goes up; soft spots need replacement, not just a new layer of cladding on top.
10. Relying on caulk as primary waterproofing
Caulk cracks under UV exposure and thermal movement, often within a few years. It is a secondary seal, not a substitute for metal flashing and shingle-style overlaps. Contractors who caulk every joint instead of installing proper flashing are creating a future leak. If you see thick beads of caulk at every window corner and roof transition, treat it as a red flag.
11. Unprimed cut edges on fiber cement
James Hardie and LP Building Solutions both require that all field cuts be primed before installation. An unprimed cut edge on fiber cement absorbs moisture, swells, and deteriorates at the end grain. This is easy to miss on a busy job site but causes premature failure at every cut end.
12. Installing siding before interior trades finish
Rushing to install siding before plumbing, electrical, or HVAC work is complete creates future penetration points through the WRB. Every new hole a trade punches through a finished wall assembly is a potential water entry point. Professionals sequence the job so interior trades are done, or they protect the WRB at access points until work is complete.
How can you tell if your siding was installed correctly?
A careful visual and tactile inspection can catch most installation problems before they become structural. Use a ladder safely, keep three points of contact, and stop if you find soft framing or visible mold. Those conditions require a contractor, not a DIY inspection.
Safety first: Do not probe areas where you suspect structural rot without professional support. Disturbing mold can spread spores; wear an N95 mask if you open any inspection port.
Visual surface checks:
- Look for rippling, buckling, or wavy panels along any horizontal run.
- Check for visible nail heads or dimples in the siding face (overdriven nails).
- Look for gaps at butt joints that are either too tight (no expansion space) or inconsistently sized.
- Inspect the bottom course for panels sitting too close to the ground or touching soil.
Sound and touch checks:
- Press gently on several panels. Properly fastened siding feels firm with minimal flex.
- Walk along the wall and listen for rattling or movement, which signals loose fasteners.
Flashing and trim checks:
- Inspect above every window and door for a visible head flashing that directs water outward.
- Look for kick-out flashing where a roofline meets a sidewall. Its absence is one of the most common sources of hidden rot.
- Check that trim boards are not rotting at the base, which often signals water running behind the cladding.
Expansion gap checks:
- At any butt joint against trim, you should see a small, consistent gap. No gap at all is a problem.
Sheathing wetness indicators:
- Soft or spongy wall sections when pressed firmly suggest wet sheathing behind the panels.
- Staining or efflorescence on the lower courses can indicate moisture wicking up from the ground.
Pro Tip: After a heavy rain, walk the interior perimeter and look for water stains on drywall near exterior walls. That is often the first sign of a flashing or WRB failure that is invisible from outside.
Urgent signs requiring immediate contractor contact:
- Water stains on interior walls or ceilings near exterior walls
- Soft, crumbly, or spongy sheathing or framing
- Visible mold or mildew smell indoors
- Sagging or detached siding sections
Non-urgent maintenance items:
- Minor paint fading or chalking
- Small hairline cracks in caulk at trim joints (monitor but not an emergency)
Photograph every problem area before calling for an estimate. Timestamped photos support warranty claims and give contractors a clear scope before they arrive. Review preparation tips so you know what to gather before a contractor visit.
How do you fix or prevent siding installation problems?
Some issues are safe for a competent homeowner to address. Others require a licensed contractor. Knowing the difference saves you time and prevents accidental damage.
Do-now steps you can take safely:
- If you suspect interior wetting, place a tarp over exposed or suspect areas of the exterior temporarily to stop active water entry.
- Clear any debris from weep holes or drain slots at the base of the siding to restore drainage.
- If a single J-channel has pulled away from a window, you can re-seat it with the correct fasteners, provided the underlying flashing is intact.
- Re-prime and paint any exposed cut edges on fiber cement panels using the manufacturer-specified primer.
Repairs a skilled DIYer can handle:
- Replacing a single loose panel using loose nailing in the center of the slot
- Re-seating a misaligned J-channel or corner trim piece
- Re-cutting and priming an exposed fiber cement edge
When to stop and call a contractor:
- Any repair that requires removing more than one or two panels
- Flashing replacement at windows, doors, or roof-wall intersections
- Reinstalling a starter strip or correcting course alignment
- Any work that exposes sheathing, because WRB continuity must be restored
Repair priority matrix:
| Priority | Condition | Action |
|---|---|---|
| Immediate | Interior water staining, soft or spongy sheathing | Call a contractor today; stop water entry with a tarp |
| High (within weeks) | Missing flashing, continuous water path behind siding | Schedule flashing repair or targeted panel replacement |
| Moderate | Overdriven nails, tight butt joints without gaps | Plan for correction at next maintenance cycle |
| Routine | Cosmetic caulk gaps, minor paint fading | Monitor; address at annual maintenance |
Questions to ask when hiring for repairs:
- What is included in the scope: WRB replacement, flashing type, fastener specs, and waste removal?
- Will the repair restore the drainage plane, or just replace the visible cladding?
- Is the workmanship covered by a written warranty, and for how long?
Which material and climate factors lead to siding mistakes?
Climate shapes how siding fails. Connecticut homeowners deal with freeze-thaw cycles, high summer humidity, and UV exposure, all of which amplify installation errors that might go unnoticed in a milder climate.
How climate drives failure:
- Freeze-thaw cycles expand water trapped behind siding, accelerating rot and pushing panels away from the wall. Any gap in the WRB becomes a bigger problem every winter.
- High humidity causes wood-based products to swell if cut edges are unprimed or if the drainage plane is missing. A vented air gap or rainscreen behind the cladding dramatically extends siding life by letting moisture escape.
- UV exposure degrades caulk faster than most homeowners expect, especially on south- and west-facing walls. Dark-colored siding also absorbs more heat, increasing thermal expansion stress on fasteners and joints.
Material-specific pitfalls:
- Vinyl siding requires loose nailing in the center of slots and manufacturer-specified expansion gaps. Tight nailing causes visible buckling and voids warranties. Vinyl also needs more expansion space than fiber cement because it moves more with temperature changes.
- Fiber cement (James Hardie) requires primed cut edges, specific ground clearances, and nailing into studs or blocking. It is heavier than vinyl, so substrate integrity matters more.
- Engineered wood (LP Building Solutions) demands dry storage, dry substrate, and primed edges. LP’s installation manual specifies fastener type, spacing, and clearance requirements that differ from fiber cement.
Pro Tip: Before selecting a siding material, review the exterior siding materials guide and discuss how your specific product performs in Connecticut’s climate with your contractor. Generic rules of thumb do not substitute for the product-specific installation manual.
Always follow the manufacturer’s installation manual for your exact product. James Hardie and LP Building Solutions both publish detailed, product-specific guides. A contractor who says “we do it the same way for every product” is a red flag.
What do repairs and reinstallation typically cost and how long do they take?
Repair scope and cost vary widely depending on how far water damage has spread. The table below gives realistic ranges for common scenarios.
| Scope | Typical Timeline | Major Cost Drivers |
|---|---|---|
| Small cosmetic repairs (1–3 panels, caulk) | 1 day | Labor, materials, primer |
| Flashing replacement at windows/doors | 1–3 days | Flashing type, trim replacement, WRB patching |
| Partial re-siding (one wall or section) | 1–2 weeks | Hidden sheathing damage, insulation, labor |
| Full re-siding | 1–3 weeks | Material choice, permit costs, full WRB replacement |
What drives cost up:
- Hidden water damage requiring sheathing or framing replacement
- Need to replace insulation behind the WRB
- Permit requirements (check with your local Connecticut building department)
- Flashing and accessory replacement at every opening
- Material choice: fiber cement costs more than vinyl but lasts longer
Questions to ask for apples-to-apples quotes:
- Does the bid include WRB replacement, or just the cladding?
- What flashing material and method will be used?
- Are fastener specs and nail type specified in writing?
- Who handles waste removal and disposal?
- What workmanship warranty is included, and what voids it?
Get at least two written bids that itemize these elements. A bid that is vague about WRB and flashing is a bid that will cut corners on the parts you cannot see.
When should you hire a professional for siding problems?
Some siding issues are genuinely manageable for a careful DIYer. Others require a licensed contractor, and knowing which is which protects both your home and your budget.
Hire a contractor immediately if you see:
- Water stains on interior walls or ceilings near exterior walls
- Soft, spongy, or crumbling framing or sheathing
- Extensive missing flashing at multiple openings
- Visible mold growth behind or around siding
- Large sections of buckled, detached, or sagging panels
Questions to ask every contractor you consider:
- Do you follow the manufacturer’s written installation instructions for this specific product?
- How do you install the WRB and drainage plane? What product do you use?
- Can you show me your flashing detail for windows, doors, and roof-wall intersections?
- Do you have experience with this specific siding material (James Hardie, LP SmartSide, vinyl)?
- Can I see examples of similar completed work?
- Are you licensed and insured in Connecticut? Can you provide documentation?
- What does your workmanship warranty cover, and what voids it?
Red flags to watch for:
- Insisting that caulk alone is sufficient waterproofing at flashings
- Refusing to reference or show manufacturer installation guides or evaluation service reports (ESRs)
- “We do it our way” language when asked about nailing patterns or WRB
- Excessive face-nailing rather than slot nailing
- No written warranty or vague warranty language
Sample warranty language to request in writing:
- Material coverage: what the manufacturer covers and for how long
- Workmanship guarantee: duration and what the contractor will repair at no charge
- What voids coverage: improper maintenance, unauthorized modifications, or specific weather events
How experienced contractors prevent these mistakes from the start
Professional siding installation is as much about sequencing and documentation as it is about technique. Here is how a quality contractor approaches the job.
Pre-install checklist:
- Confirm interior trades (plumbing, electrical, HVAC) are complete before WRB or siding goes on.
- Inspect and probe all sheathing for rot, delamination, or soft spots. Replace before proceeding.
- Verify substrate is dry and flat; shim low spots before installing the starter strip.
- Install WRB with proper overlaps and tape all seams; confirm drainage plane is continuous.
- Install all flashings shingle-style before any cladding goes up. Kick-out flashing at every roof-wall intersection.
Mid-install quality control:
- Verify nail depth and placement at each course before moving to the next.
- Check expansion gaps at every butt joint and trim intersection.
- Photograph flashing installation before it is covered by cladding.
- Confirm fasteners are hitting studs or blocking, not just sheathing.
Final inspection steps:
- Walk every elevation and check for overdriven nails, tight joints, and misaligned courses.
- Verify ground clearances meet manufacturer specs for the product installed.
- Produce a written sign-off referencing the manufacturer’s installation manual.
Pro Tip: Ask your contractor for a nail pattern diagram and the WRB product data sheet before work begins. A contractor who cannot produce these documents has likely not planned the job to manufacturer spec.
Jsignorexteriors brings more than 30 years of exterior remodeling experience to every siding project in Connecticut. As a fully licensed and insured contractor, the team follows manufacturer installation manuals for James Hardie, LP Building Solutions, and other products, and documents each phase of the installation for homeowner records. You can review past siding projects to see the quality standard applied on real Connecticut homes.
Questions you can request from your contractor before signing:
- Nail pattern diagram for the specific product being installed
- WRB product name, manufacturer, and installation method
- Flashing detail drawings for windows, doors, and kick-out locations
- Written confirmation of manufacturer spec compliance
Key Takeaways
Siding installation errors, not material defects, cause most failures, and the highest-risk problems are poor moisture management, missing flashing, and incorrect fastening.
| Point | Details |
|---|---|
| Inspect flashing first | Check every window, door, and roof-wall intersection for missing or improperly lapped flashing. |
| Check nails and gaps | Overdriven nails and missing expansion gaps are the two most visible fastening errors to look for. |
| Act fast on interior stains | Water staining on interior walls near exterior surfaces signals an active leak requiring immediate contractor attention. |
| Follow manufacturer specs | James Hardie and LP Building Solutions publish product-specific manuals; generic rules of thumb are not a substitute. |
| Jsignorexteriors | A licensed, insured Connecticut contractor with 30+ years of experience installing siding to manufacturer spec with documented QC. |
Why the “it looks fine” assumption costs homeowners the most
Here is the thing about siding installation errors: the wall usually looks perfectly normal for the first year or two. Panels are straight, paint is fresh, and there is nothing obvious to flag. The damage is happening behind the cladding, in the sheathing and framing, where no one is looking.
What I see repeatedly is homeowners who discover a serious moisture problem only when they go to sell the house or when a panel finally buckles after a hard winter. By that point, the sheathing replacement alone can cost more than the original siding job. The installation error that caused it, a missing kick-out flashing or a row of overdriven nails, would have cost almost nothing to fix during installation.
The inspection checklist in this article gives you a real starting point. But if you find interior water stains, soft framing, or extensive missing flashing, do not try to manage it with caulk and hope. Get a professional assessment, get it in writing, and make sure whoever does the repair follows the manufacturer’s installation manual for your specific product. That documentation is what protects your warranty and your home’s value.
Jsignorexteriors can diagnose and fix your siding the right way
Thirty years of siding work across Connecticut has shown us one consistent truth: the homes that hold up best are the ones where the installation was done right the first time, with proper WRB, correctly installed flashing, and fasteners placed to manufacturer spec.

Jsignorexteriors offers siding diagnosis, flashing repair, targeted panel replacement, and full re-siding, all backed by a workmanship warranty and performed by a licensed, insured crew. We are a family-owned contractor, and we document every phase of the job so you have records for warranty claims and future resale.
Before your visit, gather photos of any problem areas, note the approximate installation date if you know it, and collect any prior repair receipts. That information helps us scope the work accurately and give you a written estimate that covers WRB, flashing, fastener specs, and waste removal.
Ready to get a clear picture of what your siding actually needs? Visit our siding services page to schedule a diagnostic visit with our Connecticut team.
Sources and further reading
Use these resources to look up the installation manual for your specific product before attempting any repairs. Every manufacturer publishes product-specific guides that supersede generic advice.
- LP Building Solutions: Common Siding Installation Mistakes — LP’s own guidance on expansion gaps, moisture management, and fastening for LP SmartSide products.
- James Hardie: Number One Siding Install Mistake — James Hardie’s explanation of sequencing errors and why siding should not go up before interior trades are finished.
- The Building Consultant: Common Siding Failures — A building-science perspective on nail depth, flashing, and caulk overreliance with technical detail on failure mechanisms.
- Engage Building Products: What Causes Siding Installation Failures? — Covers storage, wet-substrate installation, and drainage plane requirements.
- Connecticut Home Improvement Contractor Search — Verify that any contractor you hire holds a valid Connecticut Home Improvement Contractor registration before signing a contract.
- Trew Landscape: Common Mistakes When Installing Vinyl Fences — Useful background on vinyl material handling and drainage principles that apply to exterior installation broadly.