
The single most important rule when comparing contractor bids is this: scope detail matters more than the bottom-line number. A $12,000 quote that itemizes every line of labor, materials, and permits is almost always more trustworthy than a $9,500 lump sum with no breakdown. Before you spend another minute looking at totals, take these steps to make your bids actually comparable:
- Write a one-paragraph project scope and share it with every bidder before they visit your home.
- Request a minimum of three written, itemized bids that separate labor, materials, permit fees, and a payment schedule.
- Build a simple comparison row for your highest-cost items (roofing, framing, windows) so you can spot what each contractor included or left out.
- Invest 2–4 hours to normalize the bids. That time typically saves thousands by exposing hidden costs before you sign anything.
Three bids is the right baseline. With fewer, price fairness is uncertain; with three, outliers reveal whether a low number reflects a real bargain or a missing scope item.
Table of Contents
- How do you solicit contractor bids the right way?
- How to read and compare bids line by line
- What do contractor bids commonly leave out?
- Step-by-step checklist to review each bid before you sign
- What bid behaviors should make you pause?
- What does research say about wide price spreads?
- Key Takeaways
- Why the “cheapest bid” framing leads homeowners astray
- Get a written, itemized estimate from Jsignorexteriors
- Useful sources and further reading
How do you solicit contractor bids the right way?
Good bids start with a good bid package. If you hand three contractors a vague verbal description of your project, you’ll get three quotes built on three different assumptions. That’s not a comparison; it’s confusion.
What to put in your bid package:
- A one-paragraph written scope describing what you want done, the rooms or areas involved, and any known constraints (limited access, occupied home, HOA rules).
- Photos of the existing conditions, especially problem areas.
- Any product preferences or allowances you’ve already decided on (specific shingle brand, window grade, tile budget per square foot).
- Your desired start and completion window.
- A note on permit responsibility: ask each contractor to include permit fees in their quote.
Aim for three well-qualified bidders. Two bids give you a price and a reference point. Three give you a pattern. When one number sits well outside the other two, you can investigate whether it’s a scope gap, a material upgrade, or a genuine pricing difference.
Run every site visit the same way. Walk each contractor through the same spaces, point out the same concerns, and give them the same written scope. If you describe the project differently to each one, you’ll end up with quotes that can’t be compared no matter how carefully you analyze them later.

Questions worth asking on the site visit:
Ask who will actually perform the work. Will the contractor use their own crew, or will they subcontract major portions? Ask how they handle permit applications and inspections. Ask what happens if they open a wall and find unexpected rot or mold. Getting these answers before the bid is submitted tells you a lot about how a contractor thinks through a project.
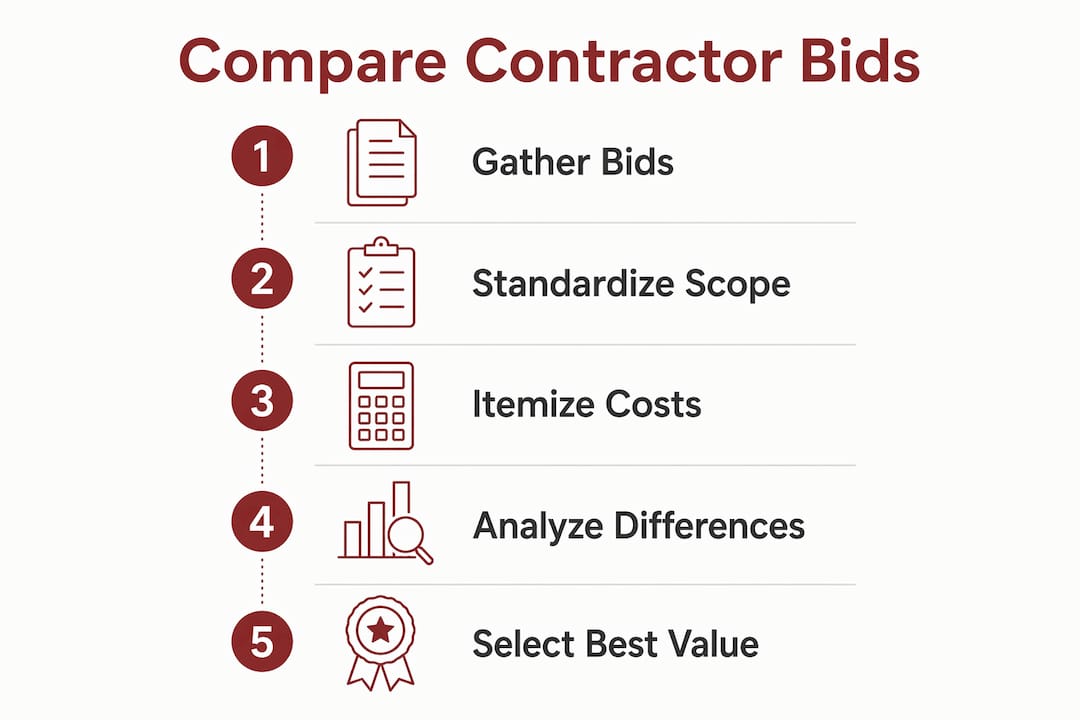
In writing, request itemized labor versus materials, permit fees as a separate line, a payment schedule tied to milestones, allowances with defined brands or grades, a project timeline, warranty terms, and a description of how change orders are triggered and priced.
How to read and compare bids line by line
The most common mistake homeowners make is comparing only the bottom-line totals. A detailed bid on a kitchen remodel can span 40–60 line items. When one contractor lists 55 lines and another lists 8, the difference in total price almost certainly reflects what’s missing, not what’s cheaper.
Start with scope, not price. List every deliverable mentioned across all three bids and build a master checklist. Mark which bid includes each item. Any item missing from one bid needs a cost added back before you can compare totals fairly.

Next, convert lump sums to unit rates where possible. Dividing a flooring cost by square footage, a window cost by the number of units, or a trim cost by linear feet lets you compare unit costs across bids regardless of how each contractor packaged their numbers. A contractor charging $18/sq ft for hardwood installation and another charging $22/sq ft are now directly comparable. A lump sum of $4,800 versus $5,500 is not.
Bid comparison matrix
Use these columns when building your comparison table:
| Dimension | What to check |
|---|---|
| Scope and itemization | Does the bid list every deliverable, or are major items bundled? |
| Labor vs. materials | Are these separated, or is it one combined number? |
| Allowances and material specs | Are brands, grades, and quantities defined? |
| Timeline and milestones | Are start/end dates and key phases specified? |
| Payment schedule and deposit | Is payment tied to milestones, or is a large upfront sum required? |
| Permits and fees | Are permit costs included, or listed as “owner’s responsibility”? |
| Warranty and cleanup | What’s covered, for how long, and who handles final cleanup? |
| Change-order process | How are changes triggered, priced, and approved in writing? |
A note on pricing models: Fixed or lump-sum bids give you price certainty but shift the risk of scope gaps onto you if the contract isn’t detailed. Cost-plus contracts pass material and labor costs through to you with a markup, which can work well for complex projects but requires trust and careful oversight. Time-and-materials (T&M) arrangements offer flexibility but no ceiling on cost. For most residential remodels, a fixed price with clearly defined change-order triggers is the safest structure.
What do contractor bids commonly leave out?
Even well-intentioned contractors omit items that seem obvious to them but aren’t obvious to you. These omissions don’t disappear from your project; they reappear as change orders after work has started, when your negotiating position is weakest.
The most frequent exclusions include:
- Dumpster and debris removal: Typically $400–$800 per haul. Some contractors assume you’ll arrange this; others include it automatically. Always confirm.
- Final site cleaning: Usually $300–$600. Many bids cover construction cleanup but not the final broom-clean or window washing.
- Paint touch-ups: Typically $200–$500. Patching drywall, caulking trim, and touching up paint after installation are often excluded.
- Hardware: Cabinet pulls, door handles, and towel bars are frequently listed as “owner-supplied” or omitted entirely.
- Appliance hookups: Plumbing and electrical connections for new appliances may require a separate licensed trade.
- Permit fees: Even when a contractor handles the permit application, the fee itself is sometimes listed as an owner cost. Confirm this explicitly.
- “If required” or “as needed” items: These phrases are red flags. Insist these be priced or explicitly excluded so you can add realistic costs back into your comparison.
- Allowance shortfalls: If a bid includes a $500 tile allowance and your chosen tile costs $800, the $300 gap becomes a change order.
Permit responsibility deserves special attention. In most U.S. jurisdictions, the licensed contractor of record pulls the permit and is responsible for inspections. If a bid lists permits as “owner’s responsibility,” ask why. A contractor who avoids pulling permits may be unlicensed or trying to avoid inspection scrutiny.
Step-by-step checklist to review each bid before you sign
Running the same review process on every bid keeps your evaluation objective. Here’s a practical sequence:
- Confirm the scope matches your bid package. Read the bid against your written scope line by line. Flag anything missing or described differently than you requested.
- Normalize units. Convert any lump sums to unit rates ($/sq ft, $/linear ft, $/fixture) so you can compare like items across bids.
- Price the gaps. For every item missing from a bid, add a realistic cost estimate. Use the other bids or local supplier quotes as a reference. This gives you an adjusted total that reflects the true project cost.
- Compare adjusted totals, not raw totals. The bid that looked cheapest may no longer be after you’ve added back the missing dumpster, permit fee, and cleanup.
- Check payment terms. Milestone-based payments protect you. A schedule that ties each payment to a completed phase (demo, rough-in, finish) is standard practice. Excessive upfront deposits are a warning sign in many states.
- Verify credentials. Look up each contractor’s license through your state licensing board. Request a certificate of insurance showing general liability and workers’ compensation. Call your local building department to confirm permit requirements for your project type.
- Call references. Ask specifically about timeline adherence, how the contractor handled unexpected problems, and whether the final cost matched the contract.
- Require written revisions. If a contractor verbally agrees to add an item or change a spec, ask for a revised written bid before you award the contract. Verbal agreements don’t hold up.
For a deeper look at contract terms and payment clauses, reviewing the key language before you sign protects you from surprises after work begins. Understanding contractor insurance coverage is equally worth your time before you hand over a deposit.
What bid behaviors should make you pause?
Some red flags show up in the numbers; others show up in how a contractor behaves during the bidding process. Both matter.
In the bid itself:
- A single-line quote with no itemization. You have no way to know what’s included or what will become a change order.
- A price dramatically lower than the other two bids. A lowball bid often signals missing scope rather than a genuine bargain. Ask the contractor to walk you through exactly what their number covers.
- “If required,” “as needed,” or “allowance TBD” language throughout the document.
- A payment schedule that demands more than 10–15% upfront before any work begins. Some states cap contractor deposits by law; check your state’s contractor licensing board for the applicable rule.
In the contractor’s behavior:
- Pressure to decide quickly or accept a “today only” price.
- Refusal to provide a written, itemized bid. Any reputable contractor will put their scope in writing.
- Cash-only offers or large discounts for cash payment. This often signals unlicensed work or an intent to avoid permits and inspections.
- Evasive answers about who will actually perform the work, whether subcontractors are licensed and insured, or how permits will be handled.
- No verifiable references or an unwillingness to provide them.
When you spot a red flag, your first move is to ask for written clarification. If the contractor won’t commit in writing, that answer tells you what you need to know. For specialized exterior work, understanding the role of licensed contractors in your project type helps you ask the right questions upfront.
What does research say about wide price spreads?
When three bids come back and one is significantly lower than the others, the instinct is to wonder whether the other two contractors are overcharging. The research points the other way. Experts consistently find that the most detailed bid indicates competence and lower execution risk, while a lowball price commonly reflects omitted scope or unrealistic assumptions about labor costs.
Here’s a practical example. Suppose Bid A comes in at $18,000, Bid B at $22,000, and Bid C at $24,500. Bid A looks attractive until you notice it excludes dumpster removal ($600), permit fees ($400), and uses a $500 tile allowance where Bid B specifies the same tile at $800. Add those back: Bid A’s adjusted total is $19,800. The gap between Bid A and Bid B just shrank from $4,000 to $2,200, and Bid B includes a one-year labor warranty that Bid A doesn’t mention.
Industry sources also warn that bids built without a contingency line or using base wage instead of burdened labor costs tend to create mid-project price pressure. A contractor who underbids their own labor will either cut corners or come back with change orders.
Pro Tip: Spend 2–4 hours building a simple spreadsheet that lists every scope item, unit rates, and adjusted totals for each bid. That investment typically saves thousands by exposing hidden costs before you’re locked into a contract.
The best value in most remodel bids sits in the middle range once you’ve normalized the numbers. The highest bid isn’t automatically the best quality, and the lowest isn’t automatically the best deal. The bid that shows the most project-specific detail and defensible assumptions is usually the one worth awarding.
Key Takeaways
Scope detail, normalized totals, and verified credentials are the three pillars of a sound contractor bid evaluation — not the raw bottom-line price.
| Point | Details |
|---|---|
| Itemized bids are non-negotiable | Request bids that separate labor, materials, and permits; a kitchen remodel can span 40–60 line items. |
| Normalize before comparing | Convert lump sums to unit rates and add costs for missing items to get true adjusted totals. |
| Three bids reveal outliers | Two bids are a coin flip; three give you a pattern that exposes scope gaps and unrealistic pricing. |
| Red flags cost more than time | Vague scope, large upfront deposits, and cash-only offers are predictors of overruns and disputes. |
| Jsignorexteriors delivers itemized estimates | As a fully licensed and insured Connecticut contractor, Jsignorexteriors provides written, itemized bids with clear milestones and warranties. |
Why the “cheapest bid” framing leads homeowners astray
Most articles about comparing contractor bids spend their energy telling you to get three quotes and pick the middle one. That advice isn’t wrong, but it skips the part that actually matters: you can’t compare three quotes that aren’t measuring the same thing.
The real work happens before you look at a single total. It happens when you write a clear scope, run consistent site visits, and build a master checklist of every deliverable. Once you’ve done that, the price comparison almost takes care of itself. The contractor who left out the dumpster, the permit fee, and the cleanup is no longer the cheapest option once you add those back. The contractor whose allowances are vague is no longer comparable to the one who specified exact product grades.
What homeowners underestimate is how much a well-written bid package changes the quality of the bids they receive. Contractors who see a detailed, organized scope know they’re dealing with a prepared homeowner. They tend to respond with more careful, complete proposals. Contractors who see a vague request tend to fill in the blanks with assumptions that favor their margins.
The 2–4 hours you invest in normalizing bids isn’t just about finding the best price. It’s about building a document you can enforce. A bid that you’ve reviewed line by line, priced the gaps on, and confirmed in writing becomes the foundation of a contract you can actually hold a contractor to. That’s worth more than any discount.
Get a written, itemized estimate from Jsignorexteriors
Jsignorexteriors brings more than 30 years of exterior remodeling experience to every estimate it produces for Connecticut homeowners. Every written bid from Jsignorexteriors separates labor from materials, lists permit fees as a distinct line, ties the payment schedule to project milestones, and documents allowances with defined product grades. You won’t receive a one-line lump sum and be asked to trust it.

Whether your project is a roof replacement, new siding, replacement windows, or a deck, Jsignorexteriors provides the kind of detailed, defensible estimate this guide describes. As a fully licensed and insured contractor, the company handles permit applications and inspections as part of the process, not as an afterthought.
Request your written estimate at jsignorexteriors.com and see exactly what a thorough, itemized bid looks like in practice.
Useful sources and further reading
The following resources were used to develop this guide and are worth bookmarking for your own research:
- QuoteChecker: How to Compare 3 Contractor Bids Fairly — Practical checklist covering itemization standards and the 40–60 line-item expectation for kitchen remodels.
- EstimateHawk: How to Compare Contractor Bids Apples-to-Apples — Step-by-step method for converting lump sums to unit rates and building a comparison matrix.
- RemodelCostCalc: How to Compare Contractor Quotes — Guidance on spotting padded bids, pricing “if required” items, and the three-bid baseline.
- Quoterly: How to Compare Contractor Quotes — Analysis of why the most detailed bid typically indicates lower execution risk.
- Jaspector: How to Get and Compare Contractor Bids — Overview of the full bid solicitation and evaluation process.
- EasyTakeoffs: How to Bid a Construction Job — Contractor-side perspective on burdened labor costs, contingency, and payment milestones.
- Jsignorexteriors: How to Evaluate Commercial Remodeling Bids in Connecticut — Deeper example of bid evaluation steps for Connecticut property owners.
- Jsignorexteriors: Exterior Remodel Contract — What Connecticut Homeowners Must Know — Practical contract checklist for finalizing and protecting yourself after selecting a bid.
For permit requirements and deposit rules specific to your town, contact your local building department directly. State contractor licensing boards (such as Connecticut’s Department of Consumer Protection) are the authoritative source for license verification and deposit caps in your jurisdiction.
This article provides general educational information for homeowners. It is not legal or financial advice. Confirm current permit requirements, licensing rules, and deposit regulations with your local building department or a qualified professional before signing any contract.