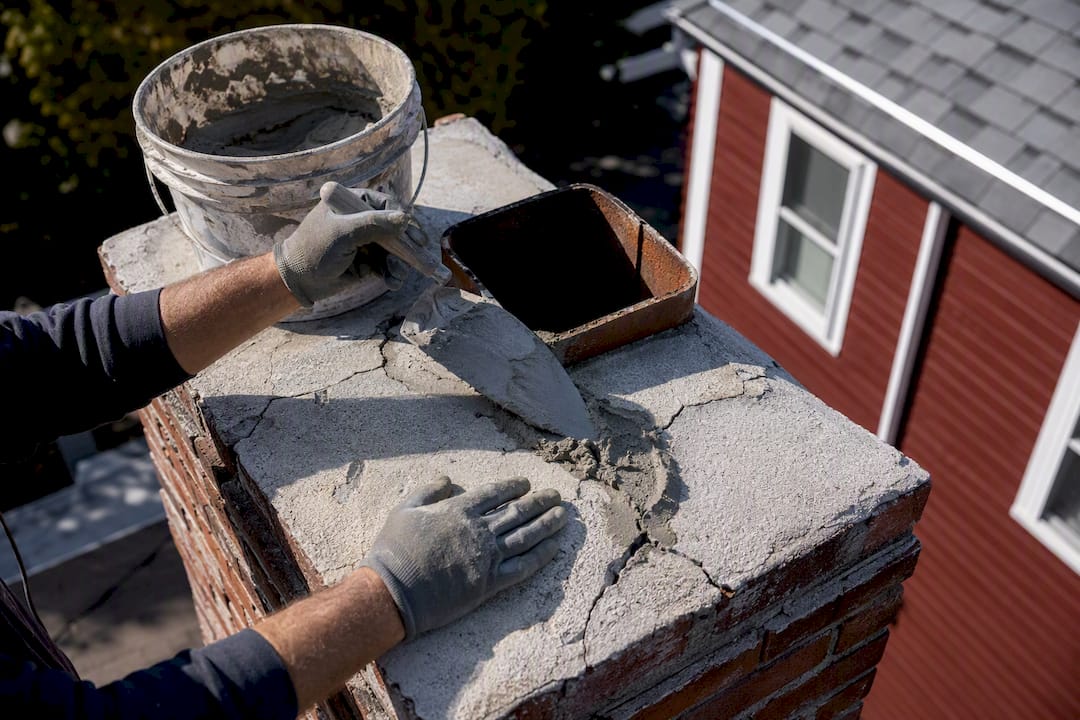
Most cracked chimney crowns are fixed with a seal or patch, not a full rebuild. Hairline cracks respond well to an elastomeric coating, while wider or structural cracks need patching or a partial rebuild. Full rebuilds only make sense when the crown has spalled, lost sections, or was built without proper slope. If water is reaching your firebox, concrete chunks are showing up in your gutters, or a section of crown has visibly shifted, treat it as urgent and get a roof-level inspection before winter sets in.
TL;DR:
- Cracks wider than 1/8 inch or those that run through the full thickness of the crown require structural repair and cannot be fixed with coatings alone.
- Water infiltration often causes or worsens crown damage, especially with poor construction features like flat slopes or missing drip edges, making repairs urgent.
- Sealant jobs for hairline cracks cost between $150 and $300, while full rebuilds for structural failure can exceed $2,000, with costs influenced by chimney access and complexity.
- DIY repairs are risky beyond sealing hairline cracks, especially on steep roofs or with visible displacement, and should be confirmed by a professional assessment with photos and measurements.
- Regular inspections before winter and after storms, along with proper maintenance of the cap, flashing, and coating schedules, can prevent small cracks from escalating into costly full rebuilds.
Table of Contents
- What Are the Warning Signs of Chimney Crown Damage?
- Why Do Chimney Crowns Crack and Fail?
- Should You Seal, Patch, or Rebuild Your Chimney Crown?
- How Much Does Chimney Crown Repair Cost?
- Can You Repair a Chimney Crown Yourself?
- Which Products Actually Fix a Chimney Crown?
- What Happens During a Professional Crown Repair?
- How Often Should You Inspect Your Chimney Crown?
- What Contractors Wish Homeowners Knew About Crown Repair
- Get a Chimney Crown Inspection From a Licensed Connecticut Contractor
- Sources
What Are the Warning Signs of Chimney Crown Damage?
Crack width tells you almost everything about severity. A hairline crack under 1/16 inch is cosmetic and easy to seal. A moderate crack between 1/16 and 1/8 inch means water is likely getting into the concrete and needs patching soon. Anything wider than 1/8 inch, or a crack that runs through the full thickness of the crown, signals structural failure that a coating alone won’t fix, according to FindChimneySweepers.
Beyond cracks, watch for these signs from the ground and roof:
- Concrete chips or gravel-sized debris collecting in gutters below the chimney
- White, chalky efflorescence staining the crown or upper bricks
- Water stains or active dripping around the firebox after rain
- A crown that looks tilted, sunken, or separated from the chimney face
Binoculars work fine for a yearly ground check. Once you spot spalling, displaced pieces, or debris in the gutters, you need someone on the roof measuring crack width directly.
Why Do Chimney Crowns Crack and Fail?
Freeze-thaw cycling does more damage to crowns than any other single factor. Water seeps into hairline cracks, freezes, expands, and widens the gap every winter until a small flaw becomes a structural one. Poor original construction makes this worse.
- Flat or reverse-sloped crowns that pool water instead of shedding it
- Missing or undersized drip edges, letting water run back against the chimney face
- Thin, unreinforced mortar washes poured without rebar or metal lath
- Crowns bonded directly to the flue liner with no flexible joint, which cracks the concrete as materials expand at different rates, per InspectApedia
A missing chimney cap or failed flashing speeds all of this up by feeding more water into the same weak points. If the crown was shaped wrong from the start, no coating will make it last. That one needs a rebuild.
Should You Seal, Patch, or Rebuild Your Chimney Crown?
Contractors generally sort crown repair into four tiers based on how far the damage has spread. Matching the tier to the actual damage, rather than jumping straight to the most expensive option, is the single biggest factor in getting a fair price.
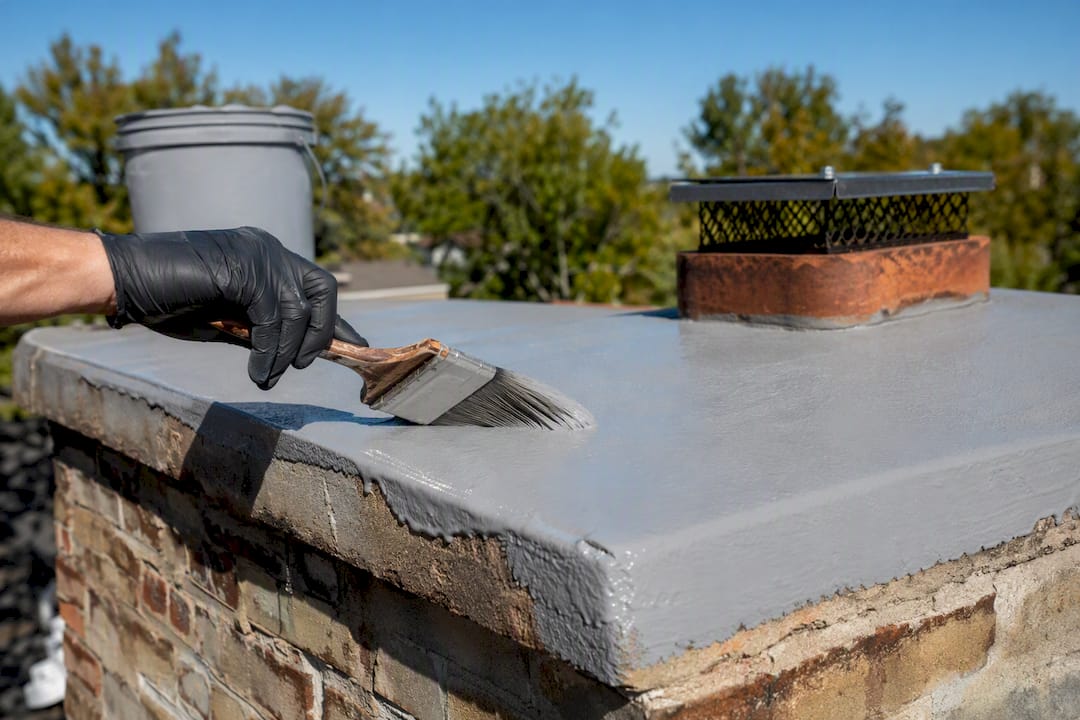
- Seal or coat. For hairline cracks, cleaning the surface and applying a water-based elastomeric coating typically holds up for 8 to 12 years. This is the cheapest, fastest fix and works well as preventive maintenance too.
- Local patch. Moderate cracks and small spalled spots get filled with quick-setting repair mortar, then sealed with an elastomeric coating over the patched area, a process Fine Homebuilding walks through in detail.
- Partial rebuild. When surface damage is widespread but the base structure is sound, a contractor removes the top layer and repours it with fresh reinforcement.
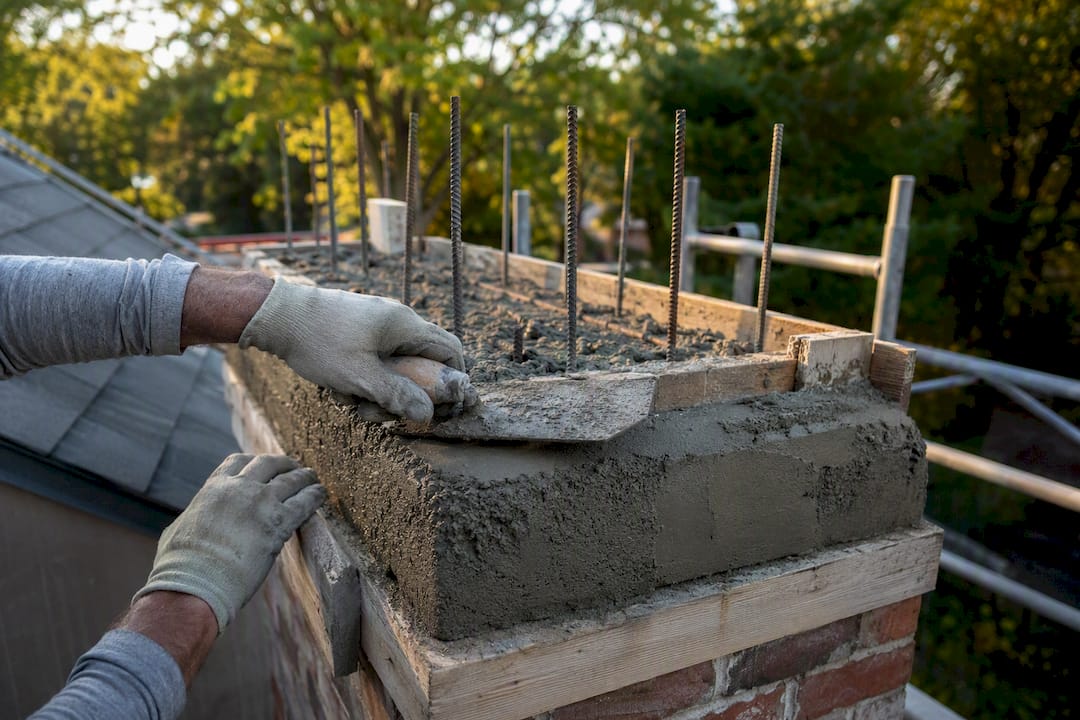
- Full rebuild. Structural failure, missing sections, or a crown that was poorly shaped from the start all call for full demolition and reconstruction with rebar, metal lath, correct slope, and a proper drip edge.
Pro Tip: If a contractor quotes you for a full rebuild without measuring crack width or showing you photos of the damage, ask why. A legitimate assessment always starts with numbers and pictures, not a guess from the ground.
How Much Does Chimney Crown Repair Cost?
Price tracks tier for tier. Sealant jobs run $150 to $300, patches run $300 to $600, partial rebuilds run $600 to $1,200, and full rebuilds run $800 to $2,000 or more. The ranges overlap because access, not just damage, drives price.
A few factors push quotes toward the high end of any tier:
- Multi-flue chimneys, which take longer to seal and rebuild around each opening
- Steep roofs or chimneys that need scaffolding rather than a straight ladder setup
- Extra height, since taller chimneys mean more rigging time
- Historic masonry that requires matching mortar color and texture
- Bundling crown work with cap replacement, which often costs less than two separate visits
For a quick sanity check on a rebuild quote, multiply the crown’s length by its width in feet, then add a flat access fee based on roof difficulty. A typical single-flue crown runs roughly 3 by 3 feet. If a quote comes in far above that math plus a reasonable access charge, ask for an itemized breakdown and photos of the crown before you sign anything.
Can You Repair a Chimney Crown Yourself?
Beyond that, the math on risk stops favoring you.
- Skip DIY if the crown shows spalling, displacement, or any crack wider than 1/8 inch
- Skip DIY on steep pitches, second-story chimneys, or anything requiring a harness
- Skip DIY if the flue joint itself looks cracked or separated from the crown
- Always use fall-protection gear and a stabilized ladder if you do attempt ground-level cleaning work
Pro Tip: Even for a simple sealant job, insist on seeing the product’s data sheet before applying it. A coating rated for horizontal crown surfaces behaves very differently from a generic roof sealant.
If you’re not confident diagnosing the crack yourself, a licensed contractor’s inspection costs far less than a misdiagnosed repair. Get photos and a written scope before any work starts.
Which Products Actually Fix a Chimney Crown?
Product choice depends entirely on which tier you’re in. Elastomeric crown coatings, such as Chimney Rx or CrownGuard HP, are designed to bridge hairline cracks with a flexible, waterproof membrane. Look for water-based formulas with published crack-bridging specs, not generic paint-on sealers.
For patches and rebuilds, repair mortar and reinforced concrete mixes do the structural work. Rebar or metal mesh, combined with correct slope and a projecting drip edge, is what separates a rebuild that lasts decades from one that cracks again within a year, according to guidance from This Old House.
Siliconized acrylic latex sealants handle hairline cracks well but won’t bridge movement the way a true elastomeric coating does. Skip household products like Flex Seal entirely. They aren’t formulated for masonry exposure, UV, or the freeze-thaw cycling a crown endures.
What Happens During a Professional Crown Repair?
A proper repair starts before anyone touches the crown. Expect this general sequence:
- Roof-level inspection with measured crack widths and photos documenting the damage.
- A written scope of work naming the specific tier and materials to be used.
- Surface prep using stainless-steel brushes, since carbon steel bristles can break off and rust, staining the masonry.
- Patching or forming and pouring, followed by finishing to match the original slope.
- A final check of the cap, flashing, and liner, since all three interact with crown performance.
Sealant jobs typically wrap in a day; rebuilds can take two to three days including cure time. Ask about expected service life before the crew leaves.
How Often Should You Inspect Your Chimney Crown?
Inspect before the heating season starts and again after any major storm. The Chimney Safety Institute of America recommends catching small cracks early, since sealing them before winter can prevent freeze-thaw cycles from turning a $200 fix into a $1,500 rebuild.
- Do an annual ground check with binoculars, and schedule a roof-level inspection every few years
- Keep the cap and flashing in good repair, since both protect the crown from constant water exposure
- Recoat elastomeric products on the manufacturer’s stated schedule rather than waiting for visible cracking
- Photograph the crown after every repair so you have a baseline for comparison next season
Bundling crown maintenance with routine preventive roof maintenance checks means a single contractor visit instead of two.
What Contractors Wish Homeowners Knew About Crown Repair
After more than 30 years in exterior contracting, one pattern shows up constantly: homeowners get quoted for a full rebuild when a patch would have done the job, simply because nobody measured the crack first. The fix for that is stubbornly simple. Ask for photos and a specific crack width in inches before agreeing to anything.
The reverse mistake happens too. Homeowners buy a tube of sealant for a crown that’s already spalling structurally, which buys a season, maybe two, before the real repair costs more than it would have originally.
— Adam
Get a Chimney Crown Inspection From a Licensed Connecticut Contractor
Jsignorexteriors gives Connecticut homeowners something most sealant-and-caulk outfits can’t: a licensed masonry crew that also handles roofing and flashing, so a crown problem tied to a flashing leak gets solved in one visit instead of two separate contractor calls.

Every inspection starts on the roof, not from the ground. Our crew measures crack width, photographs the damage, and checks the cap, flashing, and liner together, since crown failure rarely shows up in isolation. If flashing is part of the problem, our roofing contractor team can scope that work in the same estimate rather than sending you to a second company. You’ll get a written price tied to what we actually measured, not a guess from the driveway.
If your crown is showing cracks, staining, or debris in the gutters, request an inspection and we’ll tell you straight whether you need a $200 seal or a full rebuild, with photos to back it up.
Sources
- How to Repair a Chimney Crown — Fine Homebuilding
- Chimney Crown Repair: Signs, Costs & What to Expect — FindChimneySweepers
- How To Replace a Chimney Crown — This Old House
- Chimney rain cap & chimney cap/crown choices — InspectApedia
- CSIA (Chimney Safety Institute of America)