Concrete block repair covers everything from a simple surface patch on a spalled face to a full structural stabilization of a bowing foundation wall. The core decision you need to make first: is the crack stable or still moving? A stable hairline crack running vertically is often a safe DIY candidate. A horizontal crack in the lower third of your wall, a crack that keeps widening, or any visible bowing are signs of active structural stress and need a licensed masonry contractor, not a tube of caulk. CMHA maintenance guidance recommends monitoring cracks with a small gypsum patch before committing to permanent repairs, so you know exactly what you’re dealing with before spending a dollar.
Key Takeaways
Concrete block repair ranges from a simple surface patch to full structural stabilization, and choosing the right method starts with correctly identifying whether the damage is cosmetic or structural.
| Point | Details |
|---|---|
| Stable vs. active cracks | Monitor with a gypsum patch or crack gauge before committing to any permanent repair. |
| DIY scope | Repointing and surface patching are realistic for stable, nonstructural damage with proper prep and polymer-modified mortar. |
| Structural red flags | Horizontal cracks, bowing, and widening gaps require a licensed contractor, not a DIY patch. |
| Root cause first | Drainage, waterproofing, and grading corrections must accompany any structural repair or the fix will fail. |
| Jsignorexteriors | Offers full-range masonry inspection, stabilization, and rebuild services for Connecticut homeowners. |
Table of Contents
- What concrete block repair is and when your wall actually needs it
- How to inspect and monitor your wall before choosing a repair
- Common repair methods: what each one does and when to use it
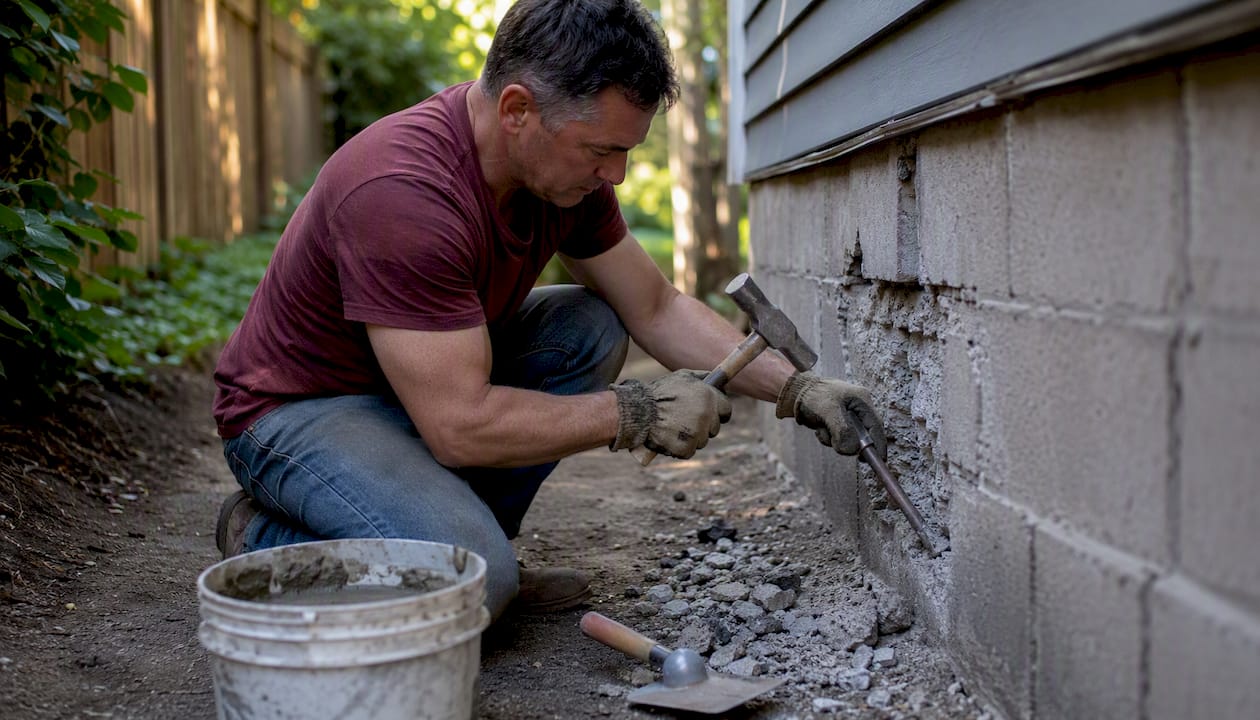
- Step-by-step DIY repair for small spalls and minor cracks
- What professionals do for structural repairs
- How to hire the right masonry contractor and what to ask
- Sources
What concrete block repair is and when your wall actually needs it
Not every crack or rough patch means your wall is failing. Knowing the difference between cosmetic damage and structural compromise is the first thing to sort out.
Common damage types to look for:
- Hairline vertical cracks (often thermal expansion, usually cosmetic)
- Stair-step cracks following mortar joints (settlement or differential movement)
- Horizontal cracks, especially in the lower third of a wall (hydrostatic pressure or lateral soil load)
- Spalling: flaking or crumbling block faces exposing the interior aggregate
- Bulging or bowing sections (lateral pressure exceeding wall capacity)
- Hollow-sounding units when tapped (voids behind the face, loss of core integrity)
Common causes behind these problems:
- Moisture intrusion and hydrostatic pressure from poor drainage or missing waterproofing
- Freeze-thaw cycles that expand trapped water and fracture block faces
- Differential settlement when soil shifts unevenly beneath a footing
- Deteriorated mortar joints that let water in and reduce wall stiffness
- Missing or failed flashing at wall-to-roof transitions
The pattern matters as much as the symptom. Horizontal cracking and stair-step cracks are red flags for hydrostatic pressure or settlement that go well beyond surface patching. A cosmetic fix applied over an unresolved drainage problem will fail within a season or two, because the water and soil pressure that caused the damage are still there. Fix the root cause first, or any repair material you apply is temporary at best.
How to inspect and monitor your wall before choosing a repair
Start with a slow visual sweep of the entire wall surface in good daylight. Look for cracks, staining, efflorescence (white salt deposits), and areas where the block face looks rough or pitted. Then get hands-on: tap the face of each block with a screwdriver handle. A solid block returns a sharp knock; a hollow or delaminating face returns a dull thud. Chip at any loose material with a cold chisel to test how far the damage goes.
Photographic monitoring is your best diagnostic tool. Take close-up photos of every crack with a coin or ruler in frame for scale, and write the date on a piece of tape next to the crack before shooting. Revisit in two to four weeks and compare. If the crack has grown past your reference mark, it is still active.
For a more precise read, the CMHA-recommended approach is to spread a thin layer of gypsum plaster or install a plastic crack gauge across the crack. If the gypsum cracks or the gauge shows movement over a few weeks, the wall is still shifting and permanent repair should wait until the cause is addressed.
Red flags that mean you call a contractor immediately:
- Horizontal cracks anywhere in the wall, especially near mid-height or the lower third
- Any crack that has visibly widened since you first noticed it
- Wall sections that bow or lean inward, even slightly
- Exposed reinforcing steel showing rust staining
- Water actively seeping through the wall during or after rain
Common repair methods: what each one does and when to use it
Different damage patterns call for different approaches. The table below maps the most common concrete block repair methods to the situations where each one fits.
| Method | What it does | Best for | DIY difficulty | Primary limitation |
|---|---|---|---|---|
| Cosmetic patching | Fills surface spalls and pits with repair mortar | Stable, nonstructural face damage | Low | Fails if crack is still moving |
| Repointing (tuckpointing) | Removes deteriorated mortar and replaces it with fresh Type S mortar | Eroded joints, minor water infiltration | Low–Medium | Does not address structural movement |
| Parging | Thin mortar coat over the wall face | Widespread surface weathering | Medium | Cosmetic only; masks but does not fix cracks |
| Epoxy injection | Fills crack voids with structural epoxy under pressure | Nonmoving structural cracks | High | Requires specialized equipment; fails in moving cracks |
| Stitching (drilled anchors) | Transfers load across a crack using bonded dowels | Corner cracks, limited cracking in sound walls | High (pro) | Not suitable for actively moving or compromised walls |
| Carbon fiber straps | Bonds high-tensile straps to wall face to resist lateral movement | Bowing foundation walls | High (pro) | Requires correct spacing and professional specification |
| Core grouting | Fills hollow block cores with grout to add mass and stiffness | Walls with void loss or needing added rigidity | High (pro) | Requires drilling and pumping equipment |
| Partial or full rebuild | Removes and replaces damaged units or entire sections | Severely compromised blocks or load paths | Pro only | Highest cost; may require permits and engineering |
Materials compatibility matters at every level. Polymer-modified repair mortars bond better and shrink less than plain cement mixes. Bonding agents applied to the substrate before patching reduce delamination risk significantly. For anchors and stitching hardware, stainless steel is the right choice to prevent corrosion-driven failure years later.
Prevention ties directly to repair choice. If you are repointing or patching, pair the repair with a check of your gutters, downspout extensions, and grade slope. Water that pools against the wall will undo any repair. For retaining walls specifically, polymer-modified mortars combined with drainage corrections such as weep holes and clean aggregate backfill are the only combination that holds long term.
Step-by-step DIY repair for small spalls and minor cracks
This procedure covers nonstructural spalls and stable hairline cracks. If your inspection raised any red flags from the section above, stop here and call a professional.
Tools and materials you will need:
- Polymer-modified repair mortar (pre-bagged mixes work well for small jobs)
- Bonding agent (liquid or brush-on)
- Pointing trowel and margin trowel
- Wire brush and cold chisel
- Angle grinder with a masonry wheel (for cutting back spalled edges)
- Bucket and mixing paddle
- Plastic sheeting or damp burlap for curing
- PPE: N95 or P100 respirator, safety glasses, work gloves
Safety first. Cutting and grinding concrete block generates silica dust, which is a serious respiratory hazard. Work outdoors or in a well-ventilated space, and always wear a properly fitted respirator, not just a dust mask. Eye protection is non-negotiable. If the wall is near your home’s electrical service or gas line, confirm clearances before drilling or grinding.
Step-by-step procedure:
- Remove all loose material. Use a cold chisel and hammer to chip away every piece of loose or delaminating concrete. Do not stop at the edge of the visible damage; probe until you reach solid substrate. Undercut the edges slightly so the patch has a mechanical key to grip.
- Clean the surface. Brush out all dust and debris with a stiff wire brush. For deeper voids, use compressed air or a shop vacuum.
- Pre-wet the substrate. Dampen the repair area with clean water and let it absorb until the surface is saturated but not shiny wet. This saturated-surface-dry (SSD) condition prevents the dry block from pulling water out of your fresh mortar too quickly, which causes shrinkage cracks and weak adhesion.
- Apply the bonding agent. Brush or roll the bonding agent onto the prepared surface per the manufacturer’s instructions. Let it reach the correct tack before applying mortar.
- Mix and apply repair mortar in thin lifts. For spall repairs, build up the patch in layers in thin lifts as recommended by the manufacturer. Scratch each layer before it fully sets if you need a second coat. Feather the edges to blend with the surrounding surface.
- Finish and cure. Smooth the final surface with a damp trowel to match the surrounding texture. Cover the patch with damp burlap or plastic sheeting and keep it moist for at least 24–48 hours. Avoid working in direct sun or temperatures below 40°F or above 90°F.
Pro Tip: Apply a small test patch about the size of your palm and let it cure for 48 hours before patching the full area. If it bonds cleanly and does not shrink or crack, your prep and mix are correct. If it pops off or crazes, revisit your surface prep and pre-wetting before proceeding.
What professionals do for structural repairs
When the damage goes beyond surface patching, the repair methods change significantly and so does the equipment and expertise required.
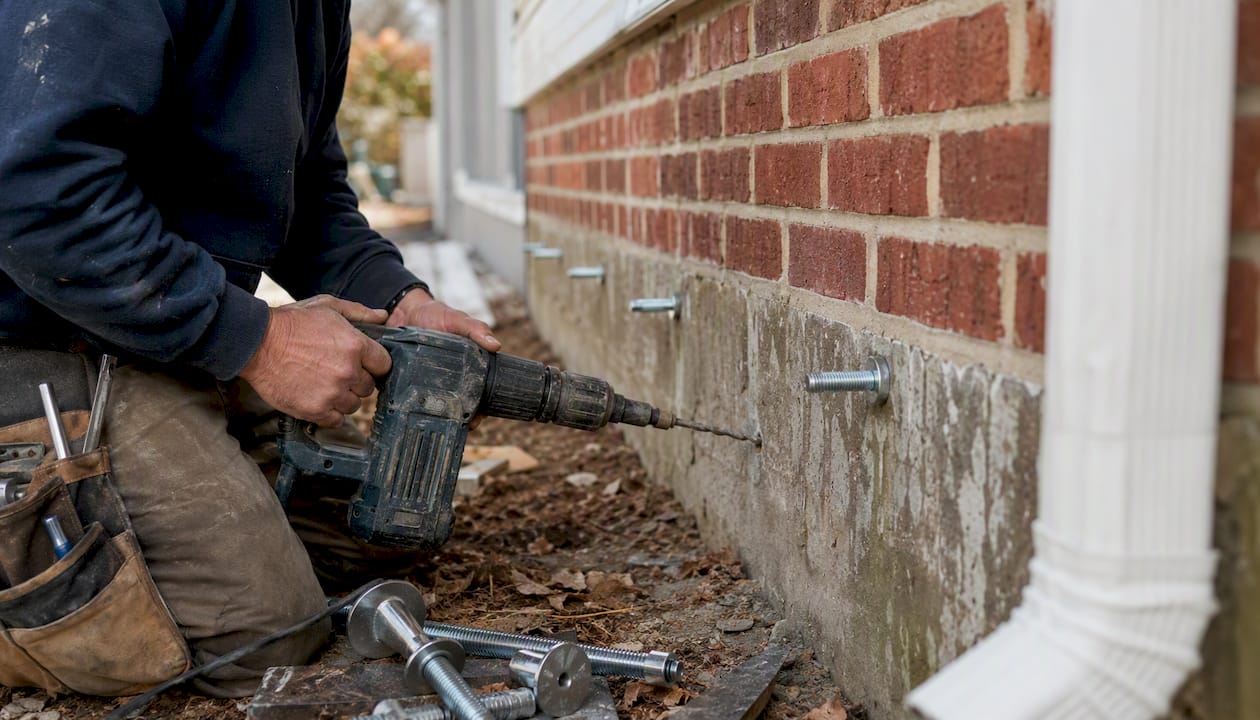
Stitching with drilled anchors is one of the most cost-effective structural options for corner cracks and limited cracking where the surrounding wall is still sound. A contractor drills holes across the crack at regular intervals, inserts stainless steel dowels or helical anchors, and bonds them with compatible epoxy or grout. This transfers load across the crack and arrests movement without removing any masonry. It is not appropriate for actively moving cracks or walls where the load path itself is compromised.
Epoxy and urethane injection fills crack voids under controlled pressure, restoring monolithic behavior to a cracked section. Epoxy works well for dry, nonmoving structural cracks. Urethane foam is better for active water infiltration because it expands to fill voids even in wet conditions, though it does not restore structural strength the way epoxy does.
Carbon fiber straps are the go-to solution for bowing foundation walls. Epoxy-bonded carbon fiber straps provide high tensile resistance against lateral soil pressure and can stop inward movement without the cost and disruption of full exterior excavation. The technique depends on correct strap spacing and professional specification; improperly spaced straps do not adequately distribute the load.
Core grouting fills the hollow cells of concrete block with poured or pumped grout, adding mass and stiffness to a wall that has lost structural integrity. It is often combined with stitching or carbon fiber for severely compromised sections.
Partial or full rebuild is the answer when individual blocks are shattered, when the load path through the wall is broken, or when a corner has shifted enough that no anchor system can realign it. A contractor removes the damaged units and rebuilds with new block and fresh mortar, matching the existing coursing.
A structural evaluation by a licensed contractor or structural engineer will typically include measuring wall deflection with a level or plumb bob, documenting crack widths and orientation, and assessing soil and drainage conditions. Permits are often required for structural masonry work, and any anchors or hardware installed in a foundation wall should be corrosion-resistant stainless steel, not galvanized, to ensure long-term performance.
Materials, tools, and safety: what you need and common pitfalls to avoid
Materials checklist:
- Polymer-modified repair mortar for patches and spalls
- Type S mortar for repointing and bedding new units
- Hydraulic cement for plugging active water leaks (not for moving cracks)
- Bonding agent (acrylic or latex-modified) for patch adhesion
- Structural epoxy for injection and anchor bonding
- Stainless steel anchors or helical ties for stitching
- Flowable grout for core filling
Tools checklist:
- Pointing trowel, margin trowel, and grout bag
- Angle grinder with masonry wheel or cold chisel and hammer
- Wire brush and shop vacuum
- Rotary hammer drill for anchor installation
- Mixing paddle and bucket
- PPE: P100 respirator, safety glasses, work gloves, knee pads
Simple urethane caulk and basic hydraulic cement are common first choices for homeowners, but they frequently fail in moving cracks or where block cores are open. Engineered polymer-modified mixes and epoxy-sand systems give far more durable results when matched to the actual crack type.
Common pitfalls to avoid:
- Patching over a crack that is still moving
- Skipping the bonding agent on a dry or dusty substrate
- Using the wrong mortar type (plain Portland cement shrinks more and bonds less reliably than polymer-modified mixes)
- Applying patches too thick in a single lift
- Curing in freezing temperatures or direct summer sun without protection
Permits may be required for structural masonry repairs, particularly on foundation walls. Check with your local building department before starting any work that involves anchors, grouting, or partial rebuilds.
Typical costs and timelines: what affects price and how long repairs take
Cost ranges for concrete block repair vary widely depending on what you are actually fixing.
Primary cost drivers:
- Severity and extent of damage (a few spalled faces vs. a bowing wall)
- Access requirements (interior basement vs. exterior retaining wall requiring excavation)
- Drainage corrections needed alongside the structural repair
- Materials (polymer-modified mortars and epoxy cost more than basic cement)
- Structural reinforcement (carbon fiber straps, anchors, grouting add significant cost)
- Labor rates in your area and permit or engineering fees
Rough scenario ranges (these vary significantly by region and scope):
- Small patching or repointing job: a competent DIYer can complete this in a day for the cost of materials; a contractor typically charges a few hundred dollars for minor work
- Carbon fiber strap stabilization for a bowing wall: a multi-day professional job that typically costs several thousand dollars depending on wall length and number of straps
- Partial or full rebuild of a compromised section: costs scale with the extent of demolition, new materials, drainage work, and any required engineering review
Typical timelines:
- Surface patch or repoint: one day of work plus 24–72 hours of curing before the area can be loaded or painted
- Epoxy injection or stitching: one to two days for a contractor, with epoxy reaching full cure in 24–72 hours
- Carbon fiber installation: one to three days depending on wall length
- Partial rebuild with drainage correction and backfill: several days to a couple of weeks
Get at least three written estimates for any structural work. Compare scope of work, materials specified, and warranty terms, not just the bottom-line price. An estimate that skips drainage correction or specifies galvanized rather than stainless anchors is not a bargain.
How to hire the right masonry contractor and what to ask
The contractor vetting process matters as much as the repair method itself. A structural repair done with the wrong materials or without addressing the root cause will fail, and you will pay twice.
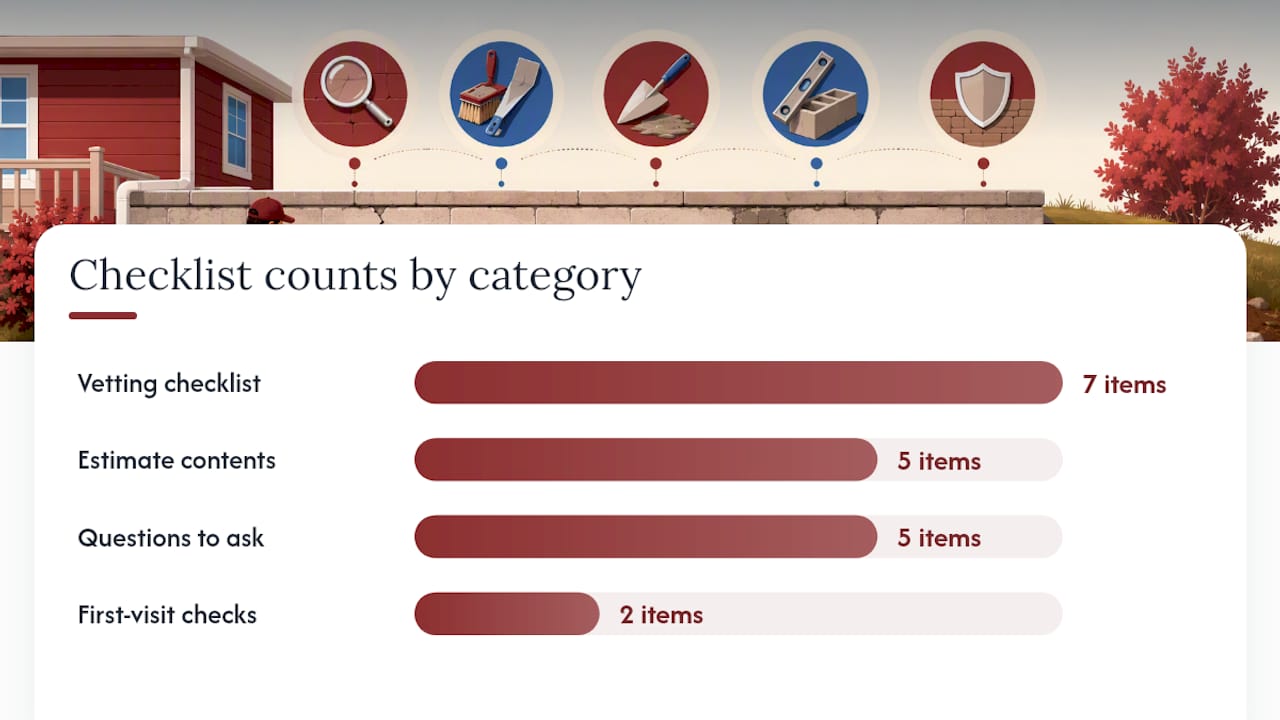
Vetting checklist:
- Valid contractor’s license and general liability plus workers’ compensation insurance (ask for certificates)
- Documented masonry or foundation repair experience with references you can call
- Familiarity with local soil and climate conditions
- Written scope of work that names specific materials (mortar type, anchor spec, epoxy brand)
- Written warranty covering both labor and materials
- Corrosion-resistant hardware specified (stainless steel anchors, not galvanized)
- Partnership with or referral to a structural engineer for complex evaluations
What a professional estimate should include:
- Diagnostic findings: crack type, orientation, width, and any measured deflection
- Recommended repair method with clear rationale
- Full materials list with product names or specifications
- Phasing, cure times, and any drainage or excavation work included in scope
- Allowance for root-cause correction (drainage, waterproofing, grading)
Questions to ask on the first visit:
- How will you address the water or soil pressure causing this damage?
- Do you grout the block cores, and if so, what mix do you use?
- What anchors and corrosion protection do you specify?
- Can you show photos or references from similar projects in this area?
- Will this repair require a building permit, and will you pull it?
Look for contractors who bring a level or plumb bob to measure deflection on the first visit, not just a phone camera. A contractor who cannot explain why the crack formed is not equipped to fix it permanently. You can review masonry facade considerations for additional context on what a thorough professional assessment covers.
A candid take on DIY limits and risk calibration
Repointing deteriorated mortar joints and patching stable, nonstructural spalls are genuinely within reach for a careful homeowner with the right materials and a willingness to prep properly. The work is not complicated, but it does require patience: proper surface prep, correct pre-wetting, and disciplined curing make the difference between a patch that lasts a decade and one that pops off in the first winter.
Where homeowners consistently get into trouble is treating a structural problem as a cosmetic one. A horizontal crack or a wall that has moved even a quarter-inch inward is not a patching job. The forces involved, lateral soil pressure, hydrostatic load, or compromised footing support, are not something a tube of repair mortar can resist. Attempting a DIY fix on a moving structural crack does not just waste money; it can delay a proper repair long enough for the damage to worsen significantly.
Seasonal timing matters too. Avoid any concrete repair when temperatures are expected to drop below 40°F within 48 hours of application, or when the surface is in direct sun above 90°F. Both conditions accelerate moisture loss from fresh mortar and lead to early failure. Spring and early fall are the most forgiving windows in most climates.
The conservative choice, hiring a licensed masonry contractor for anything that involves movement, bowing, or horizontal cracking, almost always costs less in the long run than a failed DIY attempt followed by a more extensive professional repair.
Masonry repairs done right in Connecticut
If your inspection has turned up horizontal cracks, bowing, or damage that goes beyond a surface patch, Jsignorexteriors offers professional masonry inspection and repair services for homeowners throughout Connecticut. The team handles the full range of work: diagnostic inspections with written findings, tuckpointing and repointing, parging, structural stitching, carbon fiber stabilization, and partial or full rebuilds when needed.

Every project starts with an honest assessment of what the wall actually needs, not the most expensive option. Jsignorexteriors is fully licensed and insured, with more than 30 years of local experience navigating Connecticut’s freeze-thaw cycles and soil conditions. To schedule a no-obligation inspection and get a written scope with clear timelines, contact the team directly through the masonry services page.
Sources
- Maintenance of Concrete Masonry Walls – CMHA
- Craftingwithconcrete
- Stabilizing a Concrete Block Foundation Wall – EpoxyWorks
- Rapidrepair