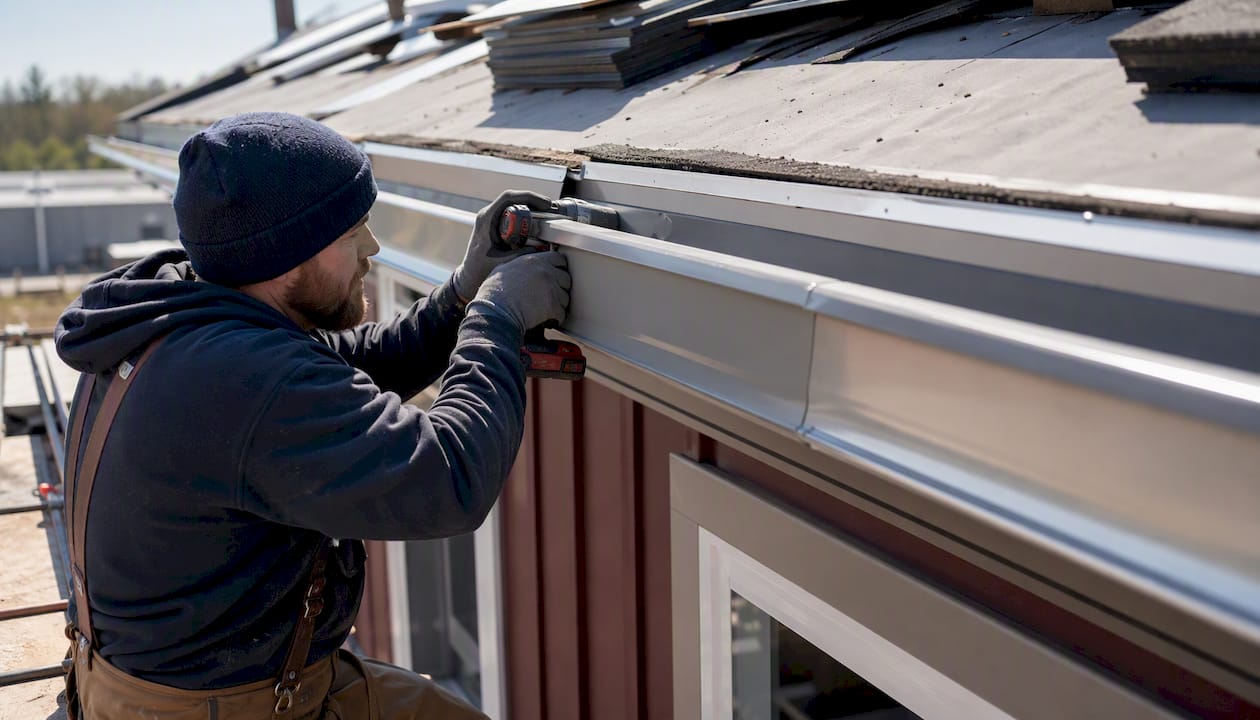
For most commercial buildings, start with a 6-inch K-style gutter for smaller roof runs and step up to a 7-inch K-style or box gutter when your adjusted drainage area exceeds what a 6-inch profile can handle at your local design rainfall intensity. The one-line rule: multiply your roof’s contributing area (in square feet) by your local rainfall intensity (in inches per hour), divide by 96.23, and match the resulting flow in gallons per minute to a gutter profile’s published capacity. That calculation, grounded in SMACNA guidance, NOAA Atlas 14 rainfall data, and IBC/IPC prescriptive tables, is the foundation of every sound commercial gutter specification.
Quick reference: A 6-inch K-style gutter typically handles up to a moderate size roof area at a moderate rainfall intensity. Once your adjusted area climbs past that threshold, a 7-inch or box profile is the right call.
Key Takeaways
Correct commercial gutter sizing requires calculating adjusted drainage area, matching peak flow to profile capacity, and planning the full discharge path from gutter to storm outlet.
| Point | Details |
|---|---|
| Start with the right profile | Use 6-inch K-style for smaller runs; step up to 7-inch or box gutters when adjusted area exceeds —. |
| Run the peak flow calculation | Q (GPM) = Adjusted Area × Rainfall Intensity ÷ 96.23; use NOAA Atlas 14 for your local intensity value. |
| Apply the pitch factor | Multiply measured area by 1.0 (≤4/12), 1.1 (5–8/12), or 1.2 (≥9/12) before calculating flow. |
| Plan downspout count carefully | One outlet per ~40 linear feet is a field baseline; verify with hydraulic calculations for your drainage zone. |
| Jsignorexteriors for Connecticut projects | Jsignorexteriors provides end-to-end commercial gutter sizing, specification, and installation across Connecticut. |
Table of Contents
- How to calculate commercial gutter size: the step-by-step method
- Common gutter profiles and downspout sizes: capacity at a glance
- Choosing the right profile and material for your building
- Installation details that change real-world performance
- Worked example: sizing gutters for a commercial warehouse
- Cost drivers, lead times, and when to hire a professional
- What contractors get wrong on commercial gutter jobs
- Jsignorexteriors handles commercial gutter sizing and installation in Connecticut
- Sources
How to calculate commercial gutter size: the step-by-step method
Sizing a commercial gutter system is a five-step hydraulic calculation, not a guess based on what looks proportional to the building. Here is how to work through it.
-
Determine the drainage area per gutter run. Divide the roof into distinct drainage zones, one per gutter run. For a sloped roof, the contributing area is the horizontal projection of the roof surface draining to that gutter, not the actual slope surface. Measure length × width of each zone in square feet.
-
Find your local design rainfall intensity. Pull the 5-minute, 100-year (or locally required return period) rainfall intensity for your site from the NOAA Atlas 14 PFDS tool. Intensities vary widely across the U.S.: coastal Connecticut sites often see design intensities in the 4–7 in/hr range for a 5-minute, 100-year storm, while arid inland regions may be lower. Your local Authority Having Jurisdiction (AHJ) may specify a different return period, so confirm early.
-
Apply the pitch adjustment factor. Steeper roofs shed water faster, so the effective drainage area increases. Multiply the measured horizontal area by the appropriate factor: roofs at or below 4/12 pitch use 1.0; pitches from 5/12 to 8/12 use 1.1; pitches at 9/12 or steeper use 1.2. This gives you the adjusted drainage area.
-
Calculate peak flow (Q). Use the simplified formula:
Q (GPM) = Adjusted Area (sq ft) × Rainfall Intensity (in/hr) ÷ 96.23
For impervious roofing surfaces (metal, TPO, EPDM, built-up), the runoff coefficient C is effectively 0.95–1.0, so this formula applies directly. If you prefer the Rational Method form, Q = C × i × A, where A is in acres and i is in in/hr, then convert to GPM.
-
Match peak flow to gutter and downspout capacity. Use the SMACNA Downspout & Gutter Sizing Calculator or published capacity tables to find the profile that handles your Q. A field baseline: plan one downspout outlet per roughly 40 linear feet of gutter, then verify that count against your hydraulic calculation.
The cost difference between a 6-inch and 7-inch gutter is modest; the cost of overflow damage to a commercial building is not.*
When to call a licensed engineer: roofs with internal drains, controlled drainage (ponding) designs, complex multi-level drainage patterns, or total roof areas that push beyond standard SMACNA table ranges all warrant a stamped engineering design. Many jurisdictions also require it under IBC Section 1503.
Common gutter profiles and downspout sizes: capacity at a glance
Knowing the peak flow number is only useful if you can match it to hardware. The table below gives typical capacity guidance for the most common commercial gutter profiles, based on industry tables and field guidance. Actual capacities vary with slope, outlet spacing, and local code; treat these as planning references, not substitutes for a full hydraulic calculation.
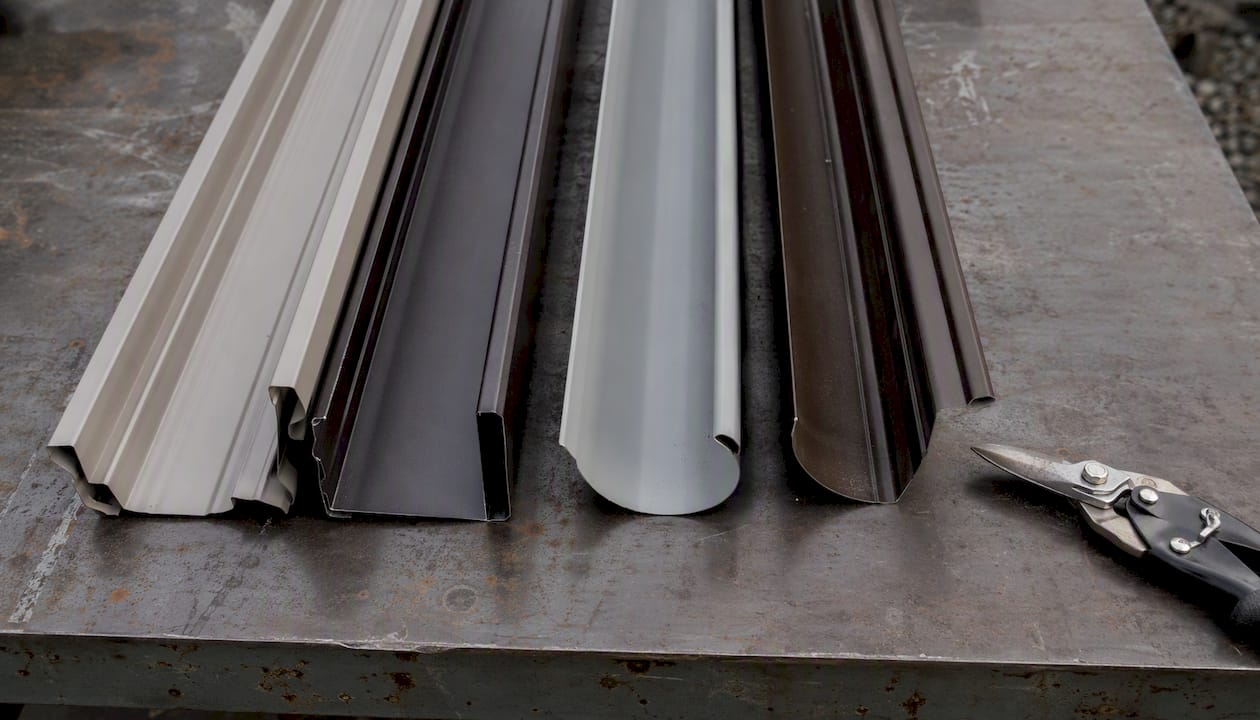
*At a moderate reference rainfall intensity; values drawn from field capacity guidance and Van’s Rain Gutters reference data. Stepping from a 6-inch to a 7-inch K-style adds significant capacity at a modest cost increase per linear foot.
Standard downspout sizes and approximate capacities
- 2×3 inch rectangular: suited for light residential loads; rarely adequate for commercial applications.
- 3×4 inch rectangular: common on smaller commercial runs; handles moderate flow.
- 4-inch round: comparable capacity to 3×4; used where round profiles suit the building aesthetic.
- 4×5 inch rectangular: a practical commercial standard for mid-size drainage zones.
- 6×6 inch rectangular: used on large commercial runs or where a single outlet must handle a substantial drainage area.
A practical rule of thumb: plan roughly 1 square inch of downspout cross-section per 100 square feet of drained roof area as a starting point, then verify against your peak flow calculation.
Pro Tip: Rectangular downspouts generally outperform round ones of the same nominal size because the corners add effective cross-sectional area. When pairing a large box gutter with downspouts, use conductor heads (collector boxes) at the transition — they reduce turbulence, improve flow, and give you a clean visual break between the gutter and the leader.
Choosing the right profile and material for your building
Profile choice and material selection affect capacity, long-term durability, and installation complexity in ways that raw sizing numbers do not capture.
K-style vs. box vs. half-round
- K-style gutters are the most common commercial profile for low-slope and moderate-pitch roofs. Their flat back mounts directly to a fascia board or structural nailer, making installation straightforward. The ogee front profile sheds debris reasonably well, though the inside corners can collect sediment on low-slope runs.
- Box gutters (also called built-in or concealed gutters) are integrated into the roof structure and offer the highest capacity for a given width. They are the right choice for large commercial roofs, historic buildings, or any application where exposed gutter hardware is undesirable. Box gutters require more precise installation and regular maintenance access.
- Half-round gutters have a smooth interior that resists debris buildup and drains cleanly, but their capacity per inch of width is lower than K-style. They appear on historic commercial buildings and premium architectural projects where aesthetics drive the specification.
Material recommendations by condition
- Galvalume or galvanized steel (24–26 gauge): the standard for high-load environments, snow and ice country, and any run where heavy debris or physical impact is a real risk. Steel’s rigidity also suits long box-gutter runs where aluminum would require more frequent hanger support.
- .032–.040 inch aluminum: the most common material for commercial K-style gutters. Lightweight, corrosion-resistant, and available in seamless form from most fabricators. Heavier gauges (.040 inch) are worth specifying for commercial work; the thinner residential gauges (.027 inch) are not appropriate for commercial spans.
- Copper: a premium option with a 50-plus-year service life when properly installed. The cost is substantially higher, and copper requires compatible fasteners and flashing to avoid galvanic corrosion. Appropriate for landmark buildings or where the owner prioritizes longevity over first cost.
Material and gauge also govern hanger spacing and expansion joint requirements. Heavier steel runs can span 18–24 inches between hangers; aluminum on long commercial runs needs expansion joints roughly every 40 feet to accommodate thermal movement and prevent buckling at seams. SAF’s commercial gutter product line illustrates how commercial profiles commonly range from 6 inches up to 12 inches, with engineering considerations required for extended runs.
Installation details that change real-world performance
Getting the size right on paper means nothing if the installation details undermine it. These are the factors that separate a system that works for 30 years from one that fails in the first hard rain.
- Slope: a minimum slope of 1/16 inch per foot toward the outlet is the practical floor for commercial gutters. Flatter runs pool water and accelerate corrosion; steeper slopes improve drainage but require careful outlet placement to avoid overflow at the high end during peak events. For more on gutter pitch standards, the relationship between slope and drainage efficiency is worth reviewing before finalizing outlet locations.
- Outlet spacing: one outlet per 40 linear feet is a field baseline, not a ceiling. On long commercial runs with high rainfall intensity, hydraulic calculations often call for outlets every 20–30 feet. Placing outlets at low points and corners is always preferable to mid-run placement.
- Hanger type and spacing: commercial installations use hidden hangers, spike-and-ferrule, or structural brackets depending on gauge and load. Spacing of 18–24 inches on center is standard; tighten to 12 inches at corners, valleys, and any location where snow or ice loads are expected.
- Seams and joints: for long commercial runs, welded or mechanically seamed joints are far more reliable than sealant-only connections. Sealant alone fails with thermal cycling. Specify seamless gutter fabrication wherever possible to minimize leak points.
- Thermal expansion joints: include engineered expansion joints every 40 feet on metal runs. Without them, thermal movement buckles seams and pulls hangers loose over time, particularly on south- and west-facing exposures.
- Discharge path: the gutter system ends at the downspout outlet, but the water has to go somewhere. Confirm that collector boxes, scuppers, daylighting points, or municipal storm connections have adequate capacity. IBC Section 1503.4 requires secondary overflow drains on controlled drainage roofs, sized equal to the primary drain capacity. Ignoring the discharge path is one of the most common and costly oversights on commercial projects.
- Debris management: leaf guards and smooth interior coatings can help, but they do not eliminate the need for regular cleaning. Design for access: a system that cannot be cleaned will not be cleaned, and a blocked commercial gutter can direct thousands of gallons of water against a building envelope in a single storm.
Pro Tip: On flat or low-slope commercial roofs, improper drainage is one of the leading contributors to premature roof failure. Specify overflow scuppers at the parapet as a secondary defense, even when the primary gutter system is correctly sized.
Worked example: sizing gutters for a commercial warehouse
Here is a concrete calculation you can follow or hand directly to your contractor.
-
Define the building. A single-story warehouse, 120 feet long × 60 feet wide, with a 4/12 gable roof. Each side of the roof drains to one continuous gutter run, 120 feet long. The horizontal projection of each drainage zone is 120 ft × 30 ft = 3,600 sq ft.
-
Find local rainfall intensity. The building is in central Connecticut. Using the NOAA Atlas 14 PFDS tool, the 5-minute, 100-year rainfall intensity for this location is approximately 5.5 in/hr. (Always retrieve the actual value for your specific coordinates.)
-
Apply the pitch factor. A 4/12 pitch uses a factor of 1.0. Adjusted drainage area = 3,600 × 1.0 = 3,600 sq ft.
-
Calculate peak flow.
Q = 3,600 × 5.5 ÷ 96.23 = 205.8 GPM per gutter run. -
Select gutter profile and downspouts. A 6-inch K-style gutter at this rainfall intensity is at or near its capacity limit for 3,600 sq ft. Given that the adjusted area is close to the 6-inch ceiling and the design intensity is relatively high, the right call is to step up to a 7-inch K-style gutter in .040-inch aluminum, which handles approximately 4,900 sq ft at this intensity with comfortable margin.
For downspouts: at 120 feet of run, place three outlets (one per 40 feet). Each outlet handles roughly 69 GPM. A 4×5-inch rectangular downspout handles this load; specify 4×5 at all three locations. Use conductor heads at each gutter-to-downspout transition.
Final spec: 7-inch K-style, .040-inch aluminum, three 4×5-inch rectangular downspouts with conductor heads, expansion joints at 40-foot intervals, hanger spacing 18 inches on center, minimum 1/16-inch-per-foot slope toward each outlet, overflow scupper at each low point.
Cost drivers, lead times, and when to hire a professional
Commercial gutter projects vary significantly in cost depending on several factors. Understanding what drives the price helps you evaluate bids and set realistic budget expectations.
Primary cost drivers:
- Gutter profile and size (7-inch and box gutters cost more per foot than 5-inch K-style)
- Material and gauge (.040-inch aluminum vs. 24-gauge steel vs. copper)
- Linear footage and number of drainage zones
- Downspout count, size, and whether conductor heads or scuppers are included
- Access and staging requirements (lift rental, scaffolding for multi-story buildings)
- Local labor rates (Connecticut labor rates are generally above the national average)
- Specialty finishes, custom colors, or architectural profiles
Typical project timeline:
- Site survey and measurement: 1–2 days
- Permitting (if required by local AHJ): 1–4 weeks depending on jurisdiction
- Fabrication lead time for seamless or custom box gutters: 1–3 weeks
- Installation: 1–5 days depending on building size and complexity
- Post-install inspection and cleanup: 1 day
When to call a licensed engineer: any roof with internal drains, a controlled drainage (ponding) design, complex multi-level drainage, or a total contributing area that exceeds standard SMACNA table ranges needs a stamped engineering design. Many Connecticut municipalities also require engineered drawings for commercial permits.
What to ask a bidder: request a written spec that includes gutter profile and gauge, downspout size and locations, hanger type and spacing, expansion joint plan, overflow scupper details, and a post-install maintenance schedule. A contractor who cannot provide those details in writing is not ready for a commercial job.
What contractors get wrong on commercial gutter jobs
The most common failures on commercial gutter installations are not exotic. They are the same mistakes repeated across job sites, and most of them are preventable at the specification stage.
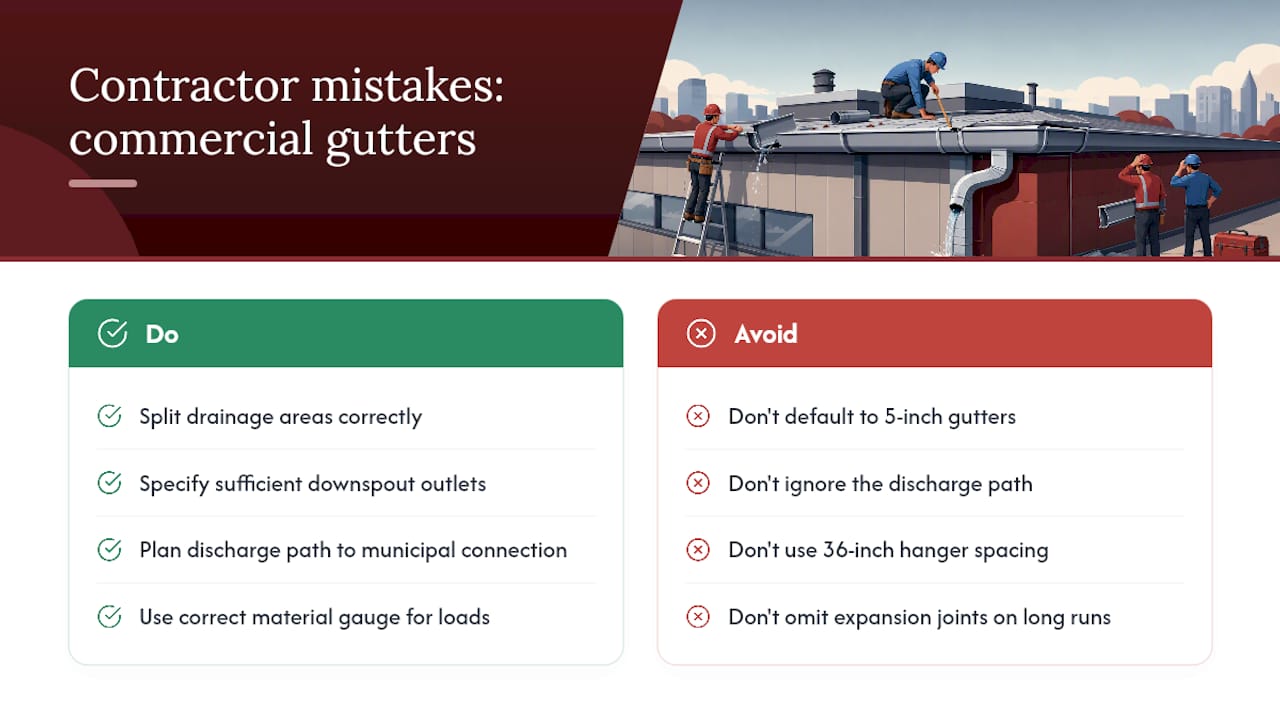
Undersizing is the most frequent error. Contractors accustomed to residential work often default to 5-inch gutters on commercial buildings because that is what they stock. A 5-inch gutter handles roughly 2,500 square feet at moderate rainfall intensity. Many commercial roof zones are two to three times that size. The result is overflow at the first significant storm, with water running down the building face, saturating the foundation, and potentially voiding roofing warranties.
Ignoring the discharge path is the second most costly mistake. A correctly sized gutter that dumps into an undersized or blocked storm connection backs up just as badly as an undersized gutter. The hydraulic calculation has to follow the water all the way to the municipal connection or daylight point.
Sparse hanger spacing is a durability issue that shows up slowly. Commercial gutters loaded with water and debris are heavy. Hangers at 36 inches or more pull loose over a single winter in Connecticut, leaving the gutter sagging and pooling. Specify 18-inch spacing in writing and inspect it before the job is signed off.
Missing expansion joints on long runs cause seam failures that look like installation defects but are actually design omissions. On a 120-foot aluminum run with no expansion joints, seasonal temperature swings can generate enough movement to open sealant joints within two to three years.
What actually matters most: get the drainage-area split right, specify enough downspout outlets, plan the full discharge path, and use the correct material gauge for the expected loads. Those four decisions determine whether a commercial gutter system performs for 20 years or fails in 20 months.
Jsignorexteriors handles commercial gutter sizing and installation in Connecticut
Getting the math right on paper is one thing. Executing it on a commercial building, with the right materials, correct hanger spacing, expansion joints, and a discharge plan that satisfies the local AHJ, is where experience makes the difference between a system that works and one that fails quietly until it becomes expensive.

Jsignorexteriors has been installing and specifying commercial gutter systems in Connecticut for more than 30 years. The team works through the full sizing calculation for your roof, specifies SMACNA-informed profiles and gauges, plans expansion joints and collector heads, and coordinates the discharge path from gutter to storm connection. For complex roofs or projects requiring engineered drawings, the team can connect you with the right resources. Whether you need a site assessment for a straightforward commercial K-style installation or a full specification package for a large warehouse or multi-unit property, the next step is a conversation. Request a site visit or get a quote and have your roof dimensions ready.
Sources
These are the primary sources used in this article. Bookmark them before you start your sizing calculation.
A note on local requirements: manufacturer spec sheets and your local AHJ may modify the final design. Always confirm which code edition your jurisdiction has adopted and whether a stamped engineering design is required before submitting for permit.