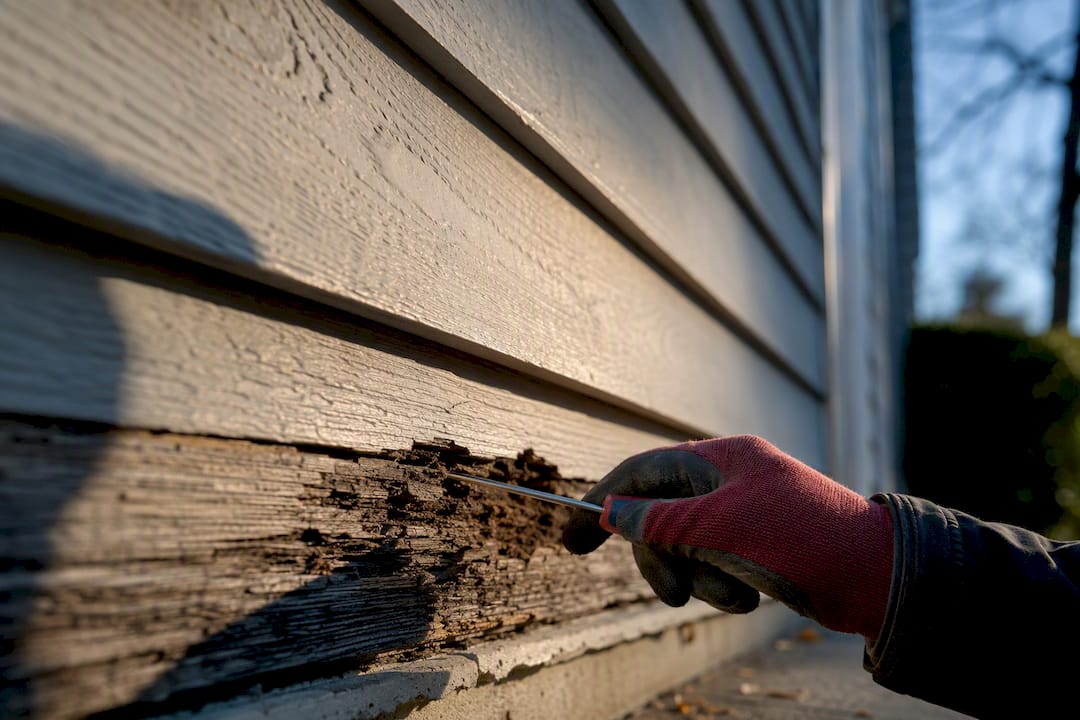
Most small, shallow rot spots on wood siding can be repaired in an afternoon with wood hardener and two-part epoxy filler. Deep rot, board-wide soft spots, or decay that has spread into the sheathing behind the siding calls for full board replacement instead. If you find soft framing, mold, or rot covering more than a quarter of a board, stop patching and bring in a licensed siding contractor.
TL;DR:
- Repair small, shallow rot spots with wood hardener and epoxy filler, but replace entire boards if rot affects more than 25 percent of the surface or if soft spots appear along multiple areas.
- Use a moisture meter to ensure wood moisture content stays below 19 percent after repair, preventing future internal rot.
- When rot reaches the sheathing or framing, fixing only the siding is insufficient; proper drying and potential sheathing or stud replacement are required.
- Routine inspections, gutter maintenance, and controlling water flow around the house significantly reduce the risk of future siding rot.
- Hire a professional when rot damages beyond surface areas, reaches the sheathing or framing, or involves working above ground level without proper safety measures.
Table of Contents
- How to Spot and Measure Wood Siding Rot
- When Do You Patch, Replace a Board, or Call a Contractor?
- How to Fix Small Rot Spots With Wood Hardener and Epoxy
- How to Remove and Replace a Rotted Siding Board
- What If Rot Reaches the Sheathing or Framing?
- How to Keep Wood Siding From Rotting Again
- When Is It Time to Hire a Siding Contractor?
- Why This Repair Advice Holds Up
- The Gap Between DIY Confidence and What Rot Actually Requires
- Get a Straight Answer on Your Siding Repair
- Sources
How to Spot and Measure Wood Siding Rot
Rot rarely announces itself right away. By the time paint is bubbling or a board looks discolored, moisture has usually been working underneath the surface for months. Knowing where to look, and how to test what you find, determines whether you’re dealing with a weekend patch or a bigger job.
Rot shows up most often in predictable spots: bottom edges of lap siding, butt joints between boards, areas beneath window sills and door trim, corners near downspouts, and anywhere siding sits close to the roofline or ground. Look for peeling paint, dark staining, a spongy feel underfoot when you press on the board, or a slightly sunken profile compared to the boards around it.
The probe test tells you what your eyes can’t. Push an awl, screwdriver, or small pick into the suspect area at a low angle. Sound wood resists and feels firm. Rotted wood gives way with little pressure, sometimes crumbling into fibers instead of splintering. This Old House recommends starting your diagnosis at the top of the damaged area and working downward, since gravity usually pulls moisture lower than where it entered. Tapping the wall with a hammer helps too. A dull thud instead of a solid knock often signals rot in the sheathing behind the siding, and it also helps you locate the studs before you cut anything.
A pinless or pin-style moisture meter gives you a number instead of a guess. Aim for a reading under 19% before you seal, prime, or paint any repaired area. Wood with elevated moisture readings can trap moisture behind your patch and rot again from the inside.
Before you touch a tool, document what you found:
- Photograph each damaged area with a tape measure in frame for scale.
- Note the moisture meter reading at the center and edges of each spot.
- Mark boards on a simple sketch of the wall so you don’t miss a section once siding is removed.
- Check twice yearly going forward. Routine inspections and the pick test catch new rot before it spreads.
When Do You Patch, Replace a Board, or Call a Contractor?
Rot severity falls into three practical tiers, and matching your repair to the right tier saves you from redoing the work in a year or two.
- Surface rot (patch territory). The probe sinks less than a quarter inch, the damage covers a small area (a few square inches), and the wood around it still tests firm. Wood hardener and epoxy filler handle this reliably.
- Deep or spreading rot (board replacement). The probe sinks through more of the board’s thickness, staining runs along a large stretch of the board, or soft spots show up in multiple places on the same piece. Family Handyman’s guides point to a 25% rule of thumb: if rot affects more than a quarter of a board’s surface or thickness, replace the whole board rather than patching it. Patching a board that’s a quarter gone or more just buys you a few months.
- Structural rot (sheathing, framing, or full-wall replacement). A hollow-sounding tap on the wall, soft sheathing under the siding, or visible stud damage means the problem has moved past cosmetic repair.
A few conditions override it regardless of how much of the board looks affected: working above the first story without proper fall protection, siding painted before 1978 (lead paint testing and containment come first), any sign the rot has reached framing, and repeated rot in the same spot after a prior repair. Any of those push the job toward board replacement or a professional visit, even if the surface damage looks modest.
How to Fix Small Rot Spots With Wood Hardener and Epoxy
This is the go-to method for surface-level wood siding rot repair, and it’s the one most homeowners can complete without renting equipment.
Tools and materials:
- Chisel, awl, or rotary tool with a carving bit to remove decayed wood
- Wood hardener (a penetrating liquid resin)
- Two-part epoxy wood filler
- Putty knife or flexible plastic spreader
- 80 and 150 grit sandpaper (a sanding block works if you don’t own an orbital sander)
- Exterior wood primer and matching paint
- Nitrile gloves, dust mask, and safety glasses
Start by digging out every trace of soft, spongy wood with the chisel or rotary tool. Go past the visible rot into solid material. Anything that resists the probe test can stay; anything that gives should come out. Let the cavity dry completely. Lowe’s guidance is direct on this point: apply hardener and filler only once the wood is dry, since sealing in moisture defeats the repair before it starts.
Saturate the exposed wood fibers with wood hardener, following the working time on the label, usually 15 to 30 minutes before it sets. Once tacky, apply the two-part epoxy filler, mixing only what you’ll use in the next few minutes since most formulas set fast. Overfill slightly, since epoxy shrinks a bit as it cures.
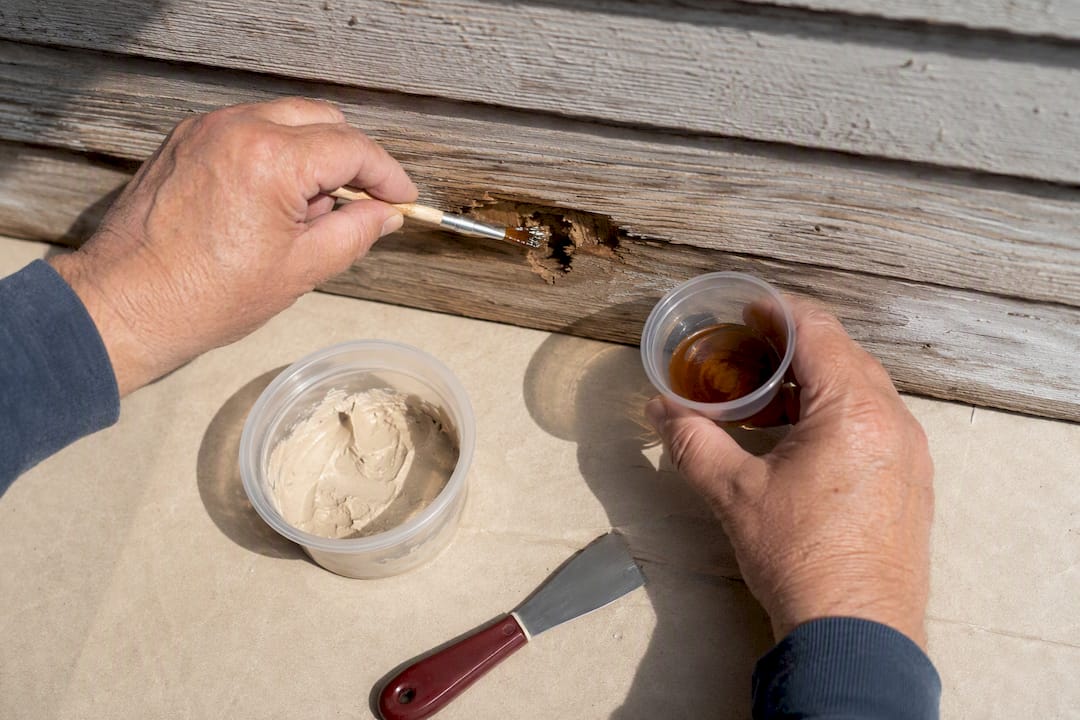
Once cured, usually 24 hours depending on temperature, sand the patch flush with the surrounding siding using 80 grit, then 150 grit for a smooth finish. Prime the entire patched area, feathering slightly onto sound wood, then paint to match.
Pro Tip: Work in dry, moderate weather, ideally 50 to 90°F with no rain forecast for 24 hours. Epoxy applied in cold or damp conditions cures unevenly and can debond within a season.
Check patched areas every spring. If you see cracking around the patch edge or the wood nearby starts probing soft again, that’s your signal to move up to a board replacement instead of re-patching the same spot.
How to Remove and Replace a Rotted Siding Board
When rot has spread beyond what a patch can fix, swapping the whole board is more reliable and often faster than you’d expect.
Score along the board’s top and bottom edges with a utility knife to break the paint seal, which prevents tearing the boards above and below when you pry. Use a flat bar to lift the damaged board gradually, working from one end to the other, and support neighboring boards with a block so you don’t crack them. Family Handyman recommends an oscillating multi-tool for cutting through hidden nails, since it gets into tight spots a pry bar can’t reach without damage.
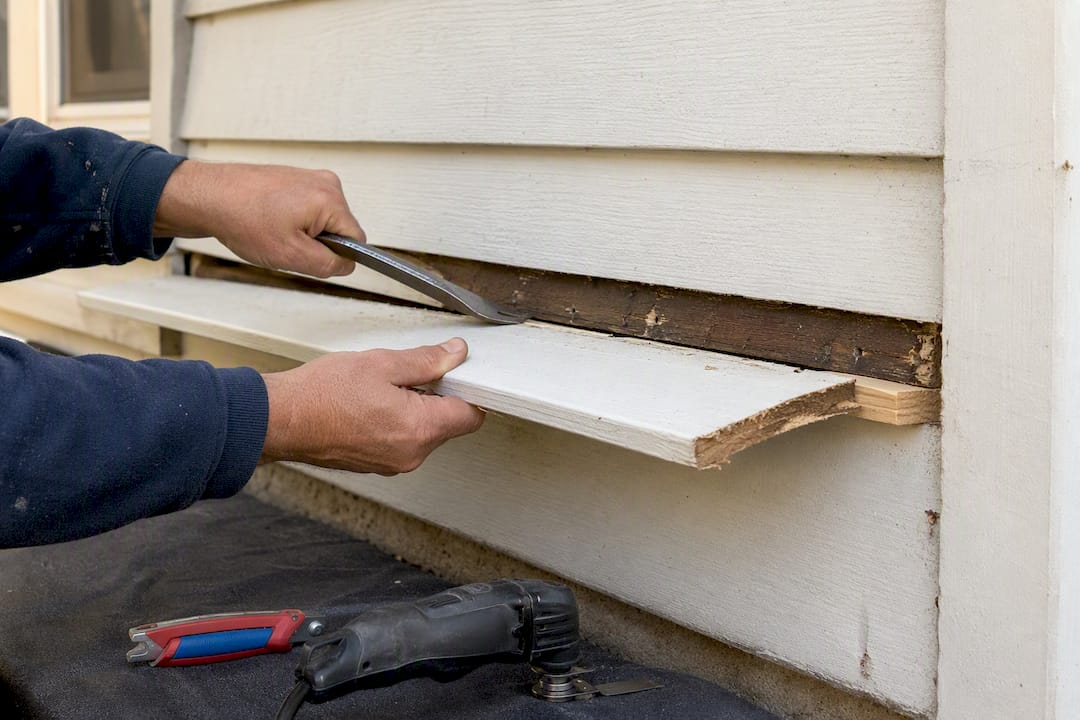
Once the board is out, inspect the housewrap or building wrap behind it. Tears, gaps, or dark staining mean water has already been getting past it. Patch small tears with flashing tape, lapped shingle style so water sheds downward, or replace larger wrapped sections. If the sheathing underneath is soft, that job has moved beyond a siding repair; see the next section.
To cut the replacement board, use the removed piece as a template when it’s intact enough to trace. Otherwise, measure the opening and cut the new board about an eighth of an inch short to allow for seasonal expansion. Back-prime the new board on all six sides, including both cut ends, before installation.
- Nail with 8d galvanized ring-shank siding nails, spaced according to the original pattern.
- Keep nails high enough to allow the next course to lap correctly.
- Caulk the butt joints at each end before sliding the board fully into place.
- Prime the face and finish with two coats of exterior paint once caulk cures.
Pro Tip: Back-caulking the joint ends before the board goes in, rather than caulking the visible seam afterward, keeps water out of the exact spot where most repeat rot starts.
Blend the new paint by feathering it slightly onto the adjoining boards so the repair doesn’t stand out as a visible patch on the wall.
What If Rot Reaches the Sheathing or Framing?
Once you pull a board and find soft sheathing or a stud that gives under the probe test, drying the area alone won’t solve the problem. Wood behind the siding needs to read below 19% moisture before any new material goes back over it, and that can take several days of open-air drying with fans if weather allows.
- Cut out damaged sheathing back to solid material, following the stud lines for clean edges.
- Cut replacement sheathing to match the original thickness and fasten it to the studs.
- Reinstall housewrap with proper overlap, taping every seam so water sheds outward, not into the wall.
- Confirm no discoloration or soft spots remain on the framing itself before closing the wall back up.
If a stud shows structural damage, that’s no longer a siding project. Sistering or replacing a stud affects the wall’s load path, and it’s the point where most homeowners bring in a contractor rather than pushing forward solo.
How to Keep Wood Siding From Rotting Again
Prevention costs a fraction of what repair does, and most of it comes down to controlling where water goes once it hits your house.
- Keep an adequate clearance between the bottom of your siding and the ground, and more where roofline runoff concentrates to help protect your property’s value.
- Check flashing above windows, doors, and where the roof meets a wall. Gaps here funnel water directly behind the siding.
- Back-prime any cut ends or replacement boards before installation. The USDA Forest Products Laboratory found dip application of water-repellent preservative most effective, though a thorough brush coat after installation still helps.
- Clean gutters twice a year and confirm downspouts carry water at least a few feet from the foundation.
- Adjust sprinkler heads so spray never hits siding directly, and trim back shrubs that trap moisture against the wall.
Preventive maintenance rarely comes with a sticker price that scares homeowners. Cost comparisons in siding repair guidance consistently show that a few hours spent on gutters, sprinklers, and caulk checks is far cheaper than the labor and materials for rot repair down the line.
Walk the perimeter of your house each spring and fall with an awl in hand. A five-minute probe test at known trouble spots catches rot while it’s still a patch job, not a board replacement.
When Is It Time to Hire a Siding Contractor?
Some jobs are worth doing yourself. Others aren’t worth the risk. Bring in a professional when rot has reached the sheathing or framing, when the damaged area covers more than a few boards, or when repairs require working above the first story without proper fall protection.
Homes with pre-1978 paint need lead testing before any sanding or scraping begins, and containment work is not a place to cut corners. Persistent moisture or a musty smell behind the siding can also point to mold, which needs different handling than straightforward rot.
- Ask contractors for proof of license and insurance before they start.
- Request photos of similar rot repairs they’ve completed.
- Ask what’s included in the estimate: material grade, primer coats, flashing corrections, and cleanup.
- Get a written scope so “board replacement” doesn’t quietly turn into “full wall reside” without a conversation first.
Why This Repair Advice Holds Up
This guide is written by Adam, a contributor covering siding and exterior repair topics for J. Signor Exteriors, a family-owned contractor with more than 30 years of experience serving Connecticut homeowners. The company is fully licensed and insured.
The Gap Between DIY Confidence and What Rot Actually Requires
Most rot guides oversell the epoxy patch. They walk you through hardener and filler like it’s a universal fix, then bury the caveat that deep rot needs a full board swap somewhere in paragraph twelve. That order is backward. The judgment call, knowing when a quarter inch of soft wood on the surface actually means the framing behind it is compromised, is the part that saves you money.
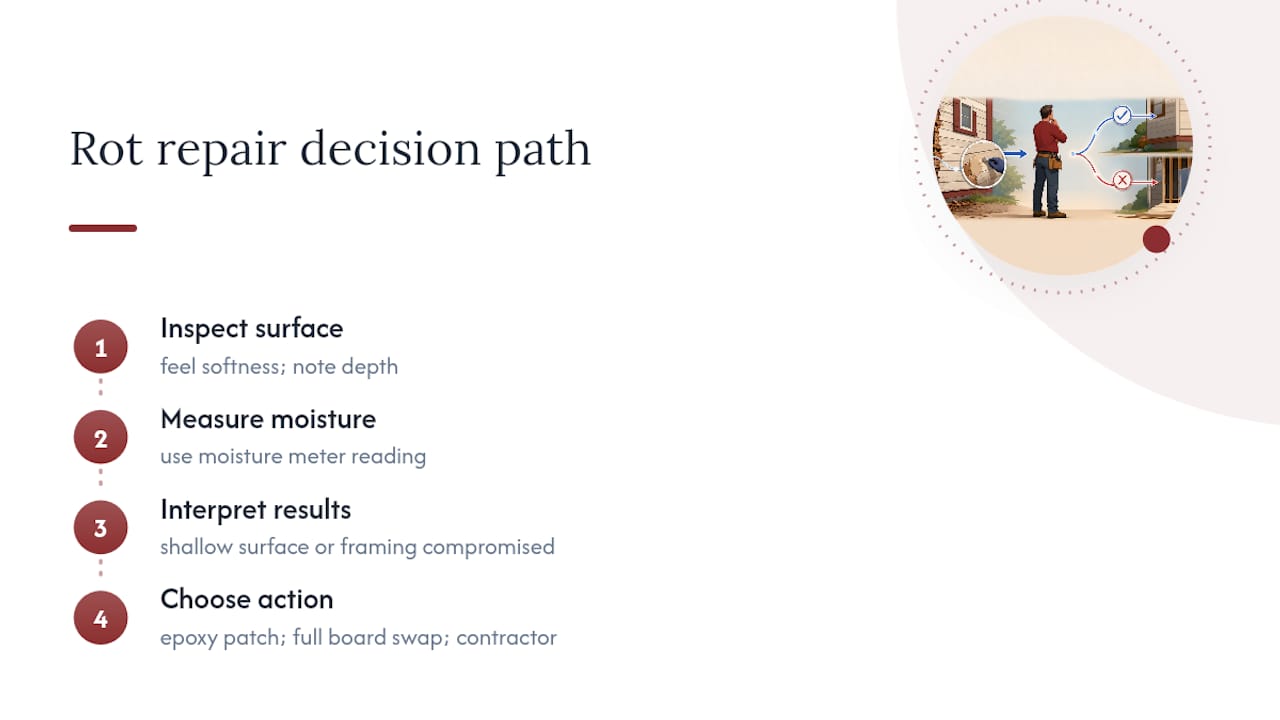
If you take one thing from this guide, let it be the moisture meter reading, not the epoxy.
— Adam
Get a Straight Answer on Your Siding Repair
If you’ve probed a soft spot, found rot reaching past a board or two, or you’re just not sure which repair track applies to your house, a site visit settles it faster than another hour of research. This contractor handles siding repair and replacement, sheathing and framing repairs when rot runs deeper than the surface, and flashing or gutter corrections that stop the same spot from rotting again.

Before your estimate, take a few photos of the damaged area, note roughly how many boards look affected, and mention anything unusual about access, like second-story siding or tight side yards. That gives the estimator what they need to give you a realistic number on the first visit instead of a second trip. Visit the siding services page to request an estimate and get a clear read on whether your project is a patch, a board swap, or something bigger.
Sources
- How To Repair Water-Damaged Siding – This Old House
- Applying Wood Finishes
- A Full Guide on Wood Siding Repair and Replacement
- How to Repair Wood Siding