Most leaks around a chimney come from one of three sources: failed flashing, a cracked crown, or deteriorated mortar joints. Flashing accounts for the largest share by far. If water is showing up on a ceiling near the chimney, your first three moves are simple: contain the water inside, get into the attic during the next rain to trace the path, and photograph anything that looks lifted, rusted, or cracked. Skip DIY unless it’s a small, easily reached sealant touch-up on a low-slope section. Anything involving lifted metal or cracked masonry needs a professional look before it gets worse.
TL;DR:
- Most chimney leaks stem from failed flashing, especially step flashing, which causes roughly 40 to 50 percent of residential roof leaks.
- Detecting the leak source requires attic inspection during rain or systematic hose testing from the roof, as water often runs along framing before appearing on the ceiling.
- Permanent repairs depend on specific failures, with re-bedding counterflashing and replacing step flashing lasting up to 40 years and being more reliable than sealant fixes.
- DIY repairs are limited to simple sealant touch-ups on low, easily accessible sections; complex tasks demand professional work to ensure proper, code-compliant repairs.
- Cost varies from a few hundred dollars for minor sealant repairs to several thousand for full flashing replacements, with long-lasting solutions needing coordinated roofing and masonry work.
Table of Contents
- What Causes a Roof Leak Around the Chimney?
- How Do You Find Exactly Where a Chimney Leak Starts?
- What Does a Permanent Chimney Flashing Repair Actually Include?
- What Does a Chimney Leak Repair Cost and How Long Does It Last?
- Should You DIY the Repair or Call a Roofing Contractor?
- How Do You Prevent a Chimney Leak From Coming Back?
- What We See Most Often in the Field
- Get a Straight Answer on Your Chimney Leak
- Where to Learn More About Chimney Flashing and Leaks
- Sources
- FAQ
What Causes a Roof Leak Around the Chimney?
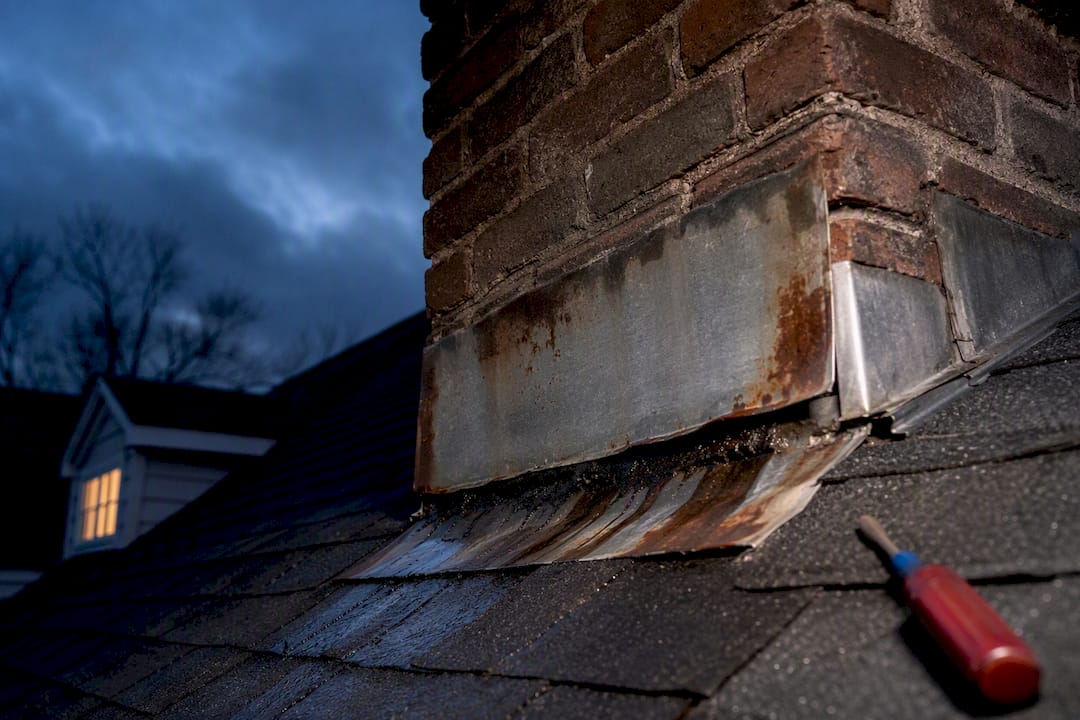
Chimney flashing isn’t one piece of metal. It’s a layered system, and each layer fails in its own way. Flashing around a chimney typically includes step flashing, counterflashing, an apron, and a rear pan or cricket, and figuring out which one gave way tells you what the repair actually involves.
-
Step flashing runs up the sides of the chimney, woven piece by piece into each shingle course. It fails when pieces shift, corrode, or were never woven correctly to begin with.
-
Counterflashing is set into a mortar reglet and folds down over the step flashing. It fails when the mortar joint holding it loosens and the metal pulls free.
-
Apron flashing sits at the front, downhill face. It fails from corrosion or from being bent out of shape by ice.
-
Rear pan and cricket handle water at the uphill, back side, the highest-volume area for runoff. Without one, water dams up behind the chimney.
-
Crown and cap issues let water in from above rather than the sides, sometimes mimicking a flashing leak entirely.
One inland finding puts this in perspective: flashing failures cause roughly 40 to 50 percent of residential roof leaks, and step flashing installed in the correct sequence, underlayment first, then flashing woven with each shingle course, then counterflashing over it, prevents most of them.
Here’s the trap a lot of homeowners fall into: a bead of roof cement or caulk smeared over a rusted flashing joint. It looks like a fix. It’s actually a stopgap, and often a bad one, since trapped moisture behind the joint accelerates sheathing rot and turns a $400 flashing repair into a $2,000 sheathing replacement.
How Do You Find Exactly Where a Chimney Leak Starts?
Water rarely drips straight down from where it enters. It follows framing, runs along a rafter, and shows up on the ceiling several feet from the actual hole. That’s why chasing a stain on the ceiling drywall almost never finds the source. You need to look higher up, at the attic and the roof deck itself.
Pro Tip: Keep a headlamp and a notepad in the attic during the next heavy rain. Water sounds different when it’s actively dripping versus just wicking along wood, and that sound will point you toward the entry point faster than a flashlight sweep.
Start with an attic check during active rainfall:
- Look for wet insulation, dark streaks on rafters, or active dripping near the chimney chase.
- Trace any wet trail back toward its highest point. That’s your rough target zone.
- Photograph everything. Estimators and insurance adjusters both want this documentation.
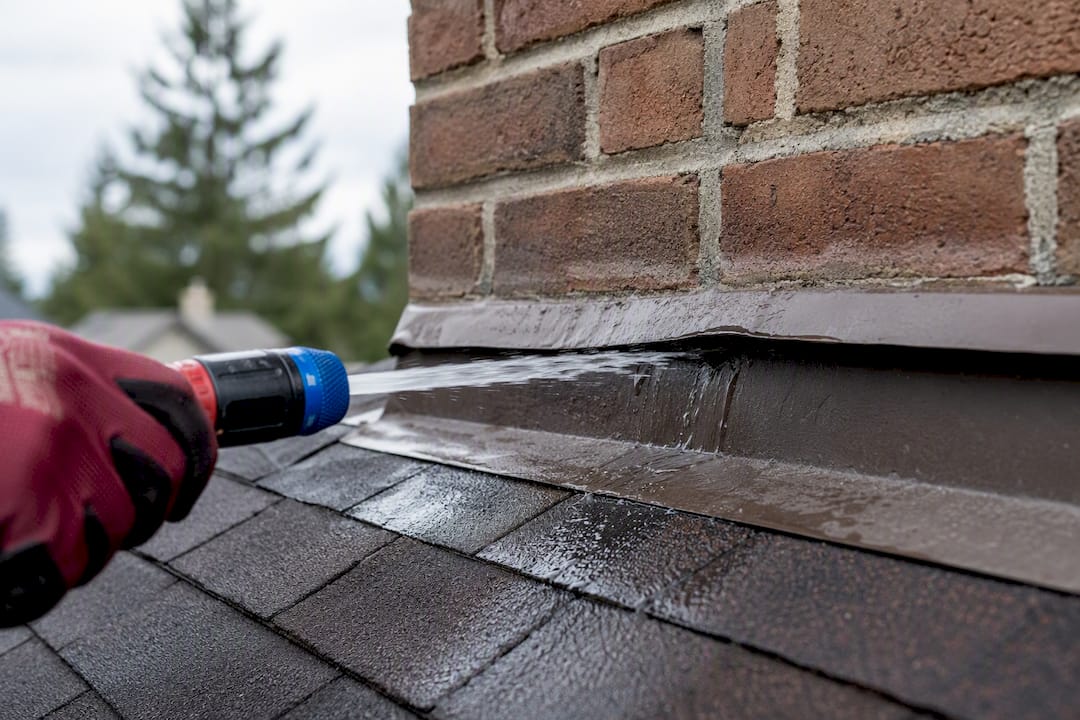
If the leak isn’t showing during rain or you need to isolate the exact component, run a hose test on a dry day. Work from the downhill side of the chimney upward, section by section, letting each area run for 10 to 15 minutes before moving higher, while someone watches inside. A systematic hose test run downhill to uphill reliably separates a flashing leak from a crown or flue problem, since water only enters once you reach the specific failed section.
One detail worth flagging to whoever tests it: leaks that only appear during wind-driven rain, not calm rain, usually point to a small lifted edge or hairline gap at the counterflashing reglet rather than a wide-open failure. It’s an easier fix, but easy to miss if you’re only testing with a straight-down hose spray.
What Does a Permanent Chimney Flashing Repair Actually Include?
The right fix depends entirely on what failed, and that’s worth understanding before you accept a quote.
- Sealant refresh: appropriate only when counterflashing is otherwise sound and a small gap opened at the reglet. This is a maintenance task, not a structural repair.
- Re-bedding counterflashing: the metal is pulled, the reglet is cut deeper into fresh mortar, and the flashing is re-embedded. This is the correct fix when the joint has separated from the masonry.
- Step flashing replacement: new step flashing pieces woven into new shingle courses as the roofing goes down, not slid under existing shingles after the fact.
- Cricket construction: a saddle-shaped structure built on the uphill side to divert water around a wide chimney instead of letting it pond against the back wall.
- Crown repair or rebuild: patching hairline cracks versus a full crown rebuild when the concrete has failed structurally.
Building code backs the cricket requirement specifically. IRC 2024 requires corrosion-resistant flashing at all roof penetrations and mandates a cricket on chimneys 30 inches or wider, measured perpendicular to the slope. If your chimney meets that width and doesn’t have a cricket, that’s a code gap worth raising with your contractor, especially during a reroof.
Masonry-related failures need a mason, not just a roofer. When counterflashing needs re-bedding or the crown needs rebuilding, the strongest outcome comes from a roofer and mason coordinating on one schedule rather than sequential, unrelated visits.
What Does a Chimney Leak Repair Cost and How Long Does It Last?
Price and lifespan track together here. A cheap fix rarely lasts, and knowing the expected service life of each repair type helps you spot a quote that’s cutting corners.
Sealant-only repairs typically last 2 to 8 years, while properly embedded counterflashing and woven step flashing can last 25 to 40 years depending on the metal used, with copper generally outlasting aluminum or galvanized steel. Cold weather matters too: sealant needs a reasonable cure temperature, so late fall through early spring in Connecticut isn’t ideal for anything beyond an emergency patch. If a reroof is already scheduled, new chimney flashing belongs on the contract as its own line item, detailed and specified clearly.
Should You DIY the Repair or Call a Roofing Contractor?
A handful of chimney-leak tasks are reasonable for a comfortable homeowner: clearing debris from a cricket, checking gutter flow near the chimney base, or applying a small sealant touch-up on a walkable, low-pitch section you can reach safely. Anything past that, working at height on a steep pitch, bending sheet metal, or re-bedding masonry, calls for fall protection, specialized tools, or trade skill most homeowners don’t have on hand. A comparison of DIY versus professional work in other exterior trades makes the same point: the tasks that look simple from the ground are rarely simple once you’re actually doing them.
Watch for these red flags from a contractor:
- A quote that promises a fix using only caulk or roof cement, with no mention of replacing metal.
- Any indication that old flashing will be reused during a reroof instead of replaced.
- A vague line item like “reflash chimney” with no material, embed depth, or warranty specified.
Pro Tip: Before calling anyone, write down when the leak appears (during rain, only in wind, after snowmelt) and take three photos: the interior stain, the attic entry point, and the exterior chimney. That single page usually gets you a more accurate quote on the first visit.
Demand specifics in writing: metal type, whether step flashing will be woven into new shingles, counterflashing embed depth (at least 1 inch into the reglet), and what warranty covers labor versus material.
How Do You Prevent a Chimney Leak From Coming Back?
Walk the perimeter of your house twice a year, spring and after any major storm, and look up at the chimney from the ground. Rust streaks on the flashing, a dark band of roof cement, or debris piled on the uphill side are all early warnings worth acting on before the next heavy rain.
- Check for a black band of old roof cement over the flashing. It usually means a past leak was masked instead of properly repaired.
- Keep gutters near the chimney base clear so runoff doesn’t pool and saturate the surrounding shingles.
- During any reroof, require woven step flashing, counterflashing embedded at least 1 inch, and a cricket if your chimney is 30 inches or wider.
- Trim back overhanging branches that drop debris into the cricket or valley area, since trapped leaves hold moisture against the metal year round.
Freeze-thaw cycles are the quiet threat here. Water that seeps into a hairline mortar crack in November can widen it significantly by March, so a repair postponed through winter often gets more expensive by spring.
What We See Most Often in the Field
The single most common cause of a “new roof, same old leak” call is reused flashing. A crew replaces the shingles but leaves the original step flashing in place, sometimes just layering new shingles over it, and within a season or two the same leak reappears in the same spot. It’s an integration problem, not a materials problem, and it’s entirely avoidable with the right contract language up front.
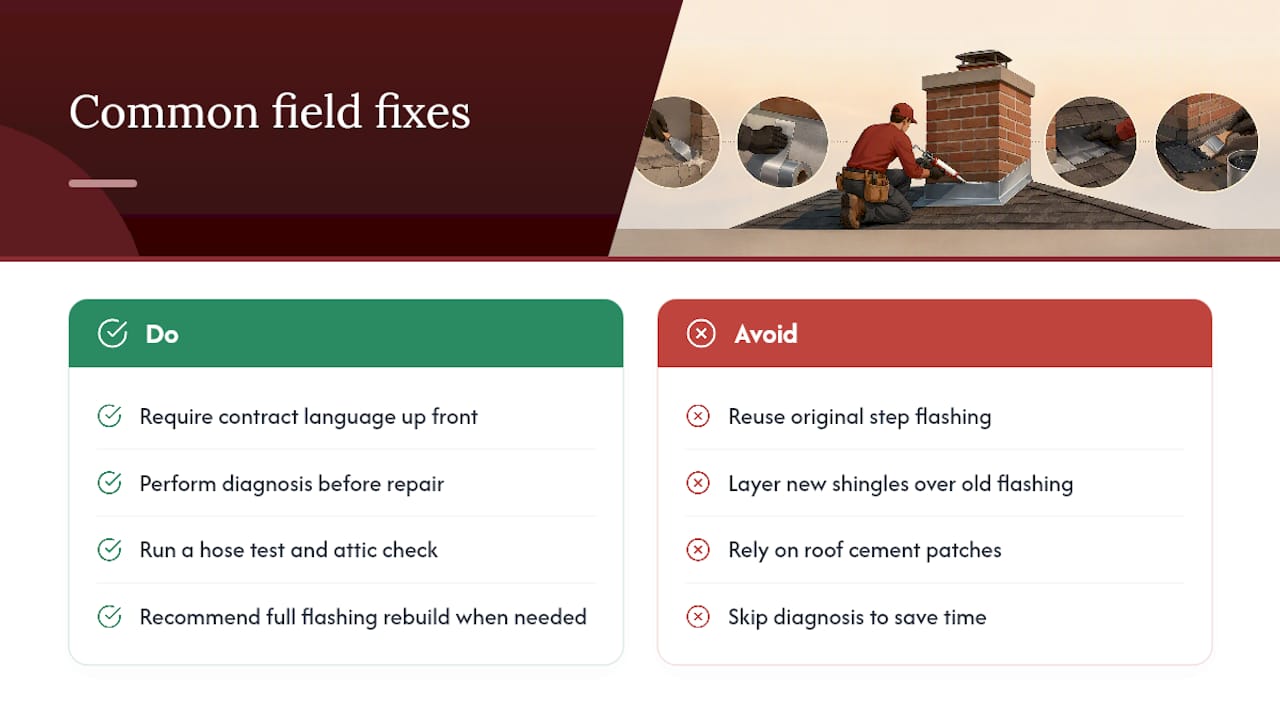
The second pattern: roof cement patches that hide rot rather than fix it. By the time a homeowner calls about a “small drip,” the sheathing underneath has often been wet for a year or more. Diagnosis before repair isn’t optional in our view. A hose test and an attic check cost you an hour. Skipping them costs you a second repair.
We’d rather tell a homeowner they need a full flashing rebuild than sell them a sealant patch that fails in three years. That’s not always the answer people want to hear, but it’s the one that keeps them off our schedule again next spring.
— Adam
Get a Straight Answer on Your Chimney Leak
A contractor who inspects before quoting is worth more than one who quotes over the phone. J. Signor Exteriors has spent more than 30 years diagnosing and repairing roofing, flashing, and masonry issues for homeowners across Connecticut, and every chimney leak call starts with an actual attic inspection, not a guess from the driveway.

If you’re getting quotes, make sure “new flashing around chimney” appears as its own line item, with material type, embed depth, and warranty coverage spelled out. That single detail separates a lasting repair from one you’ll be paying for again in three years. Our roofing services in Connecticut cover everything from a targeted flashing repair to full reroofs that include proper chimney integration from day one, and our team coordinates directly with masons when crown or mortar work is part of the job. If you want to understand the mechanics of flashing before you talk to anyone, our guide on what flashing does and why it fails breaks it down in plain terms. Ready to get an actual diagnosis instead of another patch job? Requesting a professional inspection ensures you receive an accurate diagnosis of the problem and information on appropriate repair solutions.
Where to Learn More About Chimney Flashing and Leaks
A few sources go deeper than most homeowner guides. The IRC 2024 summary on chimney flashing requirements lays out the exact cricket-width trigger and corrosion-resistance rules that any reroof should follow. The visual guide to chimney flashing failure patterns is useful for matching attic stains to specific components. For the mechanics of a proper hose test, the step-by-step chimney flashing leak repair guide walks through the sequence in more detail than most contractors will explain over the phone.
Sources
- Flashing around chimney — VIO Chimney guides
- Chimney flashing failure visual guide — Delta Chimneys
- Roof flashing — The Roofing Brief
FAQ
Will Homeowners Insurance Cover a Chimney Leak?
Usually only if the damage resulted from a sudden event like a storm, not from gradual wear or deferred maintenance. Insurers frequently deny claims tied to long-term flashing deterioration, so document the leak’s history and timeline carefully before filing.
How Can I Fix a Roof Leak Near My Chimney?
Start by confirming the source with an attic check during rain or a hose test, then match the repair to the failure: re-bed counterflashing for a loosened mortar joint, replace step flashing if it’s corroded or improperly woven, or rebuild the crown if cracks are letting water in from above.
How Much Does It Cost to Fix a Chimney Leak?
Costs range from a few hundred dollars for minor sealant refresh repairs to a few thousand dollars for full flashing rebuilds, with crown repairs varying in cost depending on extent.
How Do You Seal a Roof Near a Chimney?
Sealant alone only works as a short-term fix on a minor gap, lasting roughly 2 to 8 years. A lasting repair means re-bedding counterflashing into the mortar joint or replacing step flashing woven into the shingle courses, which can last 25 to 40 years depending on the metal used.