A single bathroom remodel typically runs 6 to 12 weeks of active construction, a full kitchen 8 to 14 weeks, and a whole-house renovation anywhere from 5 to 14 months once you factor in design, permits, and material lead times. The single rule that keeps any of those ranges realistic: lock your scope and selections before demolition starts, order long-lead materials the day your design is final, and build a buffer into every phase rather than the project as a whole.
Homeowners cause more delays than contractors do. Not because they’re careless, but because nobody warned them that a two-week decision on tile can stop a crew cold.
Pro Tip: Treat every “I’ll decide later” moment as a scheduling decision, not a design one. Late choices don’t just delay themselves. They delay every trade lined up behind them.
Three things determine whether your timeline holds:
- How early you finalize cabinetry, windows, and fixtures relative to when they’re installed
- Whether you’ve built buffer weeks into permitting and each construction phase, not just the total
- How fast you respond when your contractor needs a decision to keep moving
Key Takeaways
Managing a renovation timeline successfully depends on locking design decisions early, ordering long-lead materials immediately, and building phase-specific buffers instead of one lump contingency.
| Point | Details |
|---|---|
| Know your realistic range | A kitchen runs 4 to 7 months full timeline; a whole-house renovation runs 5 to 14 months. |
| Order long-lead items immediately | Cabinetry and windows take 6 to 14 weeks, so order the week your design is final. |
| Set decision deadlines | Finalize selections two weeks before installation to avoid stop work periods. |
| Buffer each phase, not just the total | Add 20 to 30% schedule buffer and 10 to 15% budget contingency per phase. |
| Choose a contractor with schedule discipline | J. Signor Exteriors ties milestone-based contracts and on-site project management to the same phase gates outlined here. |
Table of Contents
- How to Manage Your Home Renovation Project Timeline Realistically
- Timeline at a Glance: Duration Ranges by Project Type
- What Are the Phases of a Renovation Timeline?
- What Causes the Most Renovation Schedule Delays?
- Which Tools Help You Track a Renovation Schedule?
- How Do You Build a Renovation Schedule Step by Step?
- What Should Homeowners Check Before Each Phase Starts?
- Sources
How to Manage Your Home Renovation Project Timeline Realistically
Managing a renovation schedule isn’t about micromanaging your contractor’s crew. It’s about controlling the three things that are actually yours to control: decisions, orders, and communication. Everything else, from framing inspections to drywall drying time, follows a fairly predictable rhythm once those three inputs are handled.
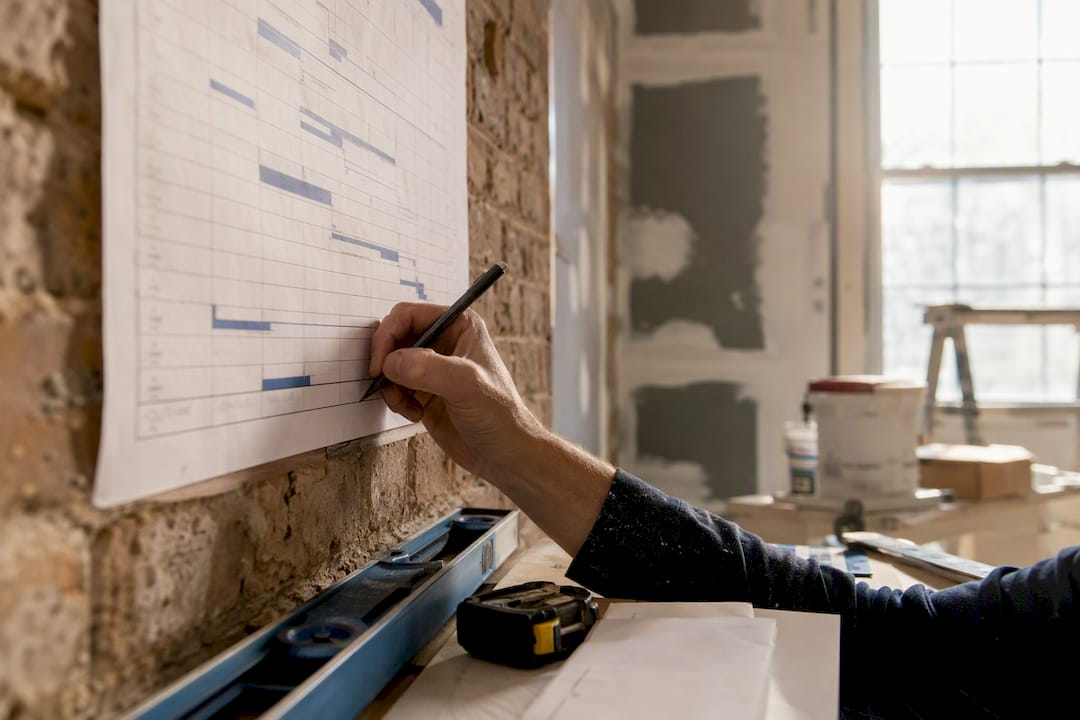
The industry standard tool for this is a Gantt chart, which maps every phase against a calendar and shows which tasks depend on which. You don’t need construction software to build one. A shared spreadsheet works fine for a single bathroom. What matters is that you can see, at a glance, which decision you’re holding up and which trade is waiting on you.
Experts recommend padding your total estimate to absorb permit review delays, material backorders, and weather. That’s sound advice, but it’s incomplete on its own. A single lump buffer at the end of the project doesn’t help if the delay happens in week three. The fix is smaller buffers attached to each phase, which is exactly how the phase breakdown below is built.
Timeline at a Glance: Duration Ranges by Project Type
“Full timeline” below includes design finalization, permit review, and the lead time to order and receive materials before the crew ever picks up a tool. “Active construction” is just the on-site work.
| Project Type | Active Construction | Full Timeline | Recommended Buffer |
|---|---|---|---|
| Single bathroom | 3–6 weeks | 8–14 weeks | 2 weeks |
| Full kitchen | 6–10 weeks | 4–7 months | 3–4 weeks |
| Basement finish | 6–12 weeks | 3–5 months | 3 weeks |
| Addition | 3–5 months | 6–10 months | 4–6 weeks |
| Whole-house renovation | 4–10 months | 5–14 months | 6–10 weeks |
The gap between active construction and full timeline is almost always bigger than homeowners expect. A kitchen with 8 weeks of demo and installation can easily carry a 4 to 7 month full timeline once you count the 6 to 14 weeks cabinetry alone takes to arrive.
What Are the Phases of a Renovation Timeline?
Every renovation, regardless of size, moves through the same sequence. Knowing which phase you’re in tells you exactly what decision or approval you should be chasing right now.
- Discovery and scope (2 to 8 weeks). You and your contractor walk the space, define what’s changing, and set a working budget. Nothing gets ordered yet, but vague scope here is the single biggest predictor of change orders later.
- Design and drawings (4 to 12 weeks). Layouts, material selections, and structural plans get finalized. This is where you should be picking cabinetry, tile, and fixtures, not during construction.
- Bidding and contracts (2 to 4 weeks). You compare pricing, finalize your contractor, and sign a contract with a payment schedule tied to milestones rather than dates.
- Permits and pre-construction (2 to 6 weeks). Review times vary by municipality and season, and this is one of the few phases entirely outside your control. Submitting complete drawings the first time avoids a resubmission cycle that can double this window.
- Demolition and structural work (1 to 4 weeks). Fast once it starts, but hidden conditions like water damage or outdated wiring often surface here and reshape the rest of the schedule.
- Mechanical, electrical, and plumbing rough-in (2 to 4 weeks). Inspections gate this phase. Nothing behind the walls closes up until the inspector signs off.
- Insulation and drywall (3 to 6 weeks). Drying and curing time isn’t negotiable, regardless of how fast the crew wants to move.
- Finish carpentry and cabinet installation (3 to 8 weeks). This is where your earlier material orders either pay off or stall the job. Cabinetry that wasn’t ordered at the design phase creates a gap here that nothing else can fill.
- Punch list and final inspections (1 to 3 weeks). Final touch ups, code sign off, and your last walkthrough before the project closes.
Each phase ends with a gate, an inspection, an approval, or a signed selection sheet, and the next phase can’t legally or practically start until that gate clears. That’s why a delayed decision in week two doesn’t just cost you a week. It pushes every downstream phase by the same amount.
What Causes the Most Renovation Schedule Delays?
Permit review timing is the most visible delay source and the least controllable. Some municipalities turn around simple permits in 10 business days; others take six weeks for the same paperwork. The mitigation is straightforward: submit your permit application the moment your design is final rather than waiting for your contract to be signed.
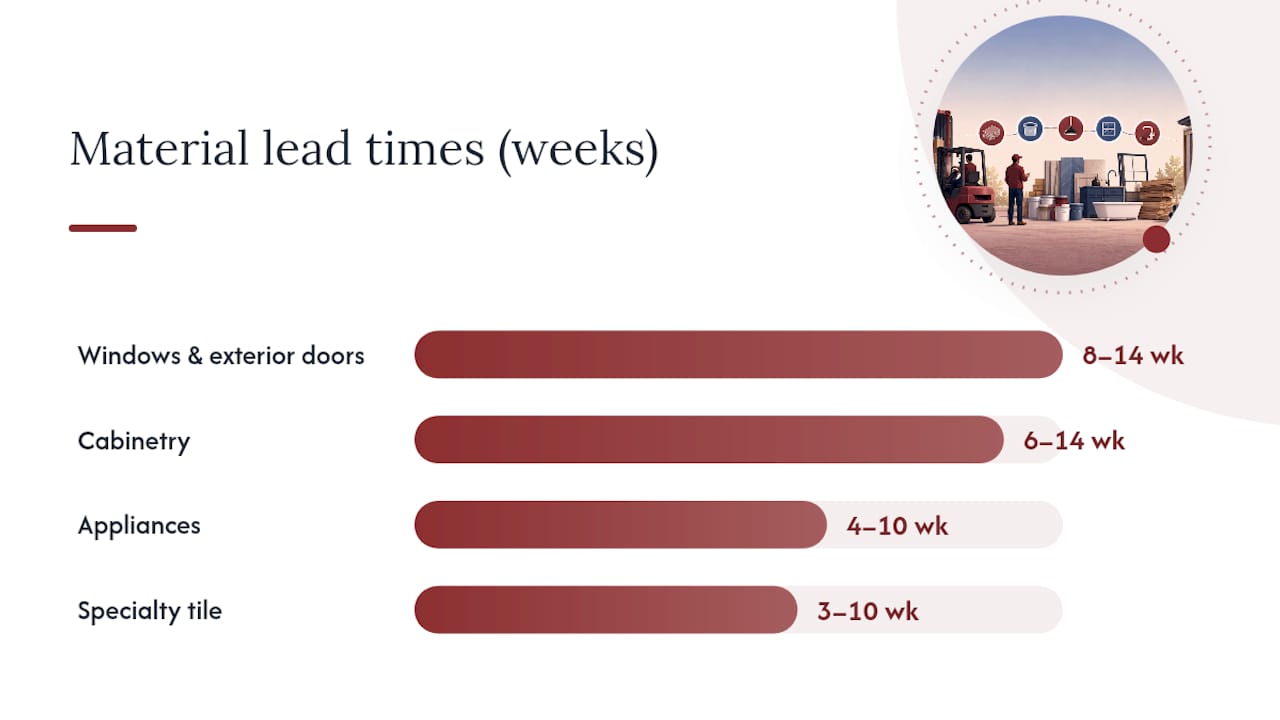
Material lead times are the second major gate, and they’re entirely within your control. Cabinetry runs 6 to 14 weeks, windows and exterior doors 8 to 14 weeks, appliances 4 to 10 weeks, and specialty tile 3 to 10 weeks. Order every one of these as soon as your design is locked, not when construction starts.
Decision latency causes more stop work periods than any material shortage. Homeowners who don’t finalize cabinetry, tile, or faucet selections at least two weeks before installation routinely stall their own crews. Set a personal decision deadline tied to each milestone and treat it as firm.

Hidden conditions, like rot behind old siding or plumbing that doesn’t match the drawings, are why contingency exists. Budget 10 to 15% extra funds and 20 to 30% extra schedule time beyond your phase estimates, especially on any project touching structure or systems older than 20 years.
Pro Tip: Ask your contractor for the three long-lead items on your specific job during your first design meeting, then put those order dates on your calendar before anything else.
A short list to act on immediately:
- Submit permit applications the day design is finalized, not after contract signing
- Order cabinetry, windows, and specialty tile the same week you approve final selections
- Set decision deadlines two weeks ahead of each installation phase and hold to them
- Reserve 10 to 15% of budget and 20 to 30% of schedule as contingency, not as a last resort
Which Tools Help You Track a Renovation Schedule?
A Gantt chart remains the clearest way to see dependencies. It shows which phases run in sequence, which can overlap, and exactly which task is holding up the next one, which a simple checklist never can.
For a single room, a shared spreadsheet with start dates, dependencies, and buffer weeks works well. For a kitchen, addition, or whole-house project, a project app built for renovation tracking is worth adopting. Platforms like Houzz Pro’s project planner combine cost calculators and checklists for homeowners still finalizing decisions, while contractor-side platforms such as Buildertrend share daily updates, progress photos, and schedules directly with clients, cutting down on guesswork about where things stand.
Whichever tool you use, pair it with a communication routine: weekly check-ins, milestone photos, and one single point of contact on the contractor’s side. That last point matters more than the software. Routing every update through one person instead of multiple subcontractors is what actually keeps small issues from becoming schedule fights.
| Point | Details |
|---|---|
| Gantt or spreadsheet | Map every phase and its dependencies before construction starts. |
| One point of contact | Route weekly updates through a single person to cut down on miscommunication. |
Pro Tip: Download a Gantt template before your first contractor meeting so you can plug in real dates during that conversation, not after.
How Do You Build a Renovation Schedule Step by Step?
Work backward from your target completion date rather than forward from your start date. It’s a small shift, but it forces you to see immediately whether your material orders and decision deadlines actually fit the calendar you want.
- Set your completion target, then subtract each phase’s duration, starting with punch list and working back through finish carpentry, rough-in, and demolition.
- Mark milestone checkpoints at each phase gate and tie your payment schedule to them rather than to calendar dates. This keeps cash flow and progress aligned.
- Apply phase-specific buffers using the ranges in the table above rather than one buffer tacked onto the end.
- Confirm order dates for every long-lead item against the schedule you just built, not against when you feel ready to decide.
- Re-baseline when a delay hits. Identify what’s on the critical path, notify your contractor immediately, and reorder any tasks that can run in parallel to recover lost time instead of just pushing the end date.
Pro Tip: When a delay happens, ask your contractor one question first: does this push the completion date, or is there slack elsewhere in the schedule to absorb it? That answer tells you whether to worry.
What Should Homeowners Check Before Each Phase Starts?
Before any trade shows up, confirm three things: materials for that phase are physically on site, the relevant permit is approved, and the inspection window is booked if that phase requires one. Skipping this check is how a crew arrives and stands around for a day.
The closeout phase deserves the same discipline. A punch list walkthrough identifies every minor fix, from a scuffed baseboard to a misaligned cabinet door, and a focused closeout window keeps that list from dragging on for months.
A schedule only holds together when someone is actually verifying the small things: materials staged, permits in hand, inspections booked before the crew shows up. That discipline, more than any single tool, is what separates a project that finishes on time from one that drifts.
At J. Signor Exteriors, our crews document daily progress with photos and logs and hold clients to the same decision deadlines we hold ourselves to, because a schedule works both directions.
- Confirm materials on site before the trade arrives, not the morning of
- Book inspection windows as soon as a phase nears completion
- Run punch list closeout within a focused window before final sign off
- Document daily progress with photos so decisions and delays are traceable
What can homeowners actually control in a renovation timeline?
Decisions, ordering, and communication. That’s the short list, and it’s also the honest one. You can’t control permit review times or how fast lumber ships, but you can control whether your tile selection is locked two weeks before installation instead of two days. Most of what feels like a contractor problem traces back to one of those three things.
— Adam
How J. Signor Exteriors Keeps Your Project on Schedule
A schedule is only as good as the crew executing it, and that’s where most DIY-managed timelines fall apart, not in the planning, but in the follow through. J. Signor Exteriors builds milestone-based contracts into every exterior and kitchen project, so payments track progress instead of the calendar, and you always know where the job stands.

Our on-site project management includes the same phase gates and decision deadlines outlined above, backed by more than 30 years of managing Connecticut roofing, siding, window, and kitchen projects. If your renovation includes exterior work like roofing or siding, we can build your material lead times and inspection windows into a schedule before your first shovel hits the ground. Request a timeline review with our team and get a phase-by-phase schedule specific to your project, not a generic estimate.
Sources
- How to Plan a Renovation Timeline—Plus Tips to Stay on Track | BHG
- Remodel Order of Operations & Timeline Guide | RemodelCalculators