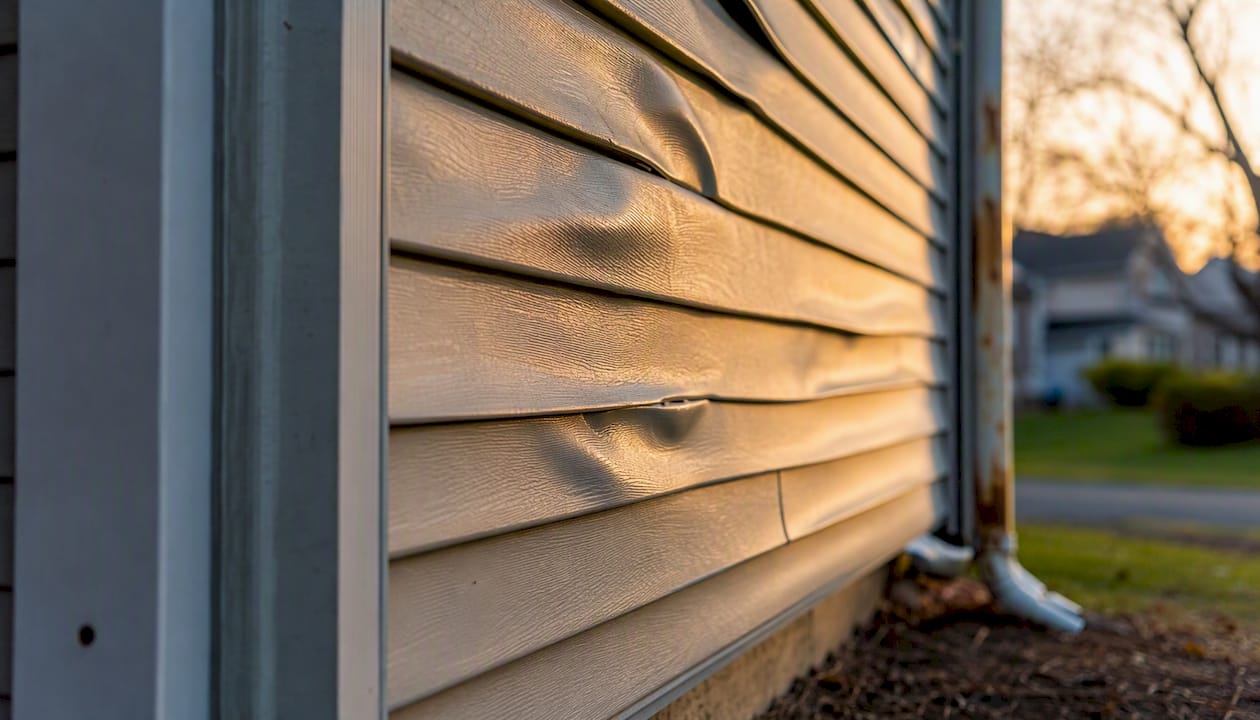
Siding warps or bubbles primarily because of three things: heat exposure (direct sunlight or reflected off windows and pavement), trapped moisture behind the panels, and installation errors like overdriven nails or panels locked too tightly into trim. If you’re seeing distortion on your home right now, the safest first step is a visual inspection at different times of day — not prying panels open, especially if you suspect rot or wet sheathing underneath.
The three most common causes at a glance:
- Heat exposure: Direct sun, reflected sunlight from Low-E windows or dark pavement, and nearby heat sources like grills or AC compressors
- Trapped moisture: Failed housewrap, damaged flashing, clogged gutters, or hidden leaks that turn to vapor under heat
- Installation errors: Nails driven too tight, panels locked into J-channel, or missing expansion gaps
According to Family Handyman, these three causes account for the vast majority of siding distortion cases contractors diagnose.
Pro Tip: Photograph the distorted area at 10 AM, 1 PM, and 4 PM on a sunny day. If the bubbling looks worse in the afternoon and better in the morning, heat is almost certainly the driver. If the distortion looks the same regardless of time or temperature, moisture or installation strain is more likely.
Table of Contents
- What causes siding to bubble, warp, ripple, or buckle?
- How do you inspect and diagnose bubbled or warped siding?
- DIY repairs you can safely try at home
- What contractors do for moisture and substrate problems
- How to prevent siding from bubbling or warping
- Why the “wall behind the wall” matters most
- When should you call a siding contractor?
- Key Takeaways
- A contractor’s perspective on what the wall is really telling you
- Jsignorexteriors can diagnose and fix your siding the right way
- Useful sources and further reading
What causes siding to bubble, warp, ripple, or buckle?
Siding deformation rarely has a single cause. Most cases involve at least two factors working together, which is why the same wall can look fine for years and then suddenly show visible distortion.
Heat-related distortion
Vinyl is the most common residential siding material in the U.S., and it has a real thermal limit. According to a Cardinal technical bulletin on vinyl siding distortion, distortion commonly occurs near 165°F, with the documented heat-deflection range running from roughly 142°F to 192°F. That sounds extreme until you consider that a dark-colored panel in direct afternoon sun can reach surface temperatures well above ambient air temperature, especially when a reflective surface nearby is concentrating additional energy onto the same spot.
Thermal threshold: Vinyl siding distortion is documented at surface temperatures that can be reached through combined direct sun and reflected heat even on a moderately warm day.
Reflected sunlight is one of the most underdiagnosed causes of localized bubbling. Low-E windows on a neighboring house, a light-colored concrete patio, a swimming pool surface, or even a parked car can focus reflected solar energy onto a specific section of siding. Contractor field reports show that this kind of localized reflection can raise panel temperatures enough to soften vinyl even when the air temperature is only in the 80s. Inside corners and alcoves compound the problem by trapping heat from multiple angles.
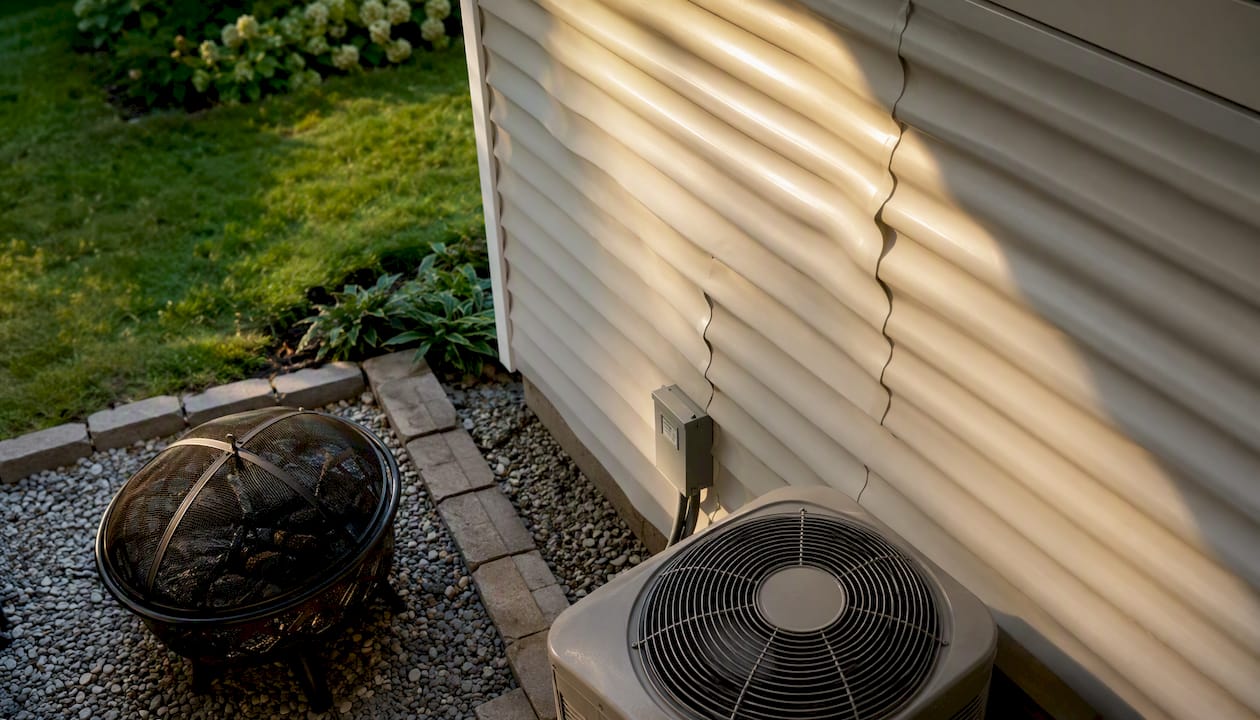
Nearby heat sources matter too. A gas grill positioned close to the house, an outdoor AC condenser, or a dryer vent exhausting directly onto siding can all create hot spots that cause repeated distortion in the same location.
Trapped moisture behind the siding
Vinyl siding is not a waterproof membrane. Water that gets behind it through failed flashing, poor housewrap laps, or clogged gutters has nowhere to go quickly. When that trapped moisture heats up, it converts to vapor and exerts outward pressure on the panel, producing a blister-like bubble. Coast Carpentry’s field guidance describes this vapor pressure mechanism as one of the most common causes of moisture-driven bubbling, with damaged flashing at windows, roof-wall junctions, and penetrations being the most frequent entry points.
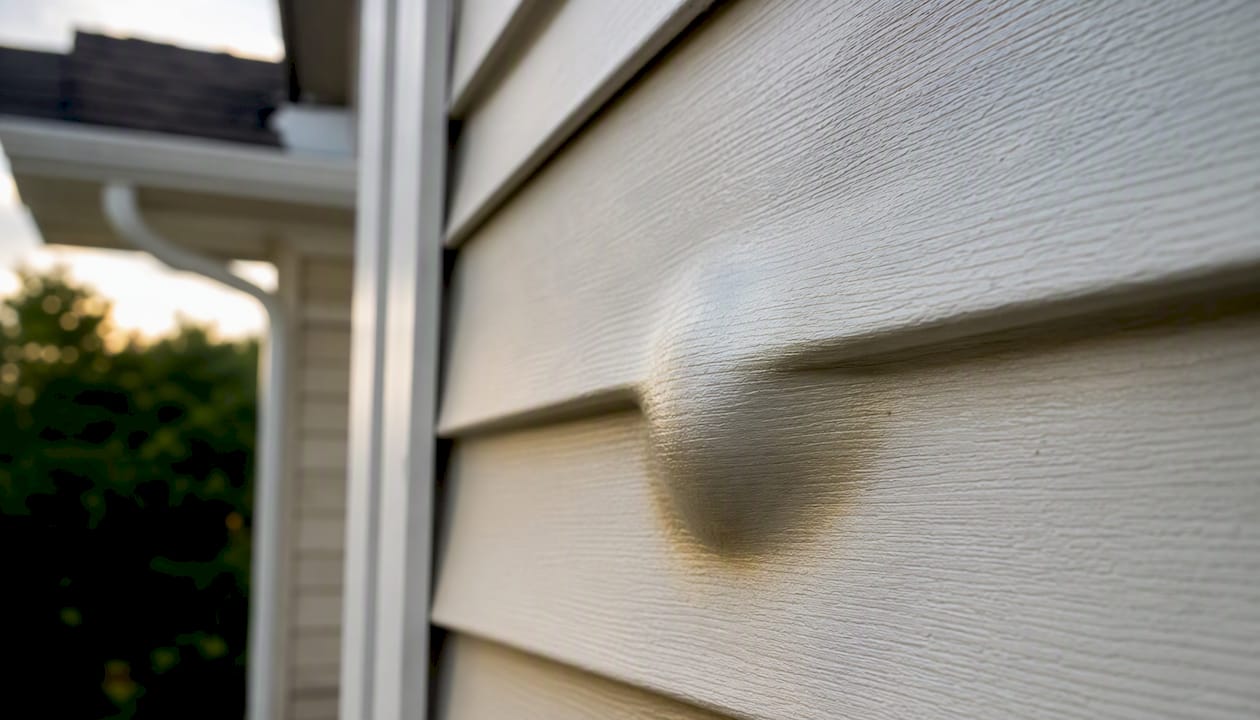
The tricky part: moisture-driven bubbling often looks identical to heat-driven bubbling from the outside. The difference shows up when you press the panel. A heat-distorted panel tends to feel firm; a moisture-driven bubble may feel slightly soft or springy, and the sheathing behind it may be compromised.
Age, material degradation, and other factors
Older vinyl panels lose flexibility over time, making them more prone to cracking or buckling under thermal stress. Panels also carry “frozen-in” manufacturing strains from the extrusion process, and when installation adds additional stress, those strains can release visibly. Impact damage from hail, chemical exposure from certain cleaning products, and framing settlement can all contribute as secondary causes.
Pro Tip: Stand at one end of the wall and sight along it at a very shallow angle, the way you’d look down a pool cue. Waves or ripples that follow a regular pattern (every panel, evenly spaced) usually point to installation strain. Distortion concentrated in one or two spots, especially facing a reflective surface, points to heat.
How do you inspect and diagnose bubbled or warped siding?
A methodical inspection takes about 30 minutes and can tell you whether you’re dealing with a cosmetic issue or something that needs a contractor’s attention before it gets worse.
Step-by-step diagnostic checklist
- Sight along the wall at a shallow angle from each end. Photograph the distorted areas and note their location relative to windows, roof edges, gutters, and any heat sources.
- Check nail heads and panel ends. Look for dimples in the panel face (sign of overdriven nails) and check whether panel ends have any visible gap where they enter J-channel or butt against trim. No gap means no expansion room.
- Press the panel gently. A panel that springs back firmly is likely heat-distorted. One that feels soft, spongy, or doesn’t spring back may have moisture behind it or a compromised substrate.
- Use an infrared thermometer (or a careful touch test on a cool day) to identify hot spots. Compare the distorted section to a nearby undistorted section. A significant temperature difference on a sunny afternoon points to a reflective heat source.
- Look for moisture clues at the perimeter: peeling paint at trim edges, mold staining along the bottom of panels, soft spots when you tap the sheathing through an open vent, gutter overflow marks on the siding face, or a musty smell near an exterior wall inside the house.
- Check flashing and gutters. Overflowing gutters and missing or lifted flashing at windows and roof-wall junctions are the most common moisture entry points, per Coast Carpentry’s moisture guidance.
Red flags that require a contractor, not a DIY fix:
- Sheathing that sounds hollow or feels soft when pressed through a gap
- Visible mold or dark staining spreading behind or around panels
- Distortion that returns within one season after a DIY repair
- Buckling near roof-wall junctions or around windows where flashing may have failed
- Any sign of interior moisture (localized staining, musty smell) on the same wall
Pro Tip: Take your time-of-day photos on a clear day when the sun is hitting the affected wall directly. If the distortion visibly worsens between your morning and afternoon shots, you have a heat problem. If it looks the same at 7 AM as it does at 3 PM, start looking behind the panel.
DIY repairs you can safely try at home
Most installation-related distortion and some heat-related buckling can be corrected without a contractor. The key is knowing which repairs are within reach and which ones require opening the wall.
Release and rehang: the most common DIY fix
This repair addresses panels that are buckled because they were nailed too tight or locked into trim without expansion room. According to InspectAPedia’s installation guidance, releasing the fastener constraint and re-nailing correctly resolves a large share of installation-related buckling.
- Slide a zip tool (a siding removal tool available at most hardware stores) under the bottom edge of the panel above the distorted one and unlock it.
- Pull the distorted panel away from the wall gently. Do not force it — vinyl becomes brittle in cold weather, so work on a day above 50°F.
- Inspect the nail slots. If nails are driven flush or below the surface, use a flat bar to back them out slightly.
- Re-nail through the center of each slot, leaving a visible gap of about 1/32 inch between the nail head and the panel face. The panel should slide left and right slightly when pushed.
- Check both ends of the panel where they enter trim. There should be a gap of at least 1/4 inch at each end. If the panel is too long, score and snap it to the correct length.
- Re-lock the upper panel using the zip tool.
- Step back and sight along the wall. Most installation-related buckling resolves immediately.
Replacing a single damaged panel
If a panel is cracked, severely warped, or shows signs of moisture damage on its back face, replacement is the right call.
- Remove the panel above it first (zip tool), then the damaged panel itself.
- With the panel off, inspect the housewrap and sheathing. Look for tears, gaps at laps, or soft spots. If the sheathing feels spongy or shows dark staining, stop and call a contractor.
- If the substrate looks sound, cut a replacement panel to length (leaving expansion gaps at both ends), snap it into the course below, nail correctly through slot centers, and lock the upper panel back in place.
Safety checklist before you start:
- Use a stable ladder with a standoff bracket; never lean a ladder directly against vinyl panels
- Wear work gloves (panel edges are sharp) and safety glasses
- Avoid powered pry bars or oscillating tools near trim — they can crack J-channel and cause more damage than the original problem
- Never work on siding in freezing temperatures
Pro Tip: Before buying a replacement panel, bring a small piece of the old one to the supplier. Color matching is harder than it sounds — even the same product line fades differently over years of sun exposure. A slight mismatch is less visible low on the wall than at eye level.
What contractors do for moisture and substrate problems
When the problem goes beyond a loose nail or a single panel, professional repair involves opening the wall to see what’s happening behind the siding. That’s where costs and timelines expand, and where the difference between a cosmetic fix and a structural repair becomes clear.
What a contractor inspection looks like
A thorough professional inspection includes more than a visual check. Expect a contractor to:
- Remove one or more panels to access the sheathing and housewrap directly
- Use a moisture meter to measure sheathing moisture content (readings above 19% typically indicate a problem requiring intervention)
- Check housewrap laps, tape condition, and flashing at all penetrations and roof-wall junctions
- Document conditions with photos and provide a written scope of work
Build-Construct’s contractor guidance stresses that replacing a panel without addressing underlying housewrap or sheathing failures leads to recurring problems, often within a single season.
Repair scopes and typical cost ranges
Costs vary significantly by region, access difficulty, panel availability, and the extent of hidden damage. These are ballpark ranges for planning purposes.
| Repair scope | Typical range | Timeline |
|---|---|---|
| Single panel swap (no substrate work) | — | 2–4 hours |
| Localized sheathing/housewrap repair + re-panel | — | 1–2 days |
| Partial re-side (one wall, housewrap replacement) | — | 2–5 days |
| Full re-side with housewrap and flashing | — | 1–3 weeks |
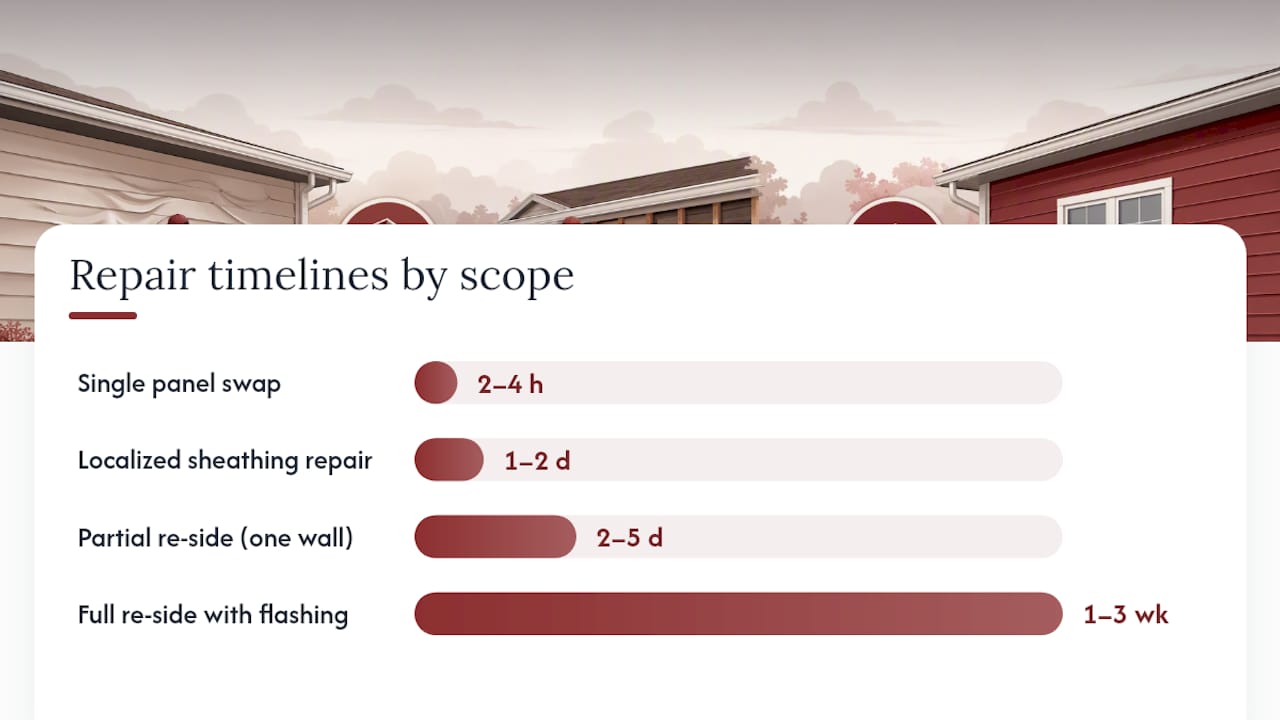
Costs rise when hidden rot requires sheathing replacement, when matching discontinued panel colors requires sourcing, when disposal fees apply to removed material, or when flashing at roof-wall junctions needs reconstruction. Always request an itemized written quote that separates labor, materials, and disposal.
What to ask for in a contractor quote:
- Moisture meter readings at the time of inspection
- Photos of sheathing and housewrap condition before work begins
- Explicit scope for housewrap repair or replacement (not just panel swap)
- Panel sourcing plan if matching existing color
- Warranty terms for both labor and materials
How to prevent siding from bubbling or warping
Prevention is mostly about giving the siding room to move and keeping water out of the wall assembly. Both are easier to get right during installation than to fix after the fact.
Installation best practices
Correct fastener placement is the single most controllable factor. Nails should always go through the center of the slot, never at the ends, and the head should sit just off the panel face. Panels need a minimum 1/4-inch gap at each end where they enter trim, and the substrate must be flat before any panel goes up. Reviewing common siding installation mistakes before a project starts can help you catch problems in a contractor’s work before they’re covered up.
Design and site choices
Color selection has a measurable effect on thermal performance. HANSONS’ guidance on vinyl siding recommends lighter colors and lower-absorptance finishes for walls that face direct afternoon sun or sit near reflective surfaces. Dark colors absorb more solar energy and reach higher surface temperatures under the same conditions. If you’re replacing siding on a south- or west-facing wall that already shows distortion, choosing a lighter color or a material with a lower solar absorptance rating is a straightforward preventive step.
Avoid positioning grills, outdoor heaters, or AC condensers within two feet of siding. For reflected heat from neighboring Low-E windows, strategic plantings or a simple lattice screen can interrupt the reflection path without requiring any structural change.
Moisture control
Proper housewrap installation, correctly lapped and taped at all seams, is the foundation of a dry wall assembly. Flashing at windows, doors, and roof-wall junctions must be installed before siding goes up, not retrofitted afterward. Clean gutters twice a year and confirm downspouts discharge water at least three feet from the foundation. These steps prevent the moisture accumulation that turns into vapor pressure and blister-like bubbles.
Installation checklist to use when getting bids or watching a job:
- Expansion gaps present at all panel ends and trim intersections
- Nails centered in slots, heads slightly proud of the panel face
- Housewrap lapped correctly (upper layer over lower, like shingles) and taped at seams
- Flashing installed at all window heads, door heads, and roof-wall junctions before siding
- Substrate checked for flatness before panels go up
Pro Tip: For walls that face south or west, or any wall near a reflective surface like a pool or a neighbor’s Low-E windows, consider exterior siding materials with a documented solar reflectance index. Lighter colors and engineered composites consistently outperform dark vinyl in high-heat applications.
Why the “wall behind the wall” matters most
Surface repairs fix what you can see. What you can’t see — the housewrap, sheathing, and flashing behind the panels — determines whether the fix lasts.
Vinyl’s heat-deflection range of 142°F to 192°F sounds like a wide margin, but geometry closes that gap fast. An inside corner or a recessed alcove traps heat from two or three directions simultaneously, effectively doubling the solar load on a single panel. Add a reflective surface nearby and a dark panel color, and a surface temperature of 165°F is reachable on a day when the air temperature is only in the mid-80s.
The “frozen-in” manufacturing strains in extruded vinyl panels add another layer. During production, vinyl is shaped under heat and pressure, and some of that stress remains locked in the material. When installation adds more strain (overdriven nails, locked trim), the combined stress can release suddenly under heat, producing visible distortion that looks like a heat problem but is partly a mechanical one. This is why the same panel style on two adjacent walls can behave differently — one wall’s geometry and installation quality tip the balance.
Moisture compounds everything. Trapped water behind siding converts to vapor when heated and exerts physical pressure on the panel from behind. That pressure is what produces the characteristic blister shape. Removing the panel and inspecting the sheathing and housewrap is the only reliable way to confirm moisture-driven failure. A contractor who replaces the panel without checking behind it is solving the symptom, not the problem.
Contractor insight: Technical bulletins confirm that vinyl distortion is rarely caused by a single factor. Geometry, reflections, color, manufacturing strains, and installation stresses combine to create hot spots where distortion occurs. Addressing only one factor often leaves the others in place.
Because exposure is cumulative, repeated short-duration heating events — reflected sun hitting a panel for 20 minutes a day across a full summer — can equal the effect of a single prolonged exposure. This explains why a panel that looked fine in May shows visible distortion by August without any single dramatic heat event.
Pro Tip: A thorough contractor inspection should include opening at least one panel in the affected area, taking moisture meter readings of the sheathing, checking housewrap lap and tape condition, and photographing everything before closing the wall back up. If a contractor quotes a repair without opening a panel, ask why.
When should you call a siding contractor?
Some siding problems are genuinely DIY-friendly. Others look simple on the surface but signal something more serious behind the wall. Knowing the difference saves you from a repair that fails within one season.
Call a contractor when you see any of these:
- Sheathing that sounds hollow or feels soft when you press through a gap or vent opening
- Mold or dark staining spreading at panel edges, especially near windows or roof lines
- Distortion that returns in the same location after a DIY repair
- Buckling concentrated near roof-wall junctions, window heads, or door frames (flashing failure territory)
- Any interior sign on the same wall: localized paint peeling, musty smell, or water staining on drywall
Questions to ask a siding contractor before hiring
- How do you diagnose whether the problem is thermal or moisture-driven?
- Will you open panels to inspect the sheathing and housewrap, and will you document what you find?
- What are my options: repair, partial replacement, or full re-side?
- How do you handle panel matching if my current color is discontinued?
- What warranty do you offer on labor and materials?
- Are you licensed and insured in Connecticut?
What to have ready before the contractor arrives
- Photos of the distortion taken at different times of day
- Any records of past repairs or the original installation date
- Notes on when the problem first appeared and whether it has worsened
- Access to the interior of the affected wall (basement, crawlspace, or interior room) if moisture is suspected
Pro Tip: Get at least two written quotes for any repair beyond a single panel swap. Scopes can vary significantly — one contractor may quote a panel replacement while another recommends housewrap repair that prevents the problem from recurring. The preparation checklist for siding replacement can help you ask the right questions and compare bids accurately.
Key Takeaways
Siding warps and bubbles when heat, trapped moisture, or installation errors prevent panels from expanding and contracting freely — fixing the visible panel without addressing the root cause leads to the same problem returning.
| Point | Details |
|---|---|
| Top three causes | Heat exposure, trapped moisture behind panels, and installation errors (tight nails, locked trim) drive most distortion. |
| Diagnose before you repair | Photograph the wall at different times of day and press-test panels before deciding whether the problem is thermal or moisture-driven. |
| DIY limit | Release-and-rehang and single panel swaps are safe DIY work; soft sheathing, mold, or recurring distortion require a contractor. |
| Prevention essentials | Center-of-slot nailing, expansion gaps at trim, correct housewrap lapping, and lighter colors on south/west walls prevent most problems. |
| Jsignorexteriors | For Connecticut homeowners, Jsignorexteriors provides on-site moisture diagnosis, written scopes, and siding repair or replacement backed by 30+ years of local experience. |
A contractor’s perspective on what the wall is really telling you
Most homeowners focus on the panel they can see. After more than 30 years working on Connecticut homes, the team at Jsignorexteriors has learned to look past the surface. A bubble or a wave in the siding is the wall’s way of signaling that something behind it needs attention, whether that’s a nail driven a fraction too deep, a housewrap lap that was never taped, or a gutter that’s been overflowing onto the same section of wall for three seasons.
The cases that come back for repeat repairs almost always share one thing: the original fix addressed the panel but not the wall assembly behind it. Vinyl siding is designed to be a weather screen, not a waterproof barrier. When the housewrap and flashing behind it are doing their job, the siding performs well for decades. When they’re not, no amount of panel swapping solves the problem permanently.
Connecticut’s climate adds its own pressure. Freeze-thaw cycles stress fasteners and panel ends every winter, and summer heat in the Connecticut River Valley can push south-facing walls into the distortion range on the hottest afternoons. That combination makes proper installation and substrate condition more important here than in more temperate climates. The exterior remodeling checklist for Connecticut homes reflects those regional realities and is worth reviewing before any siding project.
Jsignorexteriors can diagnose and fix your siding the right way
Warped or bubbled siding on a Connecticut home deserves more than a panel swap. Jsignorexteriors offers on-site siding inspections that go beyond the surface: moisture meter readings, housewrap and flashing checks, written scope documentation, and transparent pricing for repair or replacement options. Whether the job is a single panel, a localized substrate repair, or a full re-side with new housewrap, the work is backed by more than 30 years of experience and a fully licensed, insured crew that knows Connecticut’s climate.

If you’re seeing distortion on your siding and aren’t sure whether it’s a quick fix or something deeper, the right next step is a professional look behind the panel. Contact Jsignorexteriors to schedule an on-site inspection, get a written scope, and understand your options before committing to any repair. Visit the siding services page to learn more or request an estimate.
Useful sources and further reading
The following resources informed this guide and are worth consulting if you want to go deeper on any specific topic.
- Why Is My Vinyl Siding Bubbling? Reasons and Solutions
- Vinyl Siding Distortion (Cardinal technical bulletin IG14_08-2022)
- Why vinyl siding warps and how to fix it
- InspectAPedia: Causes of Vinyl Siding Buckled, Rippled, Bent, Loose or Warped
- Why Is My Siding Bubbling Or Buckling? Causes and What to Do Next
- Siding Bubbling: Causes and Solutions from Coast Carpentry
- Why Is My Vinyl Siding Bubbling? – HANSONS
“Vinyl siding distortion is rarely caused by a single factor — geometry, reflections, color, manufacturing strains, and installation stresses all combine to create hot spots where distortion occurs.” — Cardinal technical bulletin IG14_08-2022, via InspectAPedia