What is flashing on a roof?
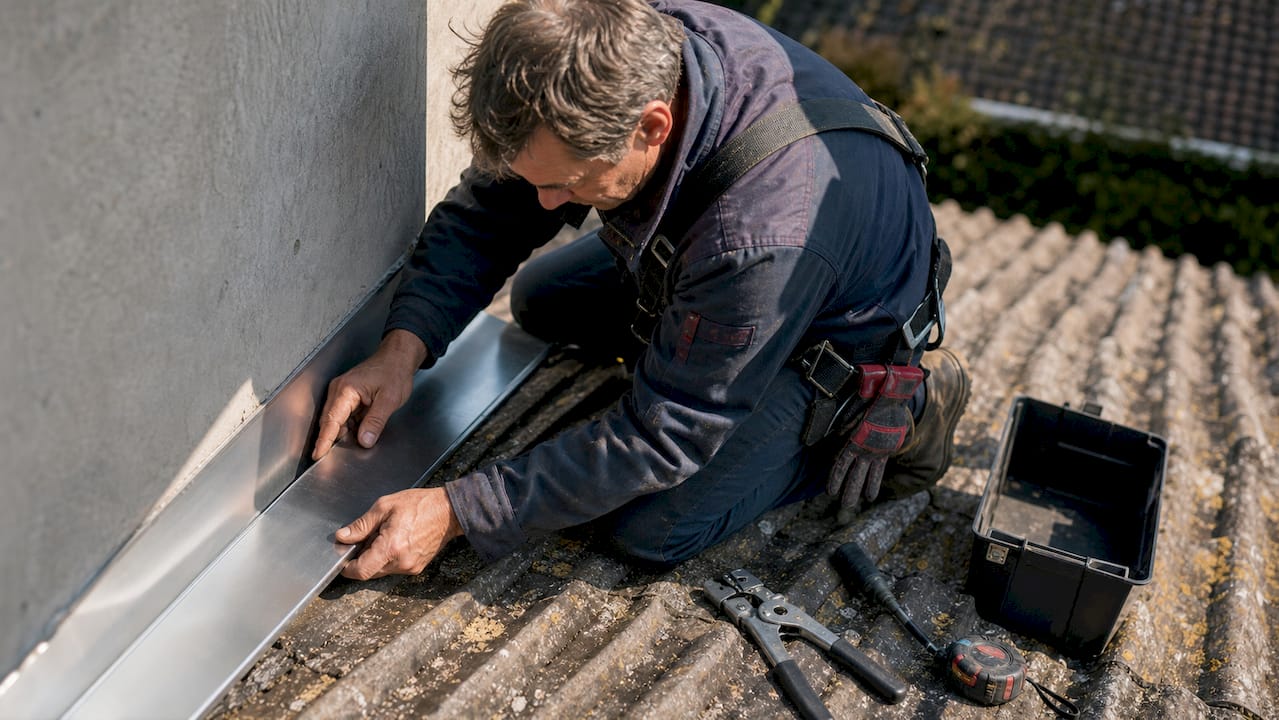
Roof flashing is thin, impervious material, typically bent sheet metal, rubber, or plastic, installed at roof transitions, penetrations, and edges to redirect water away from vulnerable seams and joints. Without it, every chimney base, valley, and vent pipe on your roof becomes a direct path for water to enter your home. Many roof leaks originate at flashing points rather than in the shingle field itself, which tells you exactly how much weight this one component carries.
Flashing works by creating a continuous, layered barrier that channels water downward and outward, away from structural joints where two surfaces meet. Think of it as the seam tape of your roofing system. Building codes, including IRC R905.2.8, require flashing at all wall junctions, valleys, penetrations, and edges on asphalt shingle roofs, so this is not optional craftsmanship. It is a code-mandated component of every compliant roof.
Key facts about roof flashing at a glance:
- Made from metal (galvanized steel, aluminum, copper), rubber, or plastic
- Installed at every transition, penetration, and roof edge
- Redirects water away from seams rather than acting as a simple barrier
- Required by building codes at all critical roof intersections
- Responsible for preventing the majority of residential roof leaks
Common types of roof flashing used on residential properties
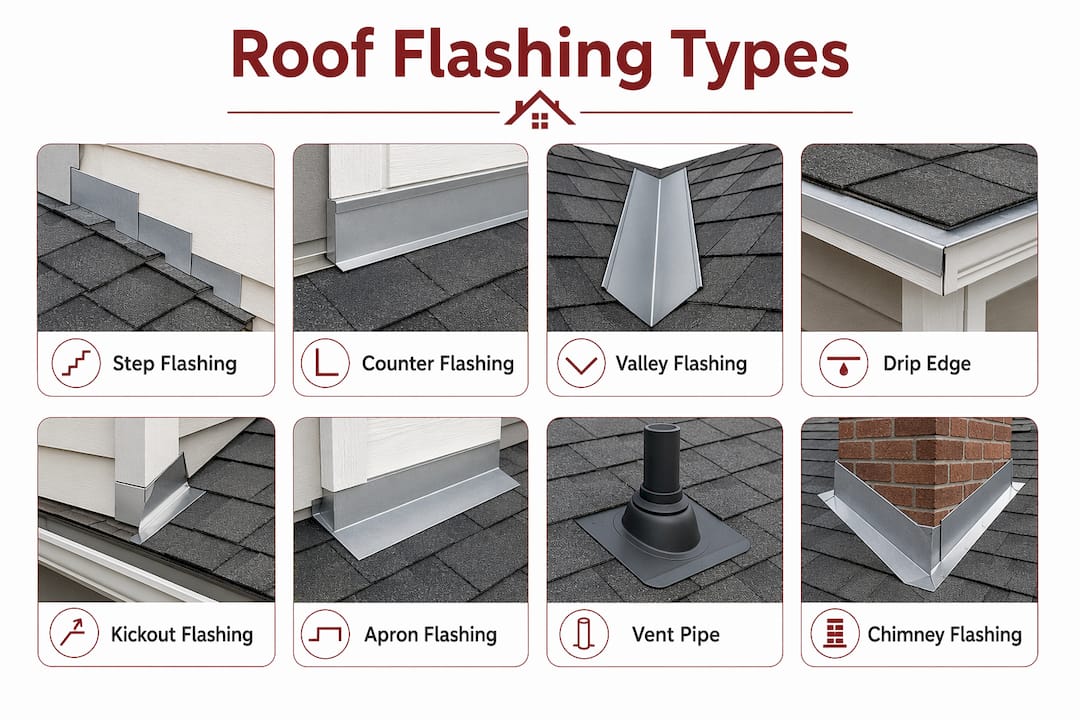
Eight standard flashing types address the different geometries and junctions found on residential roofs. Each one solves a specific water management problem, and knowing which type goes where helps you spot problems during a basic inspection.
1. Step flashing
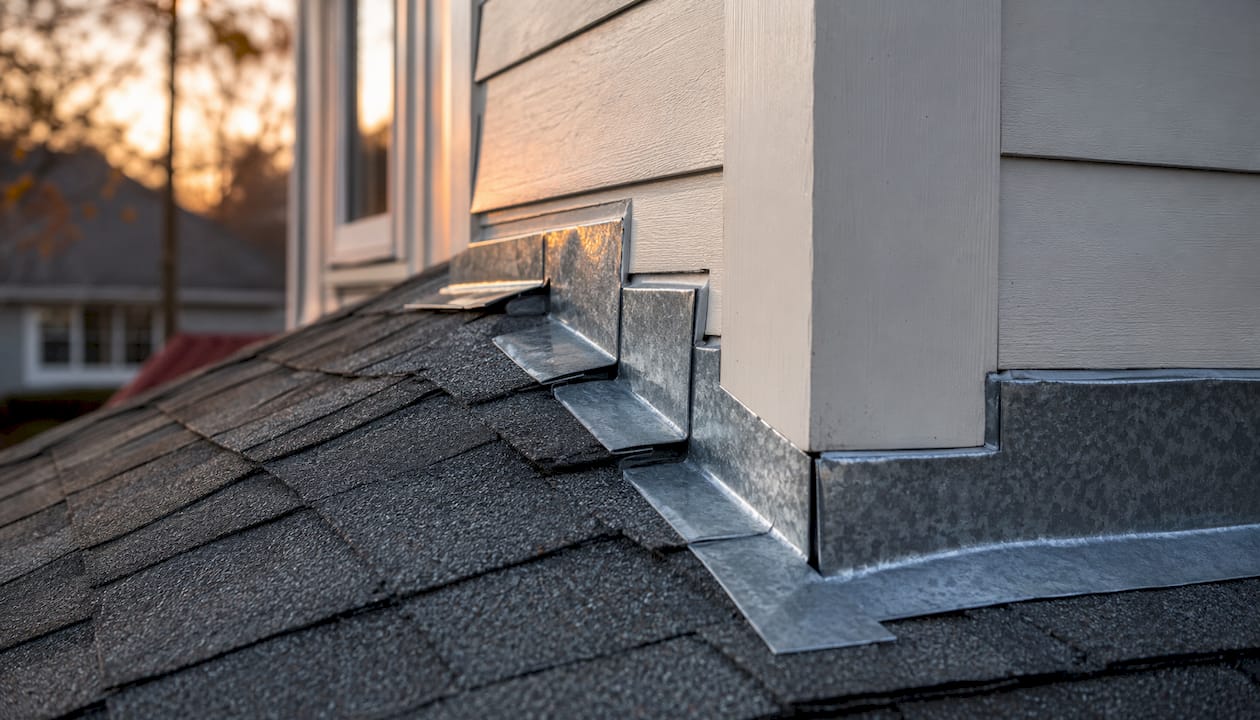
Step flashing runs along the junction where a sloped roof meets a vertical wall, such as a dormer or a sidewall. Individual L-shaped pieces, each roughly 10 inches long, are woven between courses of shingles so water steps down and away from the wall. Each piece is nailed only to the roof deck, not to the wall, allowing the two surfaces to move independently through seasonal expansion and contraction.
2. Counter flashing
Counter flashing overlaps the top edge of base or step flashing from the exterior wall or chimney side. Its job is to shield that exposed upper edge from direct rainfall. Base flashing catches water from above while counter flashing covers the base flashing’s top, creating a two-layer defense that neither piece could provide alone.
3. Valley flashing
Valley flashing sits in the V-shaped channel where two roof planes meet. Valleys concentrate runoff from both slopes, making them one of the highest-risk points on any roof. Metal valley flashing is compatible with virtually any roofing material and is most commonly paired with rigid materials like tile, slate, and metal roofing.
4. Drip edge
Drip edge is a metal strip installed along the eaves and rakes to direct water off the roof edge and into the gutter rather than letting it wick back under the shingles. It also protects the fascia board from rot. Proper installation places drip edge at the eaves before underlayment and at the rakes after underlayment, so water always flows over the top layer.
5. Kickout flashing
Kickout flashing sits at the very bottom of a roof-to-wall intersection, where step flashing would otherwise dump water directly onto the wall surface. It diverts that flow away from the façade and into the gutter. Skipping kickout flashing is one of the most common and costly installation oversights, often leading to hidden rot inside wall cavities over time.
6. Apron (head) flashing
Apron flashing, sometimes called head flashing, runs horizontally across the top of a chimney or along the low side where a roof meets a vertical wall. It catches water running down the wall above and directs it onto the roof surface below, preventing it from pooling at the joint.
7. Vent pipe flashing
Vent pipe flashing, also called a pipe boot or pipe flange, seals around plumbing vents, exhaust fans, and other cylindrical penetrations through the roof deck. It typically combines a metal base with a rubber collar that compresses around the pipe for a watertight fit.
8. Chimney flashing
Chimney flashing is a system, not a single piece. It combines base flashing at the chimney’s low side, step flashing up the sides, counter flashing embedded in the mortar joints, and a saddle or cricket behind the chimney to divert water around it. Getting all those pieces right is one reason chimney flashing is among the most complex repairs on a residential roof.
What materials are used for roof flashing?
Material choice affects how long your flashing lasts, how well it handles your local climate, and how it looks on the finished roof. Here is a breakdown of the most common options:
- Galvanized steel (26 gauge): The most widely used metal flashing material. Galvanized steel resists corrosion well and holds its shape under foot traffic during installation. It pairs with most roofing materials and is cost-effective for the majority of residential applications.
- Aluminum (0.025–0.032 inches thick): Lightweight and easy to form, aluminum works well around complex shapes. One caveat: it reacts with concrete and masonry, so it needs a protective coating in those applications.
- Copper (16 oz): The premium choice. Copper is extremely durable, develops a protective patina over time, and can last as long as the roof itself. It is also the most expensive option and is typically reserved for high-end or historic homes.
- Stainless steel: The longest-lasting metal option for penetration flashings. Stainless steel resists corrosion in coastal and high-humidity environments where galvanized steel may fail prematurely.
- Rubber and plastic membranes: Non-metal flashings offer flexibility that rigid metals cannot match, making them useful around curved or irregular penetrations. They are also easier for experienced DIYers to work with. The trade-off is a shorter service life compared to copper or stainless steel.
When choosing a material, match the flashing’s expected lifespan to your roofing material. Copper flashing under a 50-year slate roof makes sense. Rubber membrane under a 20-year asphalt shingle roof is a reasonable match. Mismatching lifespans means one component will fail long before the other, forcing a partial tear-off. For guidance on choosing compatible roofing materials for New England conditions, the climate context matters as much as the material specs.
Where on your roof does flashing need to go?
Every location where water can concentrate or where two different surfaces meet is a candidate for flashing. These are the spots that need it most:
- Chimney bases and sides: All four sides of a chimney require flashing, with a cricket or saddle on the high side of larger chimneys to prevent debris and water from pooling.
- Roof-to-wall intersections: Dormers, additions, and any vertical wall that rises from a sloped roof plane need step and counter flashing along the full length of the junction.
- Valleys: Where two roof planes intersect, valley flashing handles the concentrated runoff from both slopes.
- Eaves and rakes: Drip edge at every perimeter edge prevents water from wicking back under shingles and rotting the fascia and roof deck.
- Vent pipes, skylights, and exhaust fans: Every penetration through the roof deck needs its own flashing collar or boot.
- Wall-to-roof base (kickout): The bottom of every roof-to-wall run needs a kickout piece to divert water into the gutter rather than onto the wall.
Statistic: Many roof leaks originate at flashing points, not in the shingle field… Protecting these intersections is the single most effective thing you can do for your roof’s long-term performance.
Flashing must also maintain a positive slope so water flows away from the structure. Building science principles are clear on this: flashing is a drainage assembly component, not just a sealant. Cladding should never rest directly on flashing in a way that traps water against the surface.
How to choose the right flashing and keep it in good shape
Choosing flashing starts with your roof material, your climate, and your budget. Once it is installed, regular maintenance keeps it performing for decades.
Signs your flashing needs repair or replacement:
- Visible rust, corrosion, or dark staining on metal flashing
- Cracked, brittle, or missing sealant at flashing edges
- Lifted or separated flashing pieces pulling away from the wall or chimney
- Water stains on interior ceilings near chimneys, walls, or skylights
- Granule buildup in gutters combined with interior moisture (often a sign of shingle and flashing failure together)
Maintenance tips:
- Inspect flashing twice a year, ideally in the spring and fall, and after any major storm
- Clear debris like leaves and pine needles from valleys and kickout areas where water can back up
- Check sealant condition at chimney and vent flashings annually; reapply urethane or polyurethane sealant where cracking appears
- Look for gaps between counter flashing and masonry, which can open as mortar deteriorates
Flashing on visible roof edges also plays an aesthetic role. The Insurance Institute for Business & Home Safety notes that visible flashing frequently serves as an architectural element, so material and color choices affect curb appeal as well as performance. Copper develops a distinctive patina; painted galvanized steel can be matched to trim colors.
Pro Tip: When replacing flashing on a visible chimney or dormer, choose a material that complements your siding and trim color. Copper and dark-coated steel both age gracefully, while bare galvanized steel can streak and look worn within a few years.
DIY basics for roof flashing and when to call a professional
Some flashing repairs are within reach for a careful homeowner. Others require professional expertise to get right the first time.
What a basic repair involves:
- Remove damaged or lifted flashing pieces carefully without disturbing surrounding shingles
- Clean the substrate and remove old sealant residue
- Cut new flashing to size, maintaining the same overlap dimensions as the original
- Secure step flashing pieces with nails driven only into the roof deck, not the wall
- Layer pieces so water always flows over the top of the piece below, never under it
The most common installation mistake is “bucking” the water flow. Flashing must be layered like shingles so each piece sheds water onto the piece below it. Reversing that sequence, even on a single piece, creates a pocket where water wicks under the flashing and into the roof deck.
Nailing is another critical detail. Incorrect nailing through both the roof deck and the wall prevents the natural movement that occurs as materials expand and contract with temperature changes. Over time, that restriction deforms the flashing and opens gaps.
When to hire a licensed professional:
- Chimney flashing systems involving base, step, counter, and saddle components
- Any flashing tied into a drainage plane or integrated with house wrap or building paper
- Skylight flashing, which requires precise integration with the manufacturer’s curb system
- Any situation where interior water damage is already present
DIY flashing repairs often fail because correct integration with the drainage plane is genuinely complex. A repair that looks solid from the outside can still allow water to migrate laterally behind the flashing and into the wall cavity. Professional installation costs more upfront but typically prevents the far larger expense of rot remediation, mold treatment, and repeated repair calls.
Pro Tip: For any flashing work involving a chimney, dormer, or skylight, hire a licensed roofing contractor rather than a general handyman. These systems require precise sequencing and an understanding of how each layer interacts with the ones above and below it.
The installation sequence matters as much as the materials: drip edge at the eaves first, then underlayment, then valley metal, then step flashing woven with shingles, then apron flashing, and finally counter or cap flashings. Each step builds on the last. Skipping or reversing any part of that order creates a gap in the water management system that sealant alone cannot reliably fix.
For Connecticut homeowners dealing with freeze-thaw cycles and heavy snow loads, professional roofing services from a licensed contractor with regional experience make a real difference in long-term performance. Jsignorexteriors has handled flashing installation and repair across Connecticut for more than 30 years, with the expertise to get every layer right the first time.
Working with Jsignorexteriors on your roof flashing

Flashing problems rarely announce themselves until water is already inside your home. Jsignorexteriors offers thorough roof inspections and flashing repairs for homeowners throughout Connecticut, backed by more than 30 years of hands-on experience with New England roofing conditions. Whether you need a single kickout piece replaced or a full chimney flashing system rebuilt, the team at Jsignorexteriors brings licensed, insured craftsmanship to every job.
Contact Jsignorexteriors today to schedule an inspection or get a free estimate for your roof repair or replacement project.
Key Takeaways
Roof flashing is the single most critical waterproofing component on your home, responsible for preventing the vast majority of residential roof leaks at transitions and penetrations.
| Point | Details |
|---|---|
| Flashing prevents most leaks | Many roof leaks originate at flashing points, not in the shingle field. |
| Eight standard types exist | Step, counter, valley, drip edge, kickout, apron, vent pipe, and chimney flashing each address a specific roof junction. |
| Material lifespan should match your roof | Pair copper or stainless steel with long-life roofing; match rubber or galvanized steel to shorter-life shingle systems. |
| Layering direction is non-negotiable | Flashing must shed water downward like shingles; reversing any piece creates a leak point that sealant cannot reliably fix. |
| Complex systems need a licensed pro | Chimney, skylight, and drainage-plane flashing require professional sequencing to prevent hidden water intrusion. |